How to set up Raspberry Pi touch screen
Raspberry Pi comes with a variety of useful, handy utilities, from the popular Pi Cam module to HAT, expansion board connecting to GPIO pins for Pi. But one of the most popular utilities is the 7-inch touch screen for Raspberry Pi.
While there are many different types of screens available for Pi, only a few of these screens are flexible enough like an official Raspberry Pi product. But if you have ordered, you may also feel unsure about how to set up a touch screen for Raspberry Pi. So how do you connect the touch screen to your Raspberry Pi computer? Let's find out through the following article.
How to set up Raspberry Pi touch screen
- What's in your Pi?
- Remove protection movies in time!
- Upgrade your Pi
- Connect the display board to the touch screen
- Connect Raspberry Pi with touch screen
- Configure the touch screen
What's in your Pi?
Before proceeding (preferably before buying), you should consider your Raspberry Pi device. Although the Raspberry Pi Zero is compatible with all standard boards, you will have difficulty setting up the Raspberry Pi touch screen with Pi Zero, because the device does not have all the required connectors.

However, if you have Raspberry Pi Model B, B +, 2 or 3 standard, you will be able to use the Raspberry Pi touch screen with these devices.
But there is one more thing. Only the modified PCB design of Raspberry Pi 2 and Raspberry Pi 3 is compatible with the mounting screws on the back of the touch screen. This means you will need to take different steps to attach securely (or otherwise) an older Pi.

Now we will continue to consider how to mount a 7 inch Raspberry Pi touch screen into the Raspberry Pi 2 or 3.
Remove protection movies in time!
One thing you should not do until Pi and your touch screen are correctly connected is to remove the protection film that is stuck on the screen. It may look unsightly, but not important at this stage. It is important that you will be able to protect the new touch screen device from any scratches and stains that may occur during connection.
So remove the following protection film, at an appropriate time!
Upgrade your Pi
You will need to make sure your Raspberry Pi is configured correctly to use the touch screen, before you connect the device. To do this, start your Raspberry Pi and in the terminal, enter the following commands (wait for each step to complete, before entering the next command):
 sudo apt-get update
 sudo apt-get upgrade
 sudo apt-get dist-upgrade
 sudo apt-get install raspberrypi-ui-mods
 sudo apt-get install raspberrypi-net-mods
This will ensure that all the correct driver and software interface applications are installed, before you connect the touch screen.
After these updates are installed, you can start the connection process. It's time to get your toolbox!
Connect the display board to the touch screen
Before you connect the Pi to the touch screen, be more cautious. You should remove the screen from the box, but place it on a foam plastic package or a towel on the table.
Next, set the display panel to connect to the orange ribbon cable and display screen. In older versions, you will have to do this manually, and in newer versions these components are already connected.

The orange ribbon cable connects at two locations on the display panel. The narrow head connects to the connector of Panel 1 , where there is a small clamp that needs to be undone before you insert the ribbon and tighten it. The wider ribbon connects to the other side, to the connector labeled Panel 2 , in the same way. Use 4 pads to fix the display panel on the back of the screen and you are ready to continue the next steps.
Connect Raspberry Pi with touch screen
The next stage is to connect Pi to the touch screen.

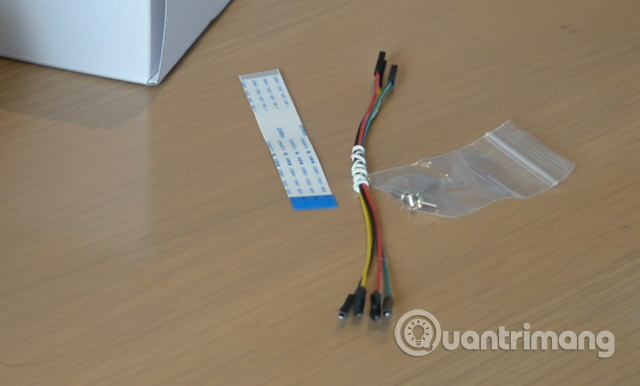
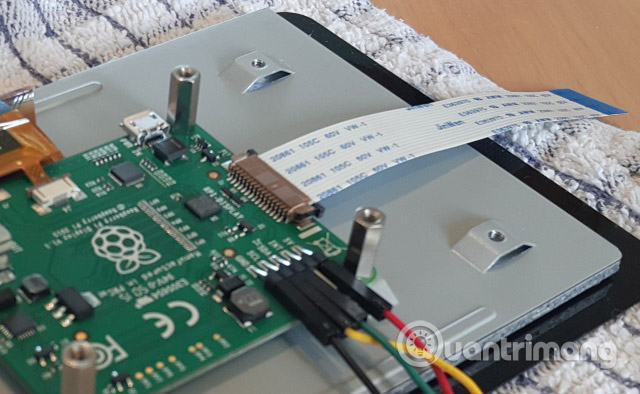
Do this first by connecting 4 cables to 5V, Ground connectors, SCL and SDA on the display panel. Although not important, you should follow the convention and use red for 5v and black for Ground.
Then, install a white ribbon cable. The end you are connecting to must now have a blue face opposite the screen (the other end will have a blue face facing up). Please plug it in place.

Next, place your Raspberry Pi on the vertical and fixed tubes with screws. Note that if you buy a photo frame monitor to do this, you can see that everything will be smaller, if you mount Pi with the GPIO below. However, for now, you need to manipulate GPIO, so let GPIO head up.

Connect 4 jumpers with GPIO, connect 5V cables to 5V, Ground to Ground, etc. Check the GPIO array for your Raspberry Pi model to make sure you have connected the cable properly. On a Raspberry Pi 3 the cables will be connected as above.
As you might expect, these cables manage power from Pi to the screen, but also transmit touch information in previous Pi models. On newer models, the green and yellow I2C connection is integrated into the ribbon cable, so they are not really necessary.
However, you don't have to connect them in a way that puts a HAT on your head. You may want to use the Y-shaped splitter from the standard Raspberry Pi feed, or use a second power source. If you are using portable batteries for this project, you will be able to keep the screen and Pi running from the same power source.

Next, connect the ribbon cable to the Raspberry Pi. First remove the hook and make sure the cable is not twisted. Press down on the hook until the ribbon cable is fully inserted to ensure its safety. By doing all this, it's time to connect your power cable to Pi and boot into Raspbian.
Configure the touch screen
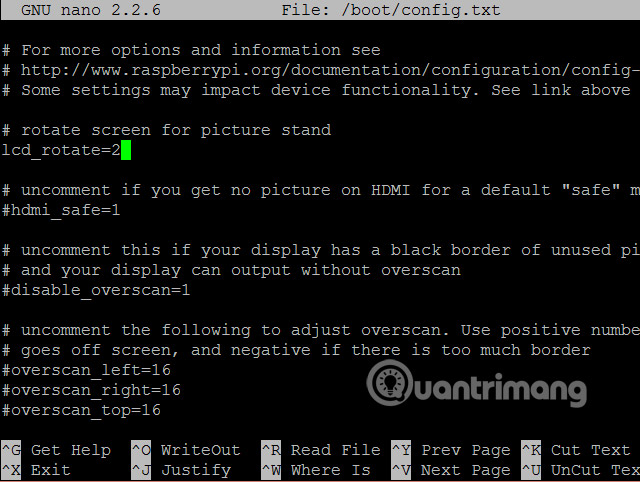
In some cases, especially if you are using a monitor with a stand, you may want to rotate the screen so that it is always in the right direction. Do this via SSH using:
sudo nano /boot/config.txt
At the top of the file, enter a new line:
lcd_rotate = 2

You should leave a note for yourself to know this amendment and any other modifications that have been made.
Use Ctrl + X to exit the nano text editor, select Y to agree with the changes, then press Enter.
To apply changes, enter:
sudo reboot
A moment later, the screen orientation will be correct.
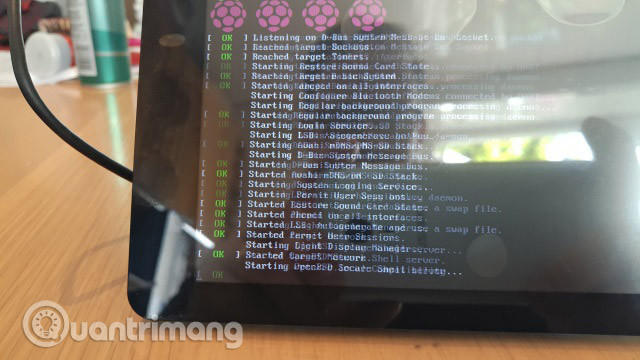
Also, if you see the script starts but the screen then turns black, there's a high chance that you need to expand the Raspberry Pi file system. To do this via SSH, enter:
sudo raspi-config
and select the first option. Activate Expand filesystem , and then select Finish to restart.
The capabilities of the Raspberry Pi are further increased after connecting to the touch screen. Maybe you will set up a tablet or some kind of mobile media with OpenElec or Kodi. Connecting Raspberry Pi to this touch screen is also useful for weather alerts, OTT alarm clocks or even Linux-based computers. It is also suitable to become a retro gaming center.
What will you do with the Raspberry Pi touch screen? Instead, did you opt in to a third-party model? Let us know your opinion in the comment section below!
See more:
- How to start Raspberry Pi 3 from USB
- How to turn an old laptop screen into a magic mirror
- How to set up Wi-Fi and Bluetooth on Raspberry Pi 3