Review the Raspberry Pi V2 camera
The Raspberry Pi camera module is a small square board on the ribbon cable, which plugs into the camera slot on the Raspberry Pi and adds camera functionality..
The versatile single-purpose computer from the UK, Raspberry Pi, is a favorite of many Linux manufacturers and fans around the world. It is small in size, lightweight, very easy to use and set up. With the release of the new Model B version 4, this tiny computer is actually quite powerful.
- Why should everyone try the Raspberry Pi 4?
Besides, there are other types of small peripherals you can attach to the main board. Most of these are third-party products, but one of the most popular is the official Raspberry Pi camera.
Camera Raspberry Pi
Advantages:
- Great upgrade, making the camera becomes much more handy and sharper
- Higher resolution
- Color rendering is much better thanks to an upgraded Sony sensor
Cons :
- This is not a complete camera. It is one of the parts you need to create a camera.
- Noise is significantly reduced in this new version, but works best with good lighting.
- You definitely need something to put this module on, even though it already has built-in vibration reduction.
The Raspberry Pi camera module is a small square board on the ribbon cable, which plugs into the camera slot on the Raspberry Pi and adds camera functionality. The original version 1.3 camera (on the left) is a 5 megapixel still camera.

The new v2.1 version (on the right) is simpler, faster and better in some respects, but the most important difference is that it is now an 8 megapixel camera. The rest, it is identical to the old version and fits all Pi boards (even Pi Zero with adapter) and runs the same software as before.
Using the camera is easy. You only need to attach the ribbon cable to the camera slot on the board.

Next, turn it on in the Raspi-Config program , using the desktop menu or via the command line. Taking photos and videos is a bit harder, asking you to enter the command line:
raspistill -o .jpg
Or
raspivid -o .h264 -t
Still images and videos are saved to the home directory with the specified file name.
So is the new version worth your money?
Quality and high resolution
The camera has been rebuilt from scratch, with a new circular board, simplified components and a new sensor chip in the center. The old 5-megapixel omnivision has been replaced by the all-new 8-megapixel Sony IMX219 module.
This means that the new camera has a wider viewing angle, as the new lens has a lower focal length, to be exactly 3.04mm. So you can 'catch' more in a frame.
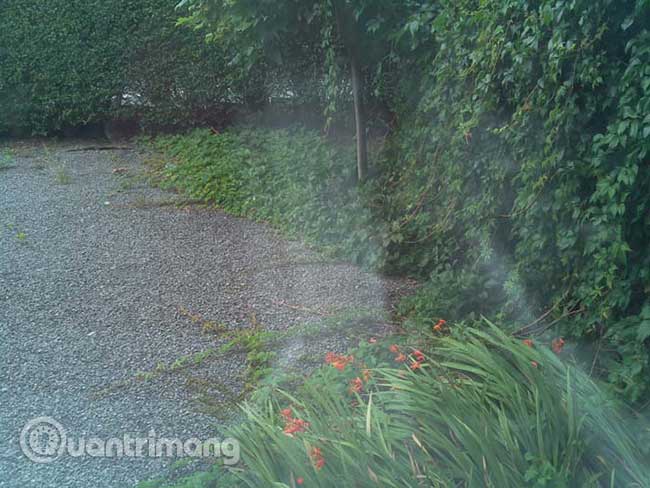
In addition, the switch to the new sensor chip has improved image quality, with less noise (especially in low light conditions) and it seems the new camera also has the ability to display good colors. than.

For example, the color of the green foliage looks much more realistic in the new orange. Image of old 1.3 cam looks unsaturated.
Indoor images from old cameras always look a little dark and yellow (color balance issues). The new camera shows much more accurate colors, even in low light.

For example, the old camera is not very blue in the sky pictures.

Overall, the image quality is excellent and much better than the old one.
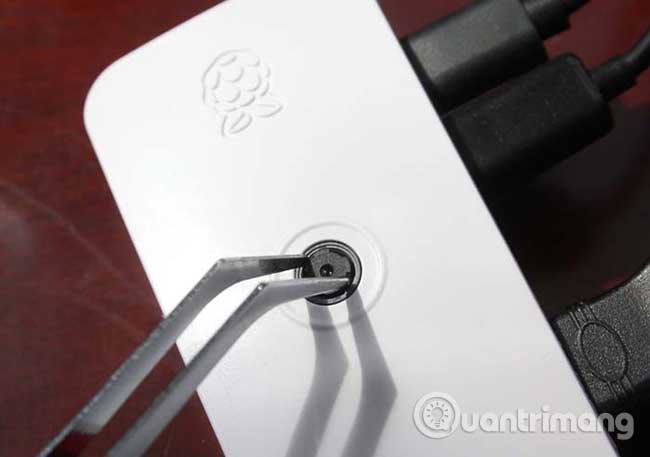
One thing you should keep in mind is that the old camera has a preset focal length (pre-set) to infinity. The new V2 cameras, or at least some of them, have a focal length set to 1 to 2 meters, which means your photos and videos may look softer. Focus is easily adjusted with a tweezers.
Sometimes videos taken with the new camera may look a little "soft". This could be due to an integrated image smoothing algorithm and even that may be included in the Sony sensor. This is a very important thing to note.
Now, that sounds obvious, but let's be clear: This is a webcam or security camera. This is not a portable (plug-in) camera solution that requires only plug and play (plug-and-go). You have to have a case to put it in and something to capture smooth video and take sharp pictures. There's a basic anti-shake feature built in, but you have to enable it, and it's really just to ease the wobble when moving slightly in the wind, not really designed for use. when holding hands.

There are several cases for the Raspberry Pi that allow you to attach a cam to the top of the case and have it look through a hole in the top. This can be a pretty neat solution.
Also, unless you have a battery and a mobile screen, you will only be able to take photos inside the room and outside the window. This is not a snapshot camera.
Turning this module into a handheld camera running Pi Zero would actually be a great project, but this is only possible with additional programming devices and operations. Discover it for yourself!
The Raspberry Pi V2 camera is a great upgrade and can become the cornerstone of some future photography and video projects with your Raspberry Pi.
Another plus point is that the Raspberry Pi V2 camera is priced at the same price as the old version, $ 29.95 (VND 690,000) and is suitable for all Raspberry Pi models. (Pi Zeros needs small cable adapters to fit into Zero's narrow slot.)