How to Set Up and Use GPG for Ubuntu
Part 1 of 2:
Setting up GPG
-
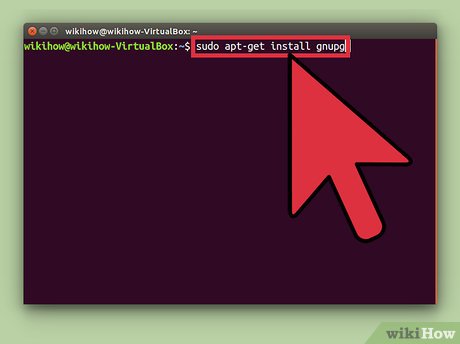
 Install GPG. To do this, run terminal and type in '
sudo apt-get install gnupg' and follow through with any prompting you may get. -
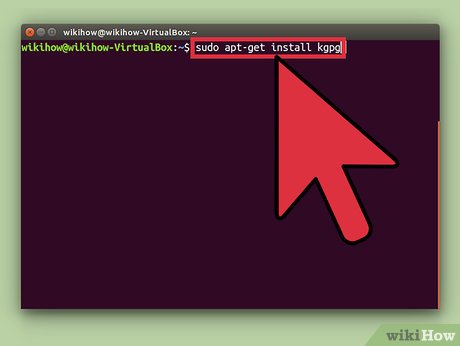
 Install a GUI for GPG. To install a popular GUI, go to the terminal and type in '
sudo apt-get install kgpg'. Follow through with any prompting you may get. -
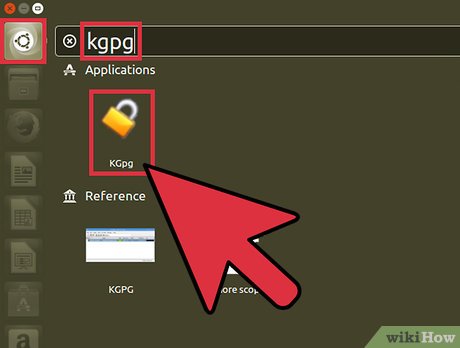
 An icon for KGPG will be present under Applications → Accessories, to launch KGPG you should click on this icon.
 -
 Generate a set of keys. To do this, click on the keys tab on the drop down bar, and from the drop down menu select Generate Key Pair. A new interface will pop up. The new interface will ask you for details so that it can generate your key pair. It will ask you for your name and e-mail address, for example.
- For name, put your screen name; you can either leave e-mail blank, put your real e-mail address, or use a fake e-mail address. It should be noted that the name and e-mail address you use will be visible to anyone you send your public key to.
- It will also ask you for a comment, which you can leave blank if you wish, or you can put a comment in if you have a reason to do so.
-
 Decide if your key will expire, and if so, when. Usually a key does not need an expiration date, although if you feel the need to put one in, you can do so. After an expiration date passes, your key will no longer function, and you will be required to generate a new pair.
 -
 Select a key size. As a rule of thumb, the larger the key size, the more secure messages encrypted with the key are going to be. Select 4096 as your key size.
 -
 Select an algorithm. The default algorithm, DSA & ElGamal, should be selected.
 -
 After filling out the appropriate fields, click the OK button. You will be taken to a new interface and asked to supply a passphrase. The passphrase should be very long and random, your best bet is to use KeePassX to generate a passphrase.
 -
 After you enter your passphrase twice, click on the generate button. A window will pop up explaining that a new key pair is being generated. During the generation of the key pair, you should move your mouse about randomly in order to create a large amount of entropy, thus making your key pair more secure. Continue to move your mouse until the generating key pair window closes.
 -
 After your key pair has generated, the window will close.
 -
 Note that now your keyring has one set of keys in it (your private key and your public key). You need to send your public key to all those you wish to communicate with, so that they can encrypt information before sending it to you. To do this, right click on the key pair you just generated, and select export public keys. A new window will pop up asking you where you would like to export the public key to. Select clipboard. Your public key will now be stored on your clipboard (meaning it is what will paste when you go to paste something.)
 -
 Send your public key to others via forums, key servers, e-mails, etc. simply by pasting the key where you would like it to appear. Now others can use your public key to send encrypted information to you.
 -
 After someone sends you encrypted information, copy the information to your clipboard. Go to KGPG and select File → Open Editor. A new window will pop up that allows you to input text into it. Paste the encrypted information into this window and select decrypt. You will be prompted for your passphrase. After correctly entering your passphrase, the information will decrypt and you will be able to read it.
Part 2 of 2:
Sending other individuals encrypted information with GPG
-
 Upload their key to your keyring. To do this, copy their public key to your clipboard. Now, go to KGPG and go to Keys → Import Keys. A new window will pop up and ask from where you want to import the new key. Select clipboard and then click ok. The persons public key will be added to your keyring.
 -
 Now that you have the public key of the individual you wish to send encrypted information to, go to File → Open editor. A new window will pop up that allows you to input text into it. Type the message you wish to send to the individual in this window, then click on the Encrypt button. A new window will pop up asking which key you want to use to encrypt the information.
 -
 If you have not set the individual's public key to trusted, you will need to click on the options button and put a check mark next to 'Allow encryption with untrusted keys'. Now simply click on the key of the person the message is intended for, and select ok. Your message is now encrypted.
- To send the message to the individual, simply copy and paste the encrypted block of text to your clipboard, and e-mail it to them, or send it to them in a private message, or whatever.
-
 Sign your encrypted message, so that the individual knows that it is in fact coming from you (or someone who has access to your private key and passphrase...which should be only you). To sign your encrypted message, click the sign/verify button and select your private key. You will be prompted to enter your passphrase, and after correctly entering your passphrase a signature will be attached to your message.
 -
 If you have someone public key, you can verify signed messages they send to you. To do this:
- Simply paste their signed message into the editor, and click on the sign/verify button. A window will pop up telling you if the signature is valid or not.
- After you verify the signature, remove the signature from the editor. You will also need to remove one extra '*' at the top and bottom of the message, so that '*****BEGIN PGP MESSAGE*****' is the first line and '*****END PGP MESSAGE*****' is the last line.
- After doing this, simply click the decrypt key and enter your passphrase after you are prompted to do so.
Share by
Isabella Humphrey
Update 05 March 2020
You should read it
- ★ How to Access Public Folders in Outlook 2016 on PC or Mac
- ★ Download and experience iOS 11.4 Public beta is more stable than Developer version, and has AirPlay 2
- ★ How to 'convert' from the iOS Public Beta version to the old version
- ★ How to create a Public Account on Viber
- ★ How do Private Network and Public Network on Windows differ?


