How to Set Up a Laptop to Print Wirelessly
Print to a network printer

Connect the printer to your home network. The connection process depends entirely on the device manufacturer.
If you are connecting using an Ethernet cable, plug one end of the cable into the Ethernet port on the printer and the other end into a router or network switch. This is all you need to do with an Ethernet network printer.
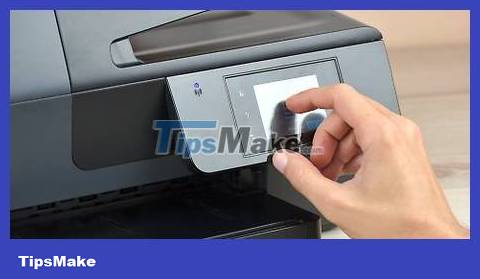
If it is a wireless printer, you need to use the device's display screen to connect to the wireless network. You need to select the network name and enter the password (if any). The steps performed on different models will be slightly different, you should read the accompanying instructions for use.
Connect to a network printer (Windows). Once the printer is installed on the network, you can connect it to your laptop. The following instructions apply to all versions of Windows.
Open Control Panel. You can access it from the Start menu. Windows 8 users can press the key ⊞ Winand type "control panel".
Select "Devices and Printers" or "View devices and printers".
Click Add a printer.
Select "Add a network, wireless or Bluetooth printer". Windows 8 users do not need to choose.
Select the network printer from the list of available printers. Follow the instructions to install the driver automatically. If Windows cannot find a compatible driver, you will need to go to the manufacturer's support site to download it.

Connect to a network printer (Mac). After installing the printer on the network, you can connect it to your laptop. The following instructions apply to all versions of OS X. Note that the network printer must support AirPrint or Bonjour (most modern network printers do).
Click the Apple menu and select "System Preferences."
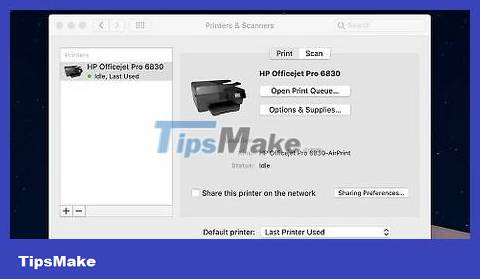
Select "Print & Scan" in the System Preferences menu.
Click and hold the "+" button at the bottom of the list of installed printers.
Select the network printer in the list of recent printers. If your printer doesn't appear in the list, you'll need to download the software from the manufacturer's support site.
Click the Download & Install button if available. Although OS If necessary, you will be asked to download the software after adding the printer.

Print using the newly installed printer. After adding a network printer to the operating system, you can print anything you want just like if the printer was connected directly to the laptop. Open the "Print" dialog box on any program and select the network printer from the list to print from.
Share a printer between Windows computers
Install the printer on the computer used for sharing. Since this computer must be turned on every time you need to print a document, you should install the printer on a personal computer that is turned on frequently.
Most printers are installed by plugging in via USB port. You can refer to the instruction manual if you have difficulty setting up the printer.
Create a HomeGroup (Windows 7 and later). If all computers on the network use Windows 7 or later, you can use the HomeGroup function to quickly and easily share printers. If using Windows Vista or XP, go to Step 5 of this section.
Create a HomeGroup on the computer used to share the printer. You can access the HomeGroup menu from the Control Panel. Click the Create a homegroup button to set up a new HomeGroup.
Follow the instructions to set up HomeGroup. When asked what you want to share, set the "Printers & Devices" section to "Shared" mode.
Copy the password that appears.
Connect HomeGroup to laptop. Now that you have enabled HomeGroup, you can connect it to your laptop.
Open the HomeGroup menu in Control Panel on your laptop.
Click the Join now button and enter your password.
Follow the instructions to complete the HomeGroup connection setup. You can choose what you want to share, but this step is not necessary if connecting a shared printer.

Print using a shared printer. Now that you have connected your laptop to the HomeGroup, you can select a shared printer similar to a printer connected directly to the laptop. Make sure that the computer sharing the other printer is open.
Open the Print dialog box in any program and select the shared printer from the list of available printers.
If you use HomeGroups, you just need to do that. The next steps only apply to people who do not use the HomeGroup function.
Enable File and Printer Sharing and share printers manually if HomeGroups cannot be used. If the computer or laptop used to share the printer runs the Vista operating system or earlier, you must share the printer manually.
Open Control Panel and select "Network and Sharing Center" or "Network and Internet" on the computer sharing the printer.
Click the "Change advanced sharing settings" link and expand the "Private" network settings.
Select "Turn on file and printer sharing" > Save changes.
Return to Control Panel and select "Devices and Printers" or "View devices and printers".
Right-click the printer you are sharing and select "Printer properties".
Click the Sharing tab and check the "Share this printer" dialog box.
Install shared printer on laptop. Now that the printer has been shared, you need to install it on your laptop for it to appear in the list of available printers.
Open Control Panel and select "Devices and Printers" or "View devices and printers".
Click Add a printer.
Select "Add a network, wireless or Bluetooth printer". Windows 8 users don't need to choose.
Select the printer from the list of available printers. Follow the instructions to install the driver automatically. If Windows cannot find a compatible driver, you must go to the manufacturer's support site to download it.
Share a printer between Mac computers

Install the printer on the computer used for sharing. Since this machine must always be turned on to access the printer, install it on the most frequently used machine.
When setting up a printer on your Mac, you simply plug it in via USB and OS X will automatically install everything.

Activate printer sharing mode on the Mac that just installed the printer. After installing the printer, you need to enable printer sharing mode so that other devices can connect to it.
Click on the Apple menu and select "System Preferences".
Click on the "Sharing" option.
Select "Printer Sharing" to enable printer sharing.
Printer sharing. After successful activation, you want to share the printer in the same window. Check the dialog box next to the newly installed printer to share.

Connect to a shared printer on a Mac laptop. Now that the printer has been shared, you can connect your Mac laptop to the printer.
Click on the Apple menu and select "System Preferences".
Click on the "Print & Scan" option.
Click and hold the "+" button, then select the newly installed printer.
Click the Download & Install button if it appears. Although OS If necessary, you will be asked to download the software after adding the printer.

Print to a shared printer. After installing the shared printer on your laptop, you can print any documents you want just like when connecting the device directly to the laptop. Don't forget to turn on the computer used to share the printer.
Open the Print dialog box in any program and select the shared printer from the list of available devices.