Disable Fast User Switching on Windows 7, 8 and 10
Fast User Switching allows users to log in to the computer when another user is still logged in. Can say this feature is quite useful for users. But what also has two sides, besides the positive side, also has drawbacks. Suppose if another user is logged in and you cannot start or shut down the computer, the risk of losing opened data or files is very high.
If you have multiple user accounts (users) on your computer and you do not want to use Fast User Switching, then you can disable Fast User Switching using the Windows Registry or Local Group Policy Editor.

1. For users of Windows Home version: use the Registry to disable Fast User Switching
If you use the Windows Home version, you will have to edit the Windows Registry to disable Fast User Switching. If you use Windows Pro or Enterprise version, use G roup Policy Editor .
Note:
Registry Editor is a powerful tool that affects your system. Therefore, you should back up the Registry Editor to prevent a bad situation when editing the Registry Editor.
First open the Registry Editor by entering regedit in the Search box on the Start Menu and then press Enter . If the UAC window appears, click Yes to allow changing your computer.

On the Registry Editor window, navigate to the key:
HKEY_LOCAL_MACHINESOFTWAREMicrosoftWindowsCurrentVersionPoliciesSystem
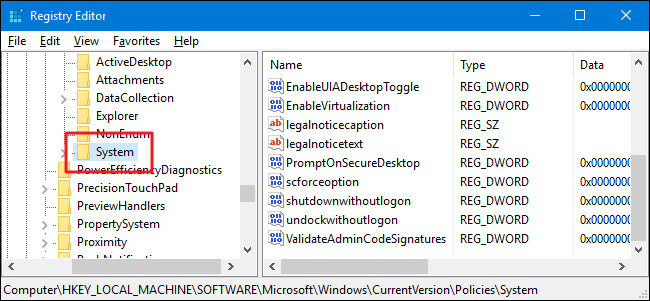
Next proceed to create a new value in the System key . Right-click the System key, then select New => DWORD (32-bit) Value. Name this new value HideFastUserSwitching .

Double-click the HideFastUserSwitching value to open the Properties window. Here you change the value in the Value data frame from 0 to 1 and click OK .
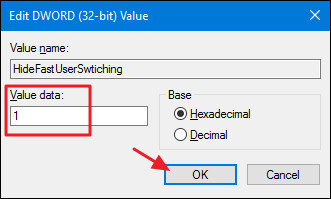
You can now close the Registry Editor window. Then log off the current user account and then log back in to any account you want or restart your computer.
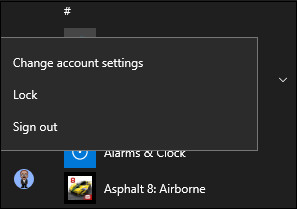
After logging in, you can check the changes by opening the Start Menu and confirming that the option to switch accounts is no longer displayed.
If you want to change the old settings, follow the same steps and set the HideFastUserSwitching value to 0 or delete the HideFastUserSwitching value.
2. Use Registry editing available

If you do not want to edit the Registry manually, you can use the built-in Registry to disable Fast User Switching.
Download Fast User Switching Hacks to your computer and install.
Download Fast User Switching Hacks to your computer and install it here.
Next, extract the Zip Fast User Switching Hacks file that you downloaded. You should now see two files: Disable Fast User Switching and ' Enable Fast User Switching (Default) .' Double-click the Disable Fast User Switching file to disable Fast User Switching.
3. For users of Windows Pro and Enterprise versions: use Local Group Policy Editor to disable Fast User Switching
If using Windows 10 Pro or Enterprise version, the fastest way to disable Fast User Switching is to use Local Group Policy Editor.
First on Windows 10 Pro or Enterprise, enter gpedit.msc into Search box on Start Menu and then press Enter to open the Local Group Policy Editor window.
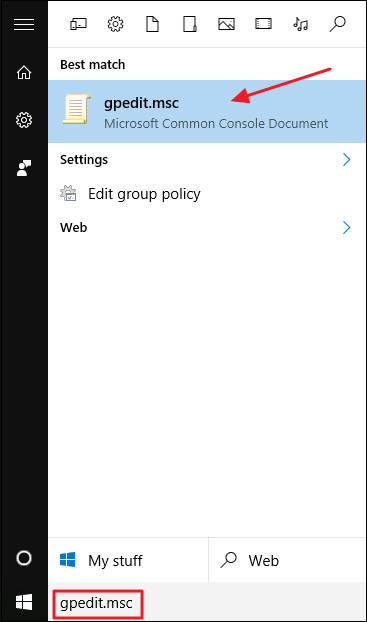
On the Local Group Policy Editor window, in the left pane you navigate to the key:
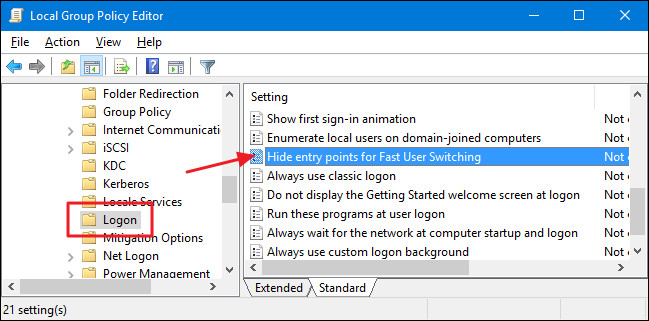
Computer Configuration => Administrative Templates => System> Logon
In the right pane, find the setting named Hide entry points for Fast User Switching and double click on it.
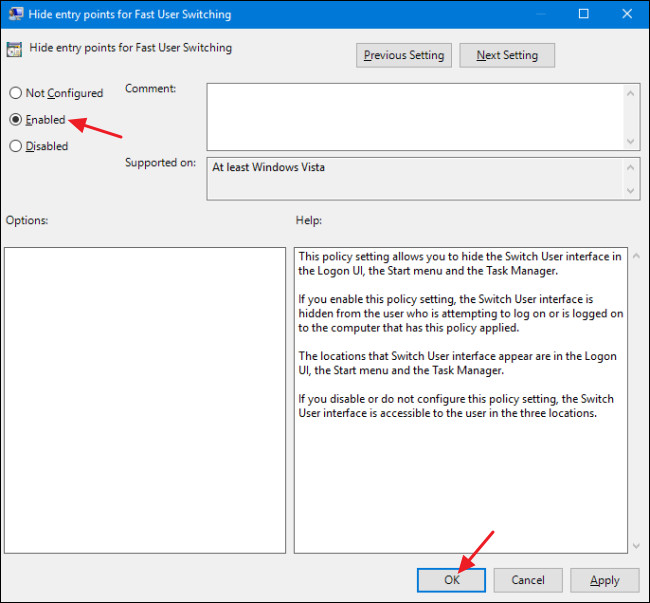
Now on the screen appears Properties window, here you select Enabled and then click OK .
Finally close the Local Group Policy Editor window, log out of your current account, then proceed to log in again or restart your computer.
After logging in, you can check the changes by opening the Start Menu and confirming that the option to switch accounts is no longer displayed.
If you want to change the old settings, follow the same steps and set the option to Disabled or Not Configured .
Refer to some of the following articles:
- Here's how to completely disable Windows Defender on Windows 10, 7 and Windows Vista
- Your computer requires entering a password after starting from Sleep mode, this is a fix
- How to disable 1 or more any key on Windows 10 keyboard?
Good luck!