How to Restore the Recycle Bin
The Recycle Bin is normally displayed on the Windows desktop by default, but can sometimes be hidden or removed by accident. If you can no longer find or access Recycle Bin, you can restore the feature through the settings or Control Panel....
Method 1 of 4:
Windows 8
-
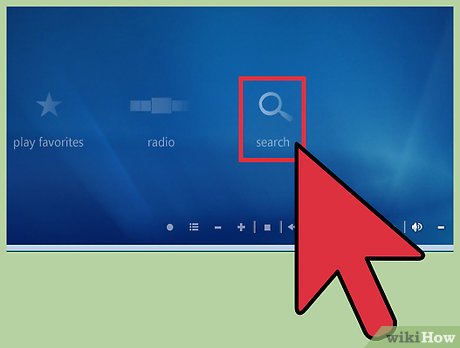 Swipe in from the right edge of the screen, then tap on 'Search.'
- If using a mouse, point to the lower right corner of your screen, move the mouse pointer up, then click on 'Search.'
-
 Type 'desktop icons' into the search field, then select 'Show or hide common icons on the desktop.'
 -
 Place a checkmark next to 'Recycle Bin,' then click on 'OK.' The Recycle Bin will now be restored to the desktop.[1]
Method 2 of 4:
Windows 7
-
 Click on 'Start,' then type 'desktop icons' into the search field.
 -
 Click on 'Show or hide common icons on the desktop.' This will open the Desktop Icon Settings menu.
 -
 Place a checkmark next to 'Recycle Bin,' then click on 'OK.' The Recycle Bin will now be restored to your Windows desktop.[2]
Method 3 of 4:
Windows Vista
-
 Click on 'Start,' then click on 'Control Panel.' The Control Panel window will open and display on-screen.
 -
 Click on 'Appearance and Personalization,' then click on 'Personalization.'
 -
 Click on 'Change desktop icons' in the left pane.
 -
 Place a checkmark next to 'Recycle Bin,' then click on 'OK.' The Recycle Bin will now be restored to your desktop.[3]
Method 4 of 4:
Windows XP
-
 Click on 'Start,' then select 'Run.' The Run dialog box will display on-screen.
 -
 Type 'regedit' into the dialog box, then click on 'OK.' Registry Editor will open and display on-screen. In Windows XP, the Recycle Bin can only be restored by making changes to Registry Editor.
 -
 Navigate to the following entry: HKEY_LOCAL_MACHINE SOFTWARE Microsoft Windows CurrentVersion Explorer Desktop NameSpace.
 -
 Right-click on 'NameSpace' in the left pane, select 'New,' then select 'Key.'
 -
 Type the following string into the 'Key' field, then press 'Enter:' 645FF040-5081-101B-9F08-00AA002F954E. The new registry key you entered will display below 'NameSpace' in the left pane of Registry Editor.
 -
 Click on the new registry key you just created, then double-click on 'Default' in the right pane. This will bring up the 'Edit String' window.
 -
 Type 'Recycle Bin' into the field next to 'Value Data,' then press 'Enter.'
 -
 Close Registry Editor. The Recycle Bin will now be restored to your Windows XP desktop.[4]