Table of Contents
This practical guide explains how to change the Windows 11 recycle bin icon. Follow the steps in order, review the requirements first, and use the troubleshooting notes when a setting or option does not work as expected.
Instructions to change the Recycle Bin icon in Windows 11
Step 1:
Press Windows + I to open Settings and then click Personalization on the left side of the interface.
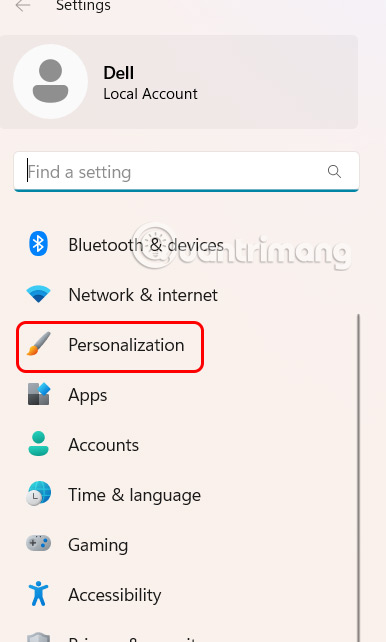
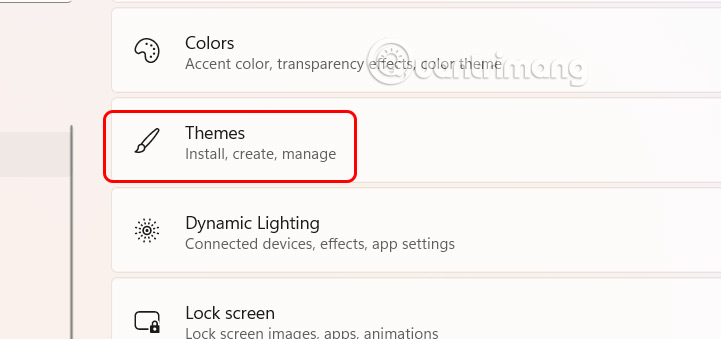
Next, look at the content next to it, we select Themes to adjust.
Step 2:
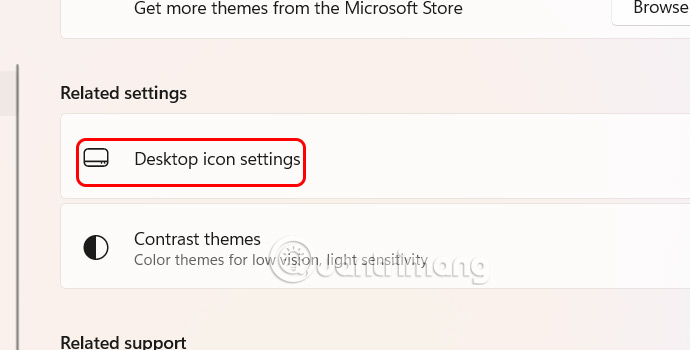
Display the new interface, we scroll down and select Desktop icon settings to change the icon displayed on the computer desktop.
Step 3:
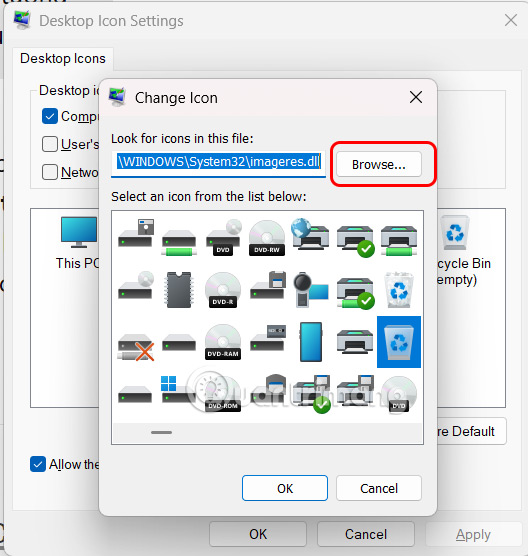
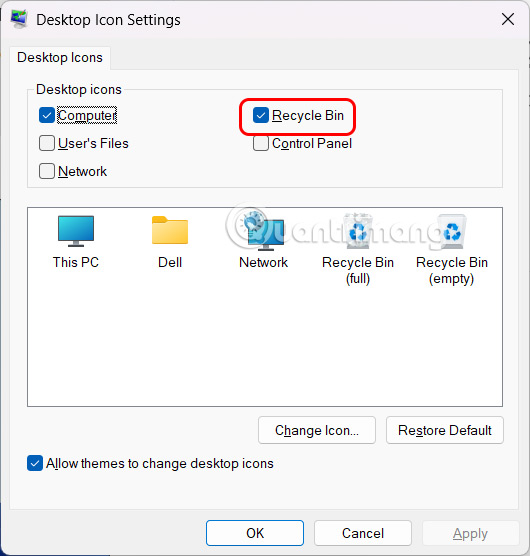
In the Desktop Icon Settings dialog box, select Recycle Bin (full) or Recycle Bin (empty) depending on the user's needs. Then select Change Icon below to change the Recycle Bin icon again.
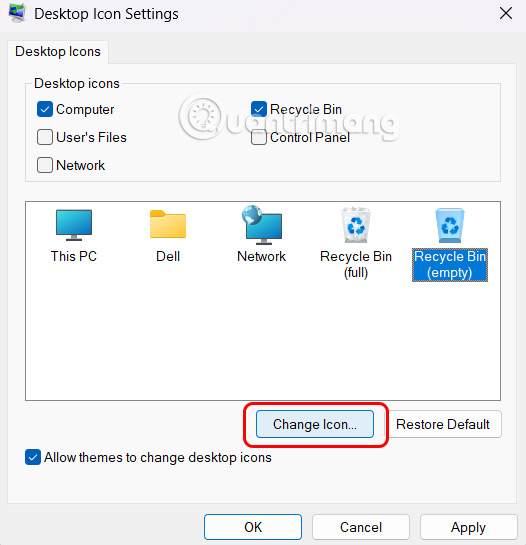
Displays an interface for you to choose a new icon, or click the Browse button to upload your own icon if you want. For users who want a classic or Windows 98 look, use an icon in.ico format.
Finally click Apply and OK to save the new changes.
In case the Recycle Bin icon disappears from the computer screen, we just need to select it to display it again in the Desktop icon settings interface.
FAQ
What should you know about instructions to change the Recycle Bin icon in Windows 11?
Press Windows + I to open Settings and then click Personalization on the left side of the interface.
What does this guide cover?
This guide explains change the Windows 11 recycle bin icon, including the main steps, important details, and practical considerations.
Who is this guide for?
It is designed for readers who want a clear, practical overview and a reliable process they can follow without unnecessary complexity.
Related Articles
 How to Restore the Recycle Bin Icon Lost in Windows 105 minutes read
 Instructions to Hide or Delete Recycle Bin Icon on Desktop3 minutes read
 Tips for Using Recycle Bin More Effectively9 minutes read
 How to Create a Shortcut to Clean the Recycle Bin on Windows 10/11: Clear8 minutes read
 11 Ways to Open the Recycle Bin on Windows12 minutes read
 How to Add Recycle Bin to Windows 11 System Tray5 minutes read
Reader Comments 0
Sign in with email or Google to join the discussion.