Table of Contents
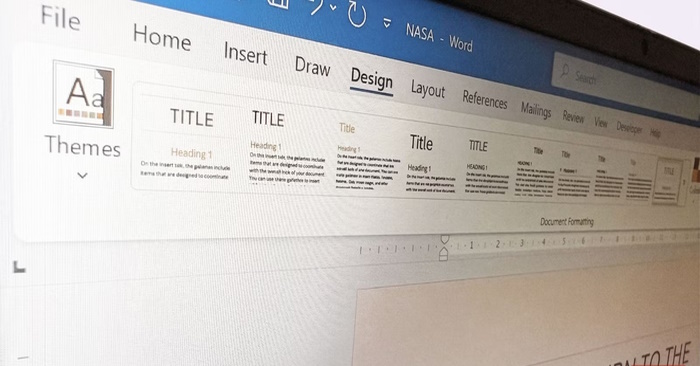
Microsoft Word's Design tab can update the look of an entire document in a few clicks. It is most effective when headings, body text, captions, and other elements already use Word's built-in styles. Apply or repair those styles first, then use themes, style sets, colors, fonts, and paragraph spacing to create a consistent design.
Before you start: use styles, not manual formatting
The Design tab changes the definitions behind a document's styles. If a heading uses Heading 1, for example, selecting a new style set can update every Heading 1 paragraph at once. A line that was merely enlarged and made bold will not behave the same way because Word still treats it as ordinary text.
- Open the Home tab.
- Select each major heading and apply Heading 1, Heading 2, or the appropriate heading level from the Styles gallery.
- Apply Normal to body paragraphs and Caption to captions where appropriate.
- Remove unwanted direct formatting with Home > Clear All Formatting, then reapply the correct style. Use this carefully because it removes deliberate local emphasis as well.
Save a copy of an important document before making document-wide changes, especially when it contains a complex company template.
What the Design tab controls
| Control | What it changes |
|---|---|
| Themes | A coordinated set of theme colors, fonts, and effects |
| Style Set | The appearance of styles such as headings, body text, and titles |
| Colors | Theme colors used by styled text, tables, charts, shapes, and other elements |
| Fonts | The theme font assigned to headings and body text |
| Paragraph Spacing | Document-wide spacing rules for styled paragraphs |
| Effects | Theme effects used by supported shapes and graphics |
| Page Background | Watermark, page color, and page borders |
These controls are primarily available in desktop versions of Word. Their exact position or selection can vary by Word version and platform.
Apply a theme as a starting point
- Open the document and select the Design tab.
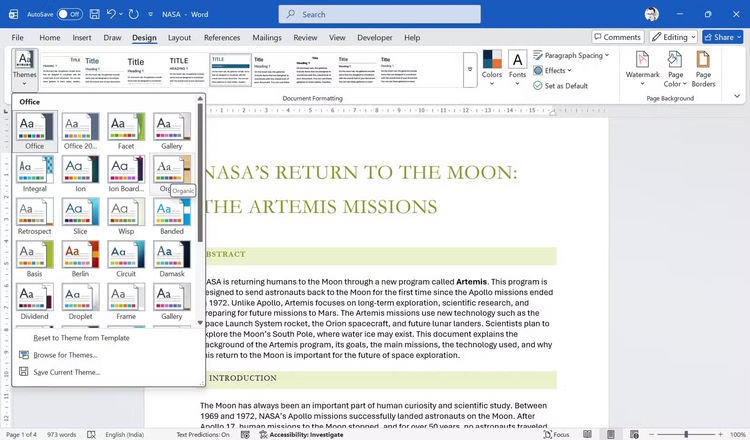
- Choose Themes and point to a theme to preview it.
- Select a theme to apply its coordinated colors, fonts, and effects.
- Review the document's headings, tables, charts, shapes, and page breaks.
A theme is a foundation, not a requirement to accept every visual choice. After applying one, use the adjacent Colors and Fonts menus to adapt it to a brand or readability requirement.
Use a style set to update headings and text
In the Document Formatting group, point to the available style sets to preview them. Select one whose hierarchy is easy to scan: the title should be distinct, Heading 1 should clearly outrank Heading 2, and body text should remain comfortable to read.
A style set does not apply heading roles to unstructured text. If part of the document does not change, return to Home > Styles and check which style that paragraph actually uses.
Choose document fonts, colors, and spacing
Fonts
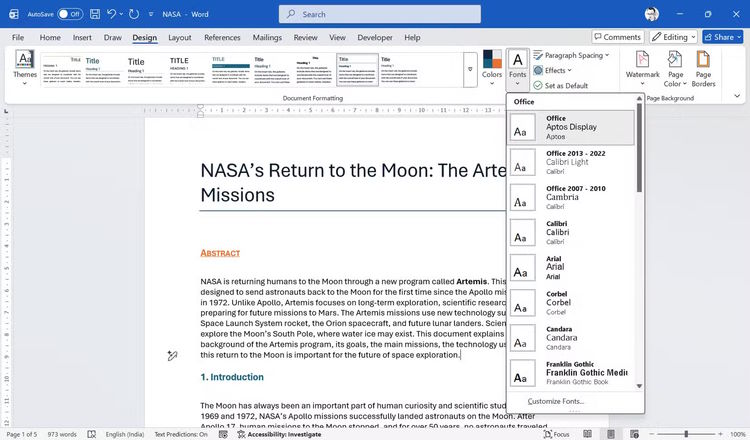
Open Design > Fonts to select a coordinated heading and body pair. Theme-aware styles and objects update automatically. Text with a manually assigned font may not change, so use direct formatting only for an intentional exception.
Colors
Open Design > Colors to replace the theme palette. This can update theme-colored charts, tables, SmartArt, shapes, and styled text together. Verify contrast after changing colors; light text on a light background and color-only distinctions can make a document difficult to read.
Paragraph spacing
Use Paragraph Spacing to apply consistent spacing to styled paragraphs. This is cleaner than inserting blank paragraphs between sections. For a specific exception, adjust Layout > Spacing Before/After on the relevant paragraph.
Add page-level elements carefully
The Page Background group can add a Watermark, Page Color, or Page Borders. Watermarks can identify a draft or confidential copy, but they should not obscure text. Page colors may not print unless Word's background-printing option is enabled, and heavy borders can reduce the usable page area.
Save a reusable custom theme
After choosing colors, fonts, and effects, open Design > Themes > Save Current Theme. A saved theme can make future documents consistent, but it does not preserve every layout detail. For recurring reports with fixed headings, cover pages, headers, footers, and placeholders, save a Word template instead.
Final formatting check
- Open the Navigation pane and confirm that headings form a logical hierarchy.
- Check tables, charts, captions, hyperlinks, and lists after the theme change.
- Use Print Preview to catch changed page breaks, widows, and isolated headings.
- Run the accessibility checker for heading order, alternative text, and contrast issues.
- If changes look wrong, use Undo or close the unsaved copy rather than repairing every element manually.
The key is to separate structure from appearance: apply styles to describe each element's role, then use the Design tab to control how those roles look across the document.
Related Articles
 How to Turn a Scanned Document into Microsoft Word Document8 minutes read
 Create Master Document in Word 2010 from Many Word Files7 minutes read
 How to Make Your Word Document Stand Out with a Beautiful Table of Contents9 minutes read
 How to Insert an Outlook Contact in Word3 minutes read
 How to Recover Word Documents: Step-by-Step Guide7 minutes read
 How to Remove Personal Information from a Word Document4 minutes read
Reader Comments 0
Sign in with email or Google to join the discussion.