Table of Contents
Styles are named sets of formatting that you can apply to text in one action. Instead of formatting every heading separately, apply Heading 1, Heading 2, and other appropriate styles. A later change to the style updates all text that uses it, while Word can use the heading levels for navigation and an automatic table of contents.
The screenshots show Word 2007. Newer desktop versions keep the main controls under Home > Styles. Word for the web can apply existing styles but has fewer tools for creating and modifying them.
Choose the right built-in style
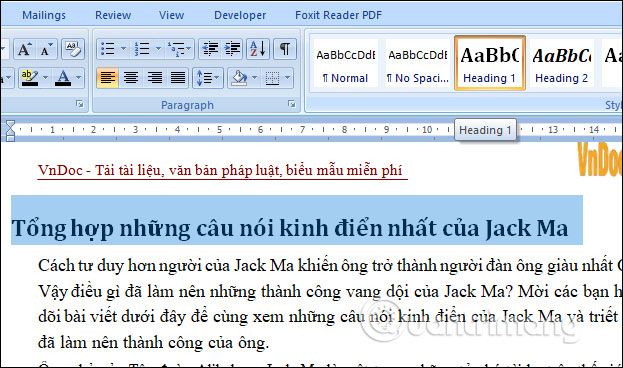
On the Home tab, use the Styles gallery to apply a style to the current paragraph or selected text. Expand the gallery to see more choices.
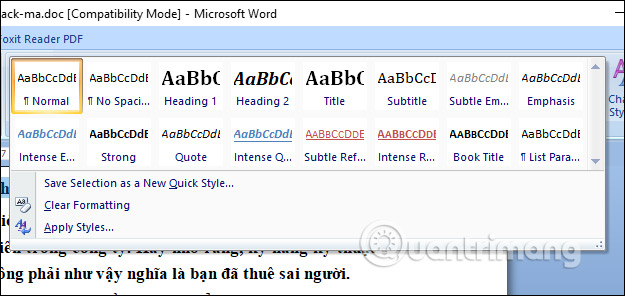
- Use Normal for ordinary body paragraphs.
- Use Title for the document title, not every prominent line.
- Use Heading 1 for main sections and Heading 2 or Heading 3 for nested sections. Do not choose a heading level merely because its default appearance looks good.
- Use character styles such as Strong when emphasis needs consistent formatting within a paragraph.
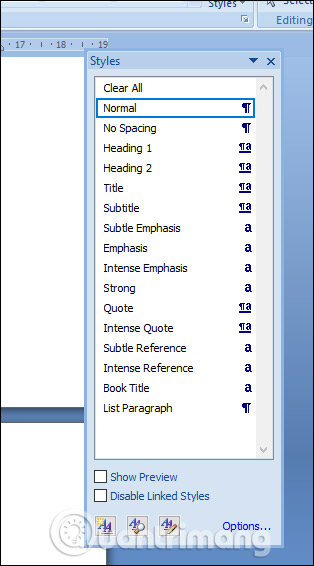
Open the Styles pane with the small dialog launcher in the lower-right corner of the Styles group. The pane makes it easier to see, apply, and manage styles in a long document.
Modify an existing style
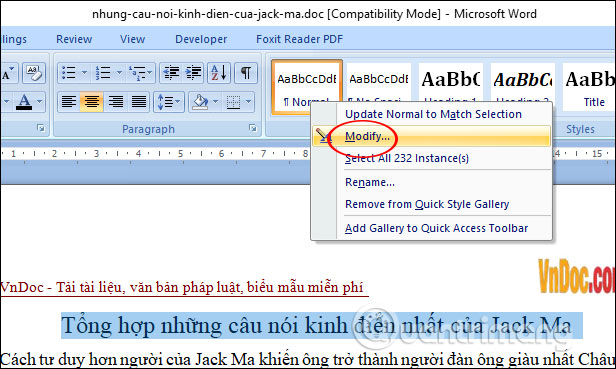
Right-click the style in the gallery or Styles pane and select Modify.
The Modify Style dialog controls both appearance and behavior:
- Name: identifies the style. Built-in style names may not be editable.
- Style type: determines whether the style applies to a paragraph, selected characters, a linked paragraph/character context, a table, or a list.
- Style based on: chooses a parent style whose properties this style inherits. It does not specify the style’s location in the document.
- Style for following paragraph: selects the style Word should use after you press Enter. A heading commonly transitions to Normal body text.
- Formatting: sets font, size, emphasis, color, alignment, line spacing, and indentation.
- Add to Quick Style list: places the style in the gallery for quicker access.
- Only in this document / New documents based on this template: controls whether the change stays in the file or is also written to its attached template for future documents.
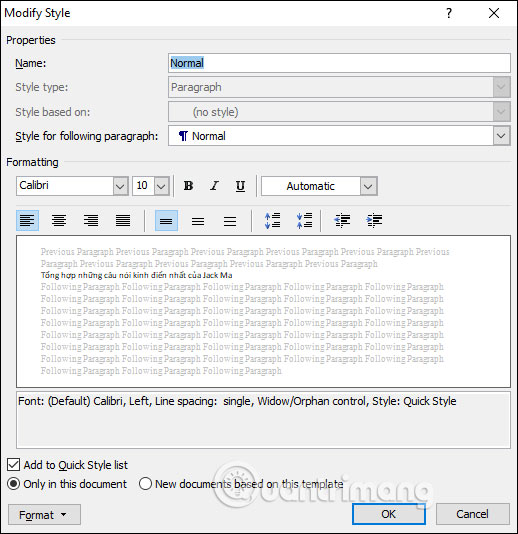
Select Format for detailed paragraph, tab, border, language, frame, or numbering settings. Keep numbering attached to the style when headings require a formal outline; manually typing numbers makes the sequence fragile.
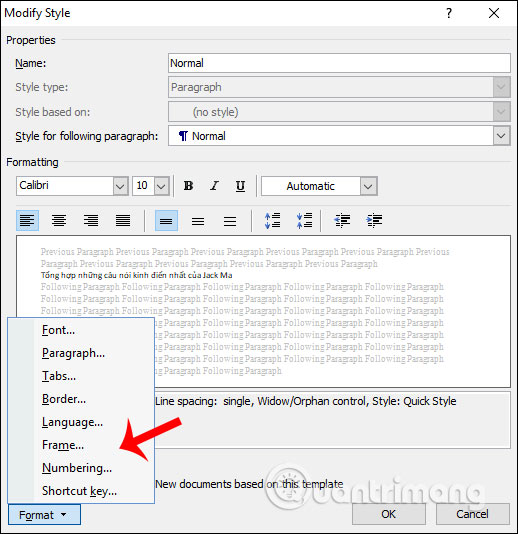
Select Automatically update only with care. When enabled, direct formatting applied to text using the style can redefine the style and unexpectedly change other paragraphs. In most shared or structured documents, leave it off and modify the style intentionally through this dialog.
After saving, select a paragraph or place the cursor inside it and choose the style.
Create a custom style
Create a new style when the document needs a reusable role that is not represented well by a built-in style. Do not create a separate style for every isolated visual variation.
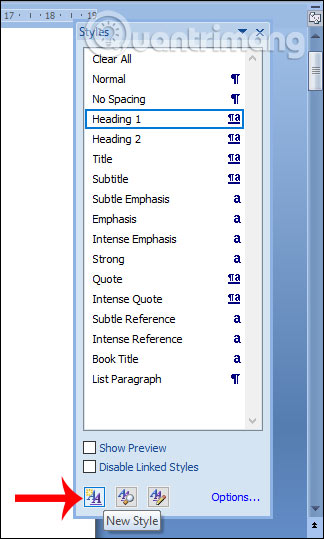
- Open the Styles pane.
- Select New Style at the bottom of the pane.
Give the style a descriptive purpose-based name such as Figure Caption, Procedure Note, or Policy Heading. Choose the correct style type and a sensible base style, then set the formatting and following-paragraph behavior.
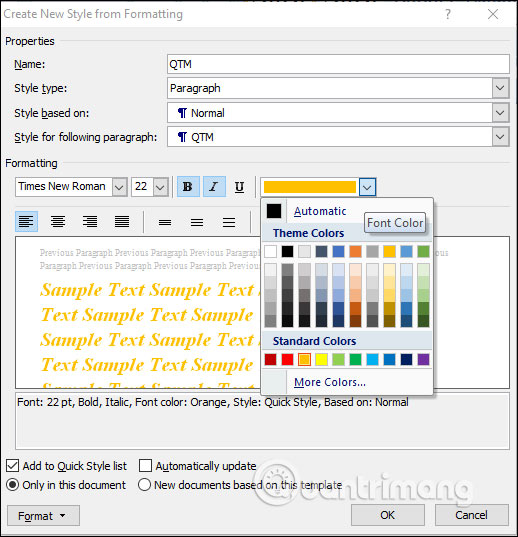
Once saved, the custom style appears in the Styles pane and, if selected, the Quick Style gallery. Right-click it to modify, rename, remove it from the gallery, or select every instance that uses it.
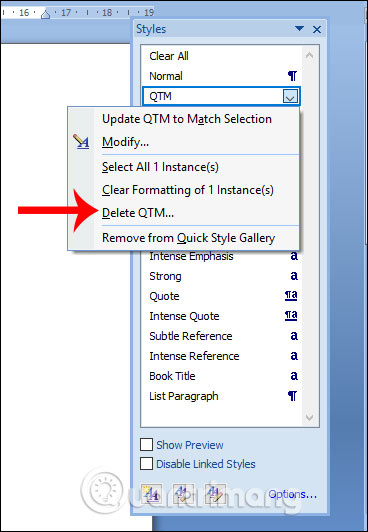
Apply the new style to the relevant content and confirm that spacing, indentation, and page-break behavior are consistent as well as the font.
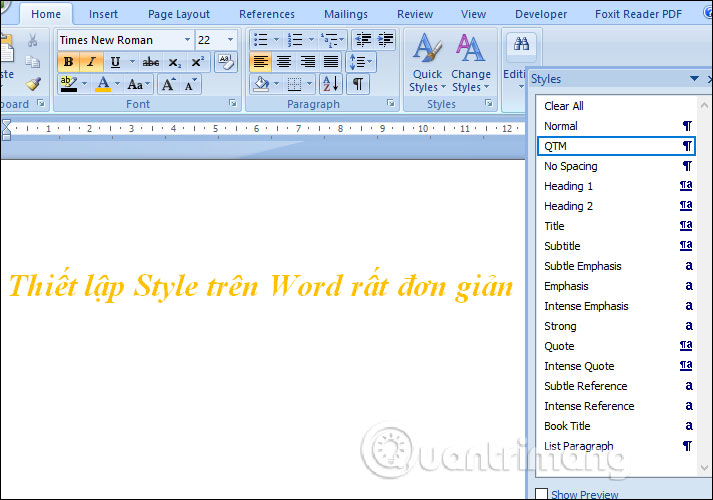
Identify formatting with Style Inspector
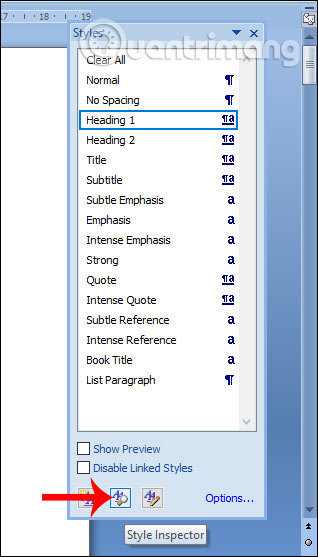
When one paragraph looks different from the rest, place the cursor inside it, open the Styles pane, and select Style Inspector.
The inspector separates the paragraph style, paragraph-level direct formatting, character style, and character-level direct formatting. This distinction helps explain why two paragraphs assigned the same style can still look different.
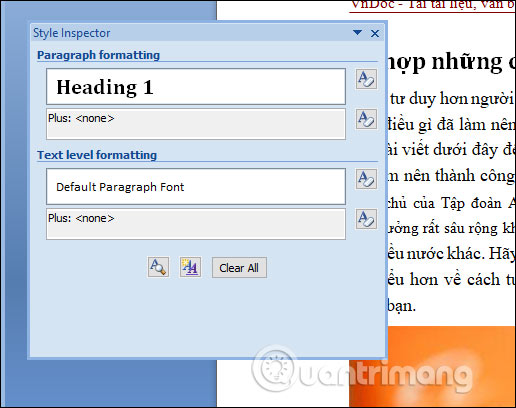
Use the adjacent reset buttons only for the layer you intend to clear. Clear All can remove both the applied style and direct formatting, so use Ctrl+Z if it removes more than expected. To normalize an ordinary paragraph, applying the intended style and then clearing unwanted direct formatting is usually safer than repeatedly adjusting individual font controls.
A practical style workflow
- Draft the document using Normal and the built-in heading hierarchy.
- Modify the styles to match the required typography and spacing.
- Create custom styles only for recurring semantic roles.
- Use the Navigation pane or an automatic table of contents to check the heading structure.
- Inspect outliers with Style Inspector instead of visually guessing their formatting.
- Test the document after copying content from another file, because pasted text may bring additional styles and direct formatting.
For related fundamentals, see How to Format a Word Document. If the styled document also contains structured data, the guide to creating and formatting Word tables explains the separate table tools.
Microsoft’s current style customization documentation covers the interface in recent desktop Word releases.
Related Articles
 MS Word - Lesson 7: Styles: Microsoft Word 20073 minutes read
 MS Word - Lesson 5: Format the Text: Microsoft Word 20074 minutes read
 How to Use Styles in Microsoft Word to Format Documents Consistently6 minutes read
 How to Copy Styles Between 2 Word Files (Import, Import Styles from the Old3 minutes read
 How to Create and Use Styles in Word 20164 minutes read
 Lesson 39: Ultra-Small Grid Styles in Bootstrap 54 minutes read
Reader Comments 0
Sign in with email or Google to join the discussion.