Table of Contents
Follow the instructions below to record on Windows 10 using tape deck efficiently and safely. Each section focuses on the actions, settings, and troubleshooting details that matter most.
The recorder on Windows computers is relatively simple, very easy to use if your recording needs only at a basic level, not too complicated compared to the recording software installed on the computer. You can also use some recording applications such as the Tape Deck application. This is also a recording application for Windows 10 computers, with a simple interface. In addition to recording, Tape Deck also has the option of Cast To Device to connect to other devices that support Miracast. The steps below explain how to use the Tape Deck recording application on a Windows 10 computer.
- How to record using Audacity on a computer
- Using Aroundsound records audio on the phone
- Effective call recording applications on smartphones
- Call recording Android with Call Recorder - ACR
Instructions for recording on Windows 10 computers
Step 1:
Users click the link below to install the Tape Deck application on the computer and proceed with the installation.
- Download the Windows 10 Tape Deck application

Step 2:
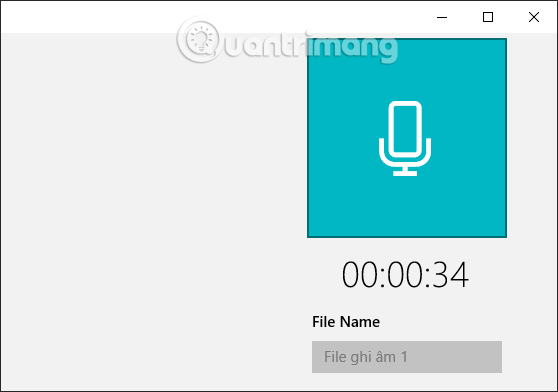
Displays the interface of the app for recording. First, users connect the microphone to the computer and check the connection. Then in the app interface Name the recording file In the File Name box, and then click The microphone icon Above to proceed with the recording.

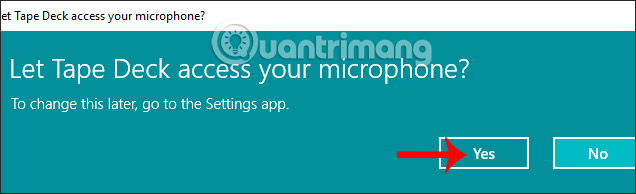
Users needs to Click Yes To agree that the Tape Deck application uses a microphone that is connected to the computer to record.
The recording process takes place immediately after that with the recording time displayed right on the interface. To stop recording, tap the microphone icon again.
Step 3:
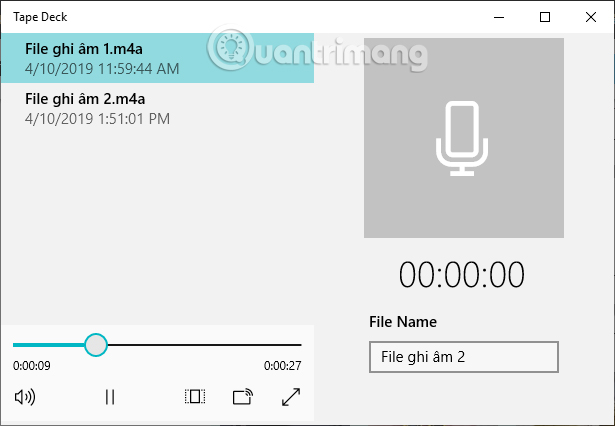
The audio files appears in the app interface, with the name that you have attached to the specific time that we have recorded. You continue recording with the above actions.
Click The Play icon To listen to the recordings made. The volume level can be adjusted below the interface.
Step 4:
When needed to delete any recording file, just right-click the file and Select Delete .
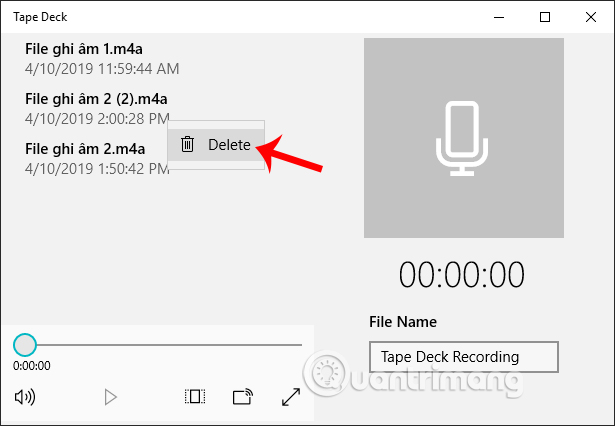
The app will ask if you are sure you want to delete this recording file, Click Yes To agree.
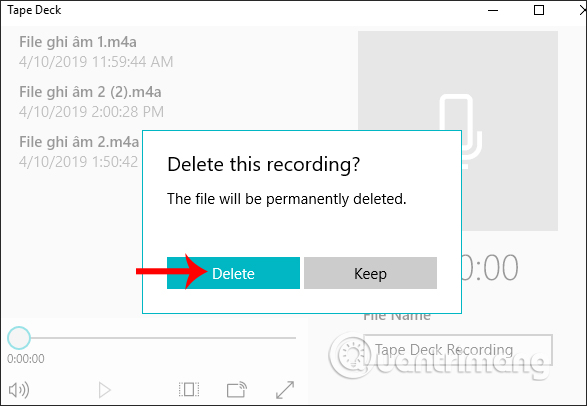
Tape Deck application has a simple, uncomplicated interface during the recording process. If your computer has Micrast support, you can connect to another device to use the app.
I wish you all success!
FAQ
What should I prepare before I record on Windows 10 using tape deck?
Review the requirements in the guide, confirm that your device or software is compatible, and save important work before changing settings related to record on Windows 10 using tape deck.
Why might record on Windows 10 using tape deck not work as expected?
The most common causes are incompatible versions, missing permissions, incorrect settings, or an interrupted internet connection. Recheck each step and restart the app or device when appropriate.
Can beginners follow these record on Windows 10 using tape deck steps?
Yes. Follow the steps in order, avoid skipping confirmation screens, and compare your interface with the screenshots because labels may differ slightly between versions.
Related Articles
 The 5 Best SSDs for Steam Deck: Features, Uses, and Practical6 minutes read
 Things to Know When Using Windows Drivers on Steam Deck5 minutes read
 How to Fix a Cassette Tape: Step-by-Step Guide11 minutes read
 Why Is the Western Deck Called ''tu Le Kh''?3 minutes read
 How to Install Windows on Steam Deck: Clear Instructions9 minutes read
 How to Clean Tape: Step-by-Step Guide8 minutes read
Reader Comments 0
Sign in with email or Google to join the discussion.