How to Password Protect Folders
Neither Windows nor Mac OS X natively support inserting passwords into your folders. However, there are still many ways to protect files. Please follow the instructions below..
Windows XP
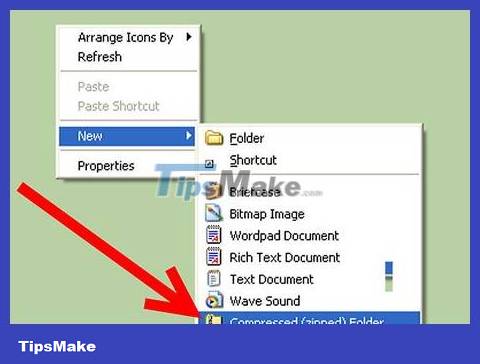
Create a compressed folder. Right-click on the desktop or wherever you want to put the folder. Select New, then click Compressed (zipped )Folder. It will create a new zip file that you can add files to like a regular folder.
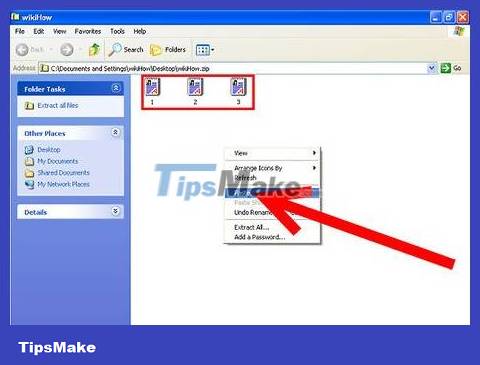
Move files. Copy and paste or click and drag your file into the new zip file. You can move as many files and folders as you want.
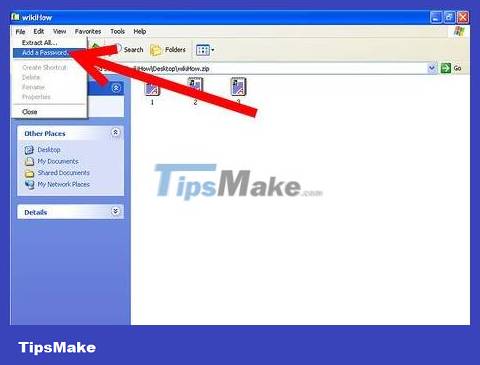
Add password. Open that zip file. Click File, then select Add a Password. Enter the password of your choice, then re-enter it to confirm. Now you will need this password every time you access that zip file.
Other users can still see the contents of each folder, but they cannot open them without a password.
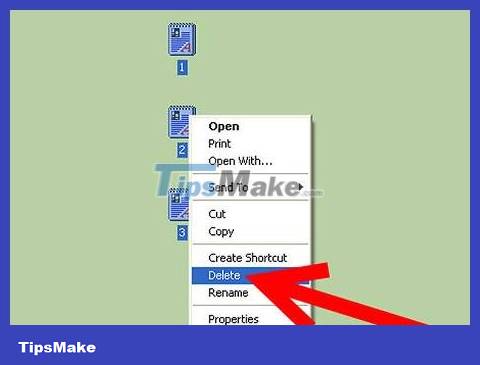
Delete the original. Once you have created the zip file, you will have two copies of the folder: the original and the zip file. Delete or move the original so that others cannot see it.
Windows Vista and Newer Operating Systems

Download and install third-party compression software. 7-zip is one of the most popular free software. This tutorial will be based on using 7-Zip.
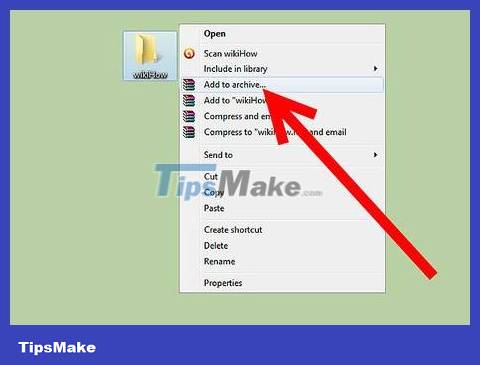
Create compressed file. Select the folder you want to password protect. Right-click and select 7-Zip from the menu. From the second menu, select 'Add to archive…' It will open 7-Zip.
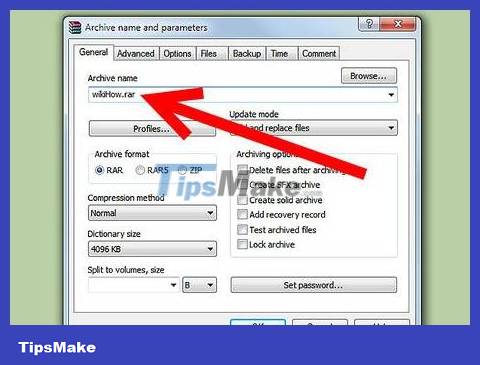
Adjust settings. You can rename the file that will be created. Select .zip from the 'Archive format' menu if you want the folder to be compatible on systems that do not have 7-Zip installed.
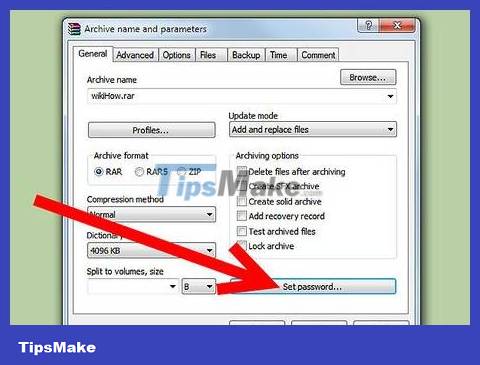
Add password. On the right side of the 7-Zip window there will be two boxes to fill in and confirm the password for that file. You can also choose your encoding format, or filename encoding. Click OK when you're done.
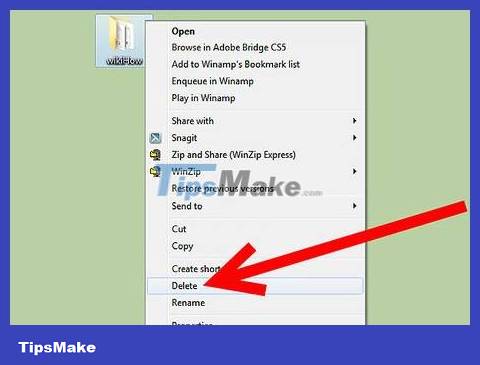
Delete the original file. Creating a compressed file will produce two copies of data: the original file and the compressed file. Delete or move the original file so that no one can read it.
Mac OS X
Create an encrypted image file. To password protect files and folders in Mac OS X, you need to create an encrypted disk image file that you will have to mount every time you want to open the file. You need to choose the size of the image but this file will have the same size as the files it contains.
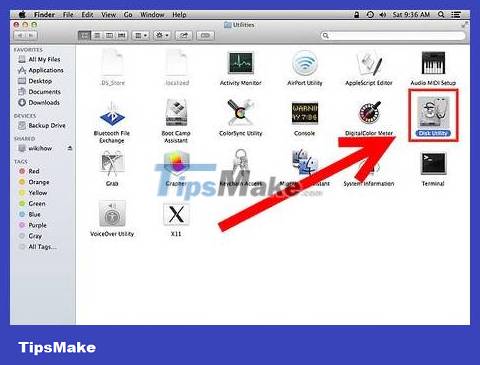
Open the Disk Utility tool. You can find it in the Utilities folder of Applications. While the program is running, click File, then select New. Select Blank Disk Image. A new window will open; Choose Sparse Disk Image from the Image Format menu.
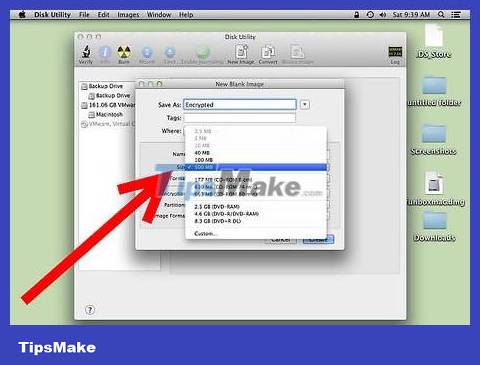
Select capacity. There will be a list of predetermined capacities that you can choose from, or you can enter the capacity you want with Custom. Choose a capacity larger than the capacity of all the files you are adding, so you can add files later if you want.
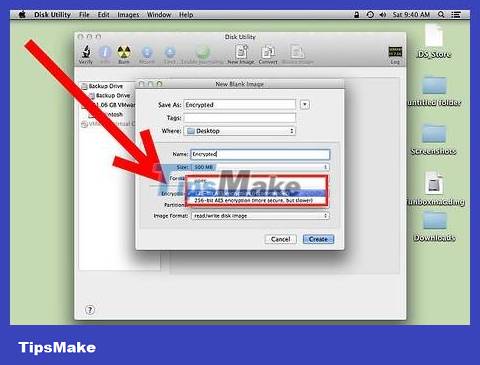
Choose the encryption method. You will have the choice of 128-bit or 256-bit. 128-bit AES encryption is very strong, and most users won't need anything higher than it. Encoding with 256-bit can be much more time consuming.
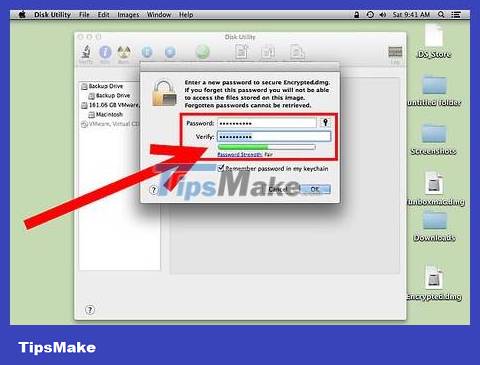
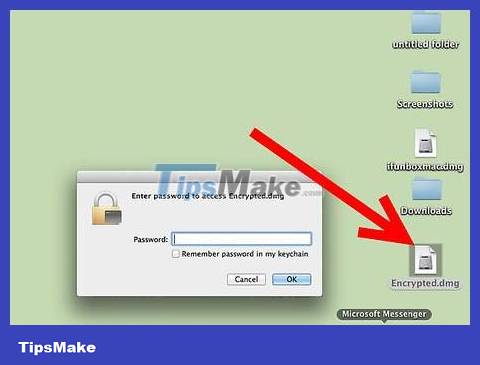
Name the disk image. This is the name that will appear in your system. Click Create. You will be prompted to enter and confirm your password.
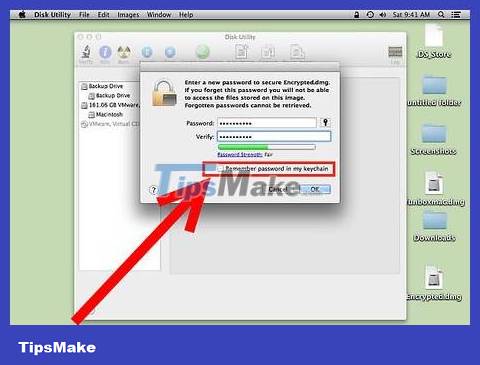
Uncheck the Remember Password option to ensure that each time you access the disk image, the system will prompt you for the password.
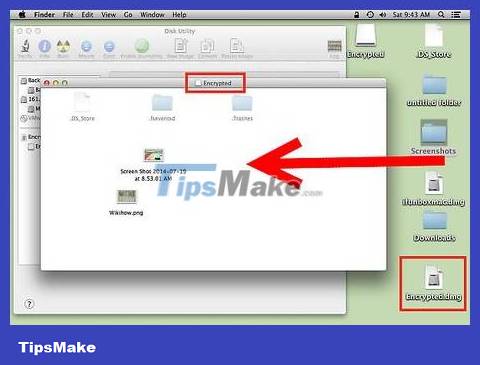
Fill the disk image. As soon as you finish creating the disc image, both the file and the attached image will appear. Add files to the attached image, then drag it to the trash to unattach it. When you want to access them again, open the image file. You will be prompted for a password and then the disk image will be remounted.