What are ESD files? How to convert ESD files to ISO on Windows
Have you ever wondered how Windows Update files get access to your computer? Or how Microsoft ships new features and security fixes? This happens through a special file type called ESD. Do not worry; You don't have to be a tech expert to understand what they are.
In this article, we will look at what ESD and ISO files are and show you how to convert ESD files to ISO on Windows.
What are ESD and ISO files on Windows?
The ESD (Electronic Software Download) file format is mainly used to provide Windows updates and new operating system versions. When you receive a Windows update, your system will fetch this ESD file from Microsoft servers.
Once downloaded, your system will decompress it (just like you would unpack a ZIP file) and overwrite the updated files on your computer.
On the other hand, ISO (International Organization for Standardization) file is a commonly used file format for disk images. ISO files are often preferred when creating Windows backup disks or flashing new Windows on a computer.
Let's say you haven't received the latest Windows update yet. In this case, you can easily download the corresponding ESD file, convert it to ISO and flash it on your computer. Now that you understand the terminology, let's learn the methods to convert ESD files to ISO files.
Methods to convert ESD files into ISO files
1. Dism++
Dism++ is a powerful free tool that comes with many utilities for Windows systems. It provides tools to manage, clean, and optimize your computer. One thing we like about Dism++ is its image conversion feature. You can convert different images like WIM, ESD and ISO easily with it.
Here's how you can use Dism++ to convert your ESD file to ISO:
1. Download the latest version from the Dism++ GitHub release page.
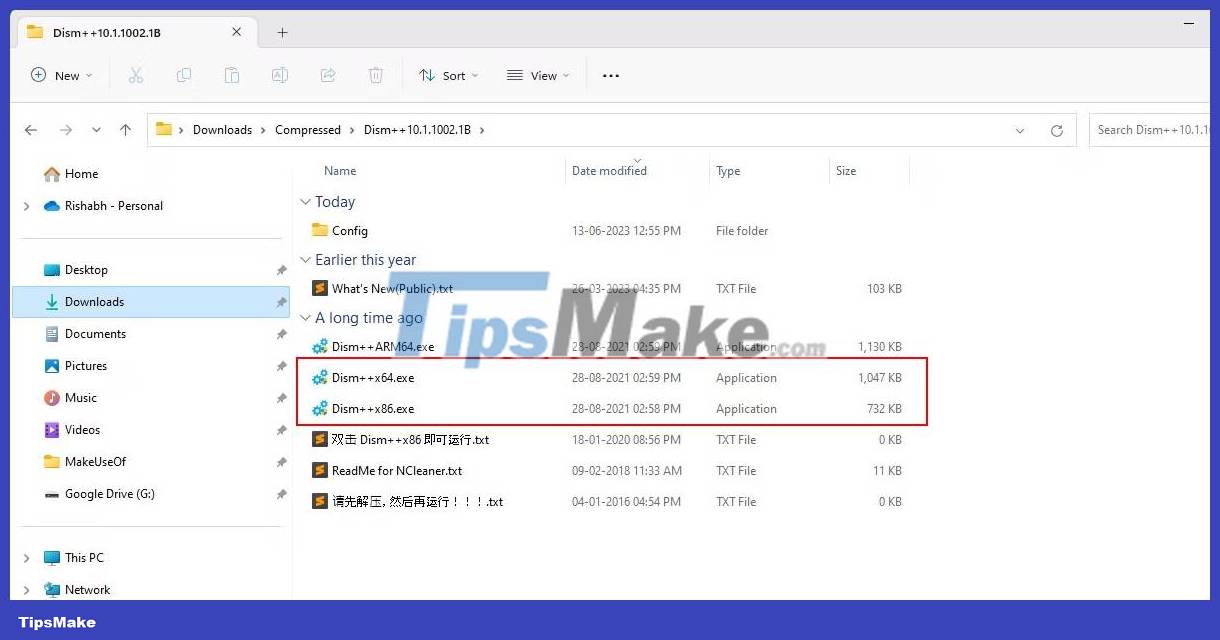
2. Run the appropriate Dism++.exe file and click Accept on the installer setup window.
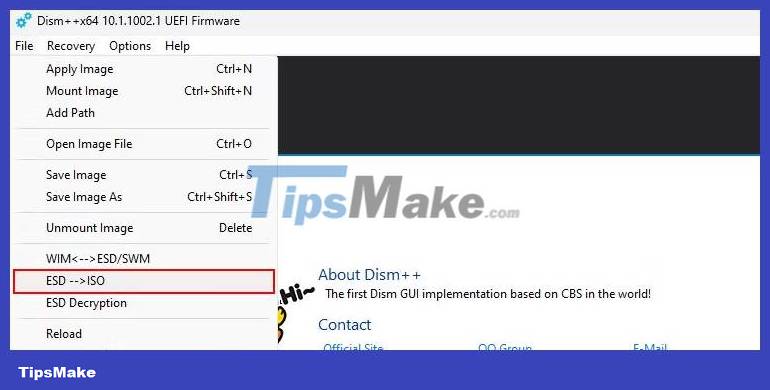
3. Click the file menu at the top and select the ESD --> ISO option . Alternatively, you can navigate to Toolkit > ESD To ISO .
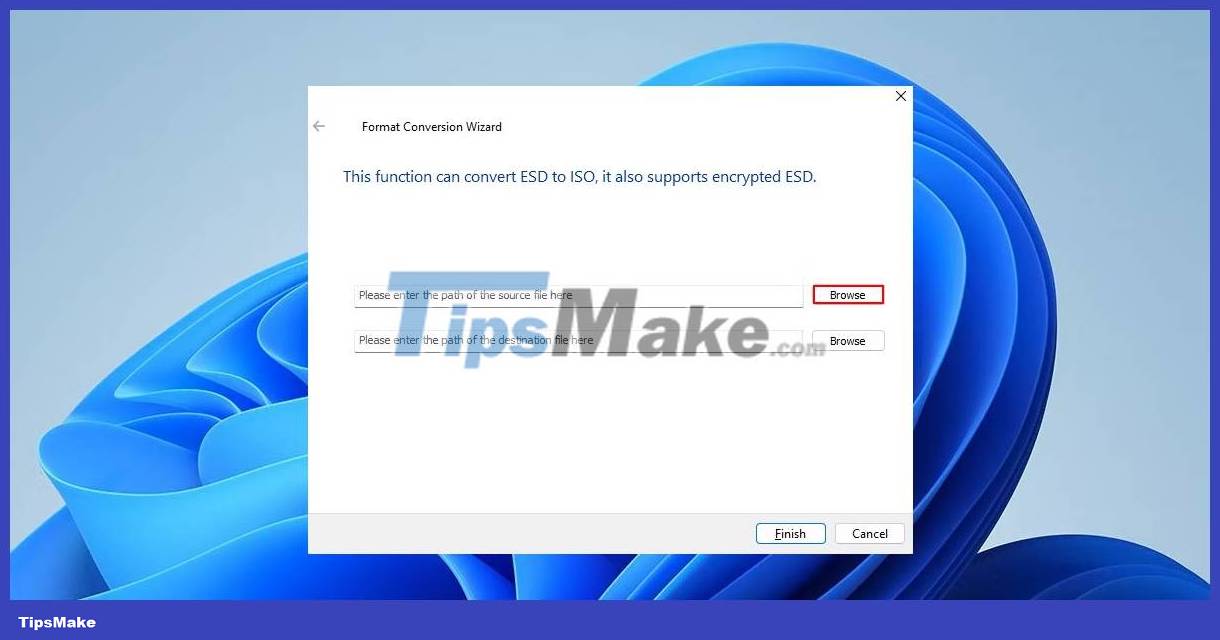
4. Click the first Browse button on the Format Conversion Wizard and select your ESD file.
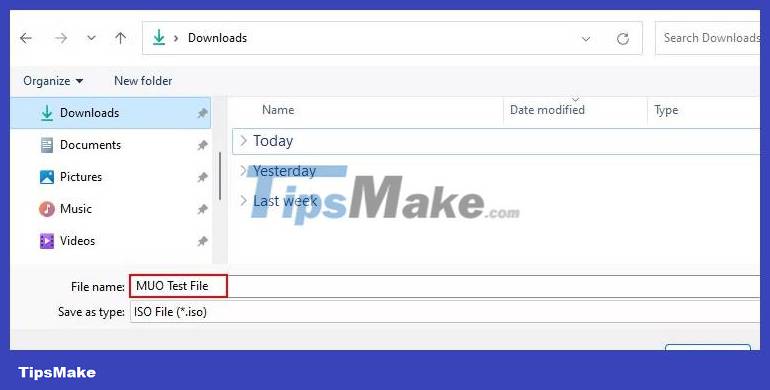
5. Click the second Browse button and choose a location for your ISO file. Then, enter a name for your ISO file. Once done, click the Save button .
6. Finally click Finish to start the conversion process. Please be patient because exporting the converted ISO file will take about 15 minutes.
After the conversion process is finished, open the location or path you selected earlier to check the exported ISO file. Now that you have the ISO file ready, let's check out how to flash the ISO file to USB.
Note : If the DISM++ utility automatically crashes or hangs in the middle, it means the ESD file you selected is corrupted. In this case, download the ESD file again and repeat all steps.
2. ESD ToolKit
ESD ToolKit is another handy utility you can use to convert ESD files to ISO. However, unlike DISM++, which provides a GUI (visual interface), ESD ToolKit operates on Command Prompt.
Follow the steps below to convert ESD to ISO file using ESD ToolKit:
1. Download the ESD ToolKit zip file from MajorGeeks.com.
2. Navigate to your Downloads folder. Extract the ZIP file and double-click the ESDISO.bat file.
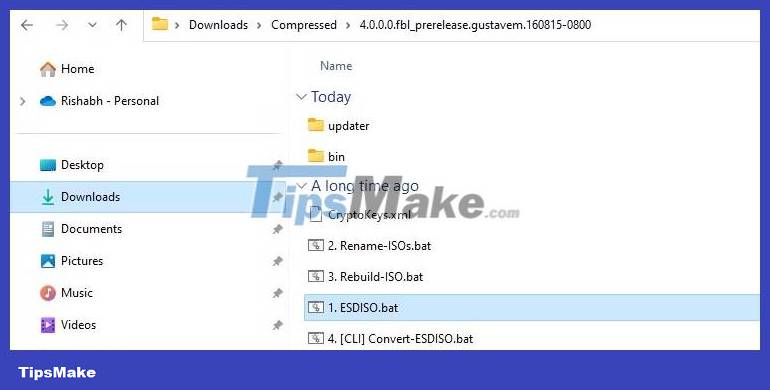
3. A Command Prompt will appear on your screen. Press the Enter key twice.
4. Copy the full path of the ESD file. For example, the sample ESD file is in the Downloads folder , so the path would be "C:UsersUserNameDownloadsFileName.esd".
5. Paste the copied path next to ESDFiles [0] . Make sure the copied path ends with your ESD file name, otherwise the conversion will not run.
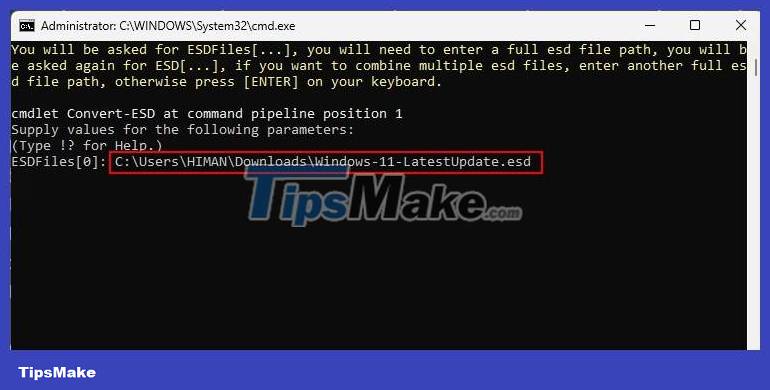
6. Press the Enter key two more times. This command will execute your command and the toolkit will create an ISO file.
When the process is finished, reopen the folder where you extracted ESD ToolKit. You will only find the extracted ISO file in that folder. Now, you may want to know how to edit ISO files on Windows to better control the exported ISO file.
Although ESD ToolKit will do the job for you, in some cases it may get stuck in the middle of the conversion process. Do not worry; There is another tool called NTLite with some additional functionality.
3. NTLite
NTLite is the most feature-rich tool among all the previous utilities mentioned above. It gives you many options to modify any Windows image as you like. Simply put, you can modify, delete and add different components and features to the custom ISO file, then flash it on any computer.
Besides customizing Windows images, it allows you to create ISO images from your ESD files.
Note : Unfortunately, NTLite cannot help you convert encrypted ESD files. So, if it is, you must first convert it to WIM format, and then convert it to ISO.
Below are the steps to convert ESD files to ISO files using NTLite:
1. First download the free version of NTLite from NTLite.com and run the installation file.
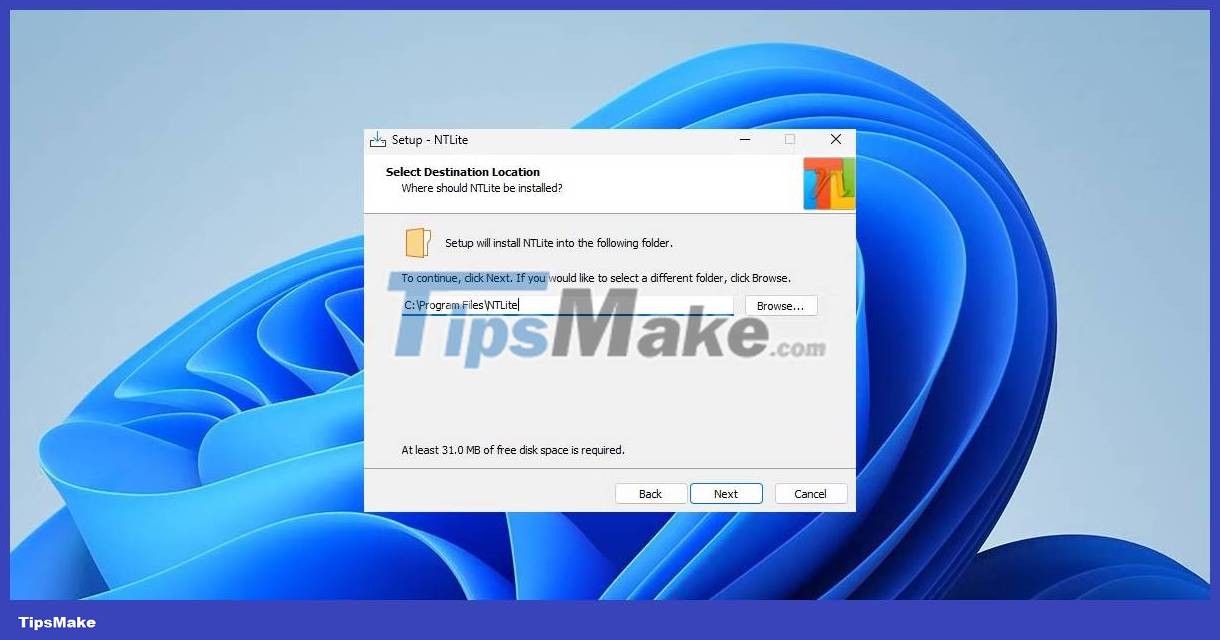
2. Launch NTLite and close the License pop-up window after the installation process is finished.
3. Click the Add button and select Image (ISO, WIM, ESD, SWM) .
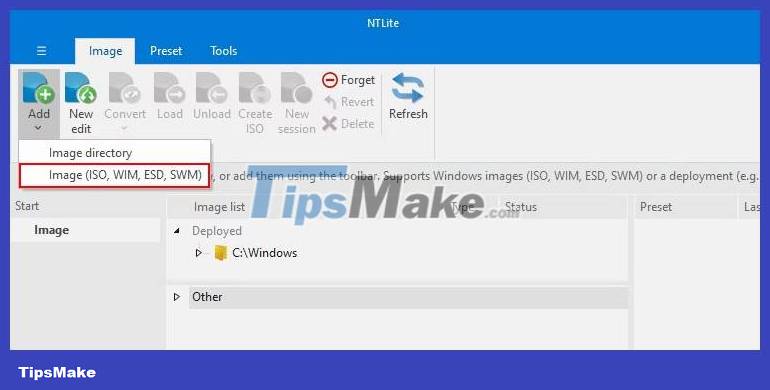
4. Double-click the ESD file you want to convert on the selection window.
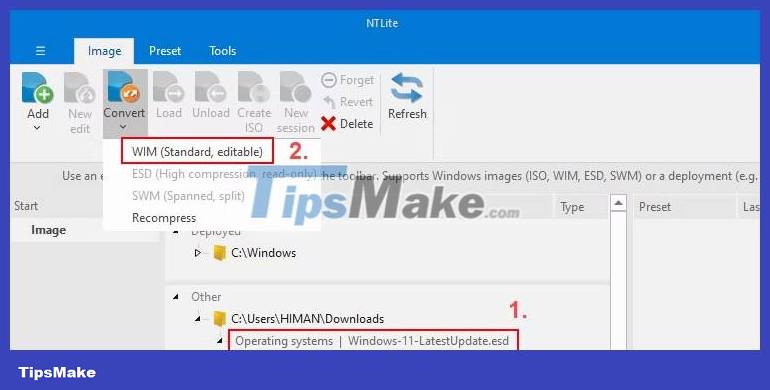
5. In the path of the selected ESD file, click on the name of your ESD file. Go to Convert > WIM (Standard, editable) to decode your ESD file.
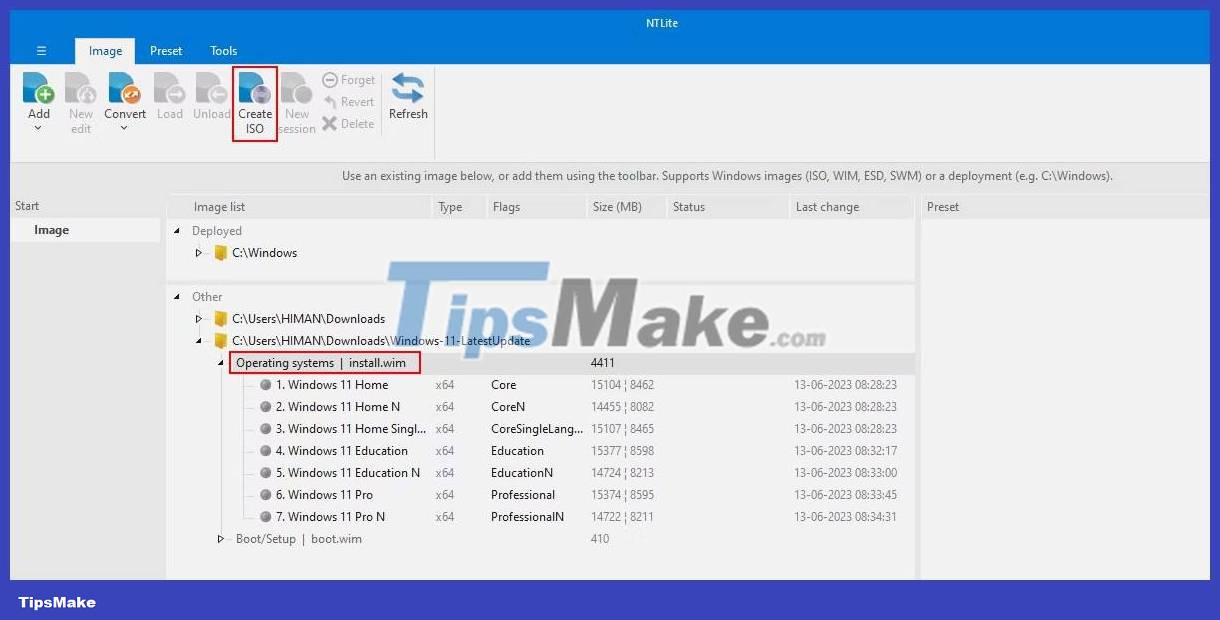
6. After decoding, select the install.wim file and click Create ISO to allow NTLite to create the ISO file.
7. Select the path for your ISO file and click the Save button .
8. Finally, click OK and wait for NTLite to process the conversion.
After conversion, confirm that the ISO file works as expected.