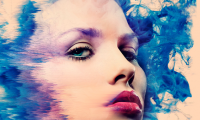
How to master Digital Coloring techniques in Photoshop
A lot of things can be done with Photoshop like photo editing, digital work creation, graphic design, web and even video editing. If you want to learn how to master Digital Coloring, Photoshop can also help you.
Table of Contents
Adobe Photoshop is a very flexible program. A lot of things can be done with Photoshop like photo editing, digital work creation, graphic design, web and even video editing. If you want to learn how to master Digital Coloring, Photoshop can also help you.
There are many great reasons to learn about this technique in Photoshop. Users can try many different options, undo errors easily and create multiple versions for the same drawing without too much effort.
Rough drawings
There are three ways to create a rough drawing to practice digital coloring skills:
1. Vectorize an available drawing
If you feel more comfortable drawing on paper, do this, then scan the image and open it in Photoshop.
You need to whiten the page and darken the lines. The best way to do this in Photoshop is to use the Levels tool . Go to Image> Adjustments> Levels or use the Ctrl / Cmd + L shortcut.
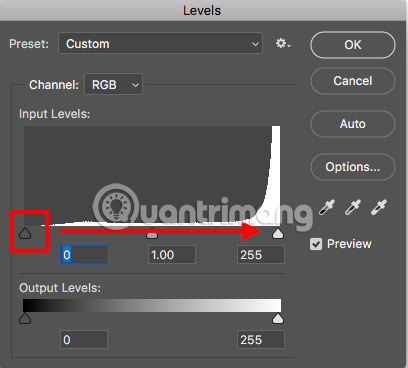
Drag the dark color marker left to right to darken the lines, and keep the left marker tool to lighten the page. Readers can search more YouTube tutorials for tips and tricks to scan hand-drawn drawings in Photoshop.
2. Creative Commons images
If you just want to practice, readers can use Creative Commons images found online. There are many websites available with rough drawings for free to use like Pixabay.com.
Finding online coloring pages for adults can also take you to a giant photo gallery to practice coloring in Photoshop.
3. Create digital drawings
If you have a graphic tablet like Wacom tablet or even iPad Pro, you can draw a digital image from start to finish.
If just starting, readers can refer to courses on how to improve Digital Art techniques.
Paint properly in the lines
You now have the image you want to color. The most important tip to learn in Digital Coloring is how Photoshop can prevent you from coloring the outlines.
First, open the image in Photoshop, create a new layer by going to Layer> New Layer or using the Ctrl / Cmd + N shortcut.
If the image is a background layer, it will be locked (that is, it cannot be colored). Go to Windows> Layers to open the Layer panel . If you see a lock icon next to the image layer, it is locked in place.
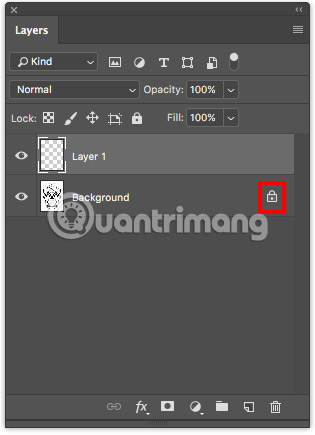
Click on the lock icon to unlock and drag Layer 1 below the image.
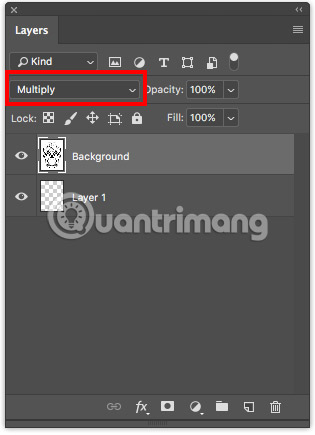
Select the layer containing the image and set the blending mode in the Layers panel to Multiply. This will ensure that the color you added to Layer 1 is displayed.
Select the Magic Wand Tool (W shortcut) and make sure that the layer containing the image is still selected. In the image used as an example from Pixabay, the author clicked on the Magic Wand Tool in the white background around the skull.

This selects the entire image except the skull. Go to Select> Inverse or use the keyboard shortcut Shift + Ctrl / Cmd + I. This will invert the selection so that your entire image will now be selected.
At this stage, go ahead and select the Brush tool (shortcut B), select Layer 1 and start coloring, and users will see that the color fits in the drawing lines. But take one more step to make sure you don't have to repeat the steps above to make sure the color doesn't get stuck out of the line.
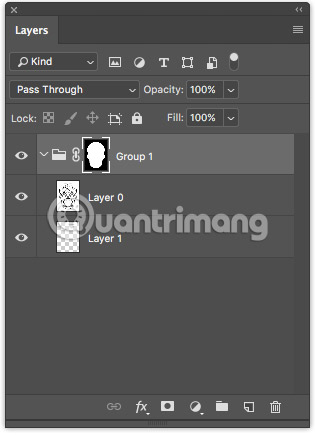
Select both layers and press Ctrl / Cmd + G to group them together. Make sure you've selected the entire group and create a mask by clicking on the Mask icon in the Layers panel or going to Layer> Layer Mask> Reveal Selection .
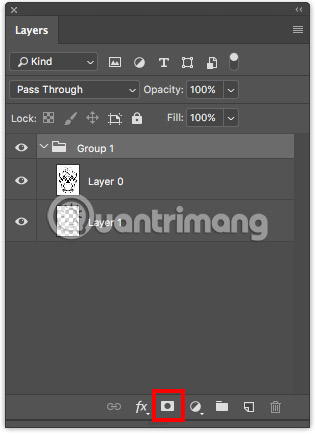
The Layers panel will be similar to the following. The background will be black and the area containing the image will be white.
Now, select the Brush tool , select the color and start painting on Layer 1 . Can't color anything other than the original option.
You can also be creative with brush options to make colors look more realistic. The program comes with some pretty useful options, but you can always install more brushes in Photoshop.
How to avoid mistakes?
If you want to use multiple colors in the image, enlarge the image. Extend different areas to allow more control, preventing colors from overlapping. You can also increase and decrease the brush size with the shortcut [ (decrease) and ] (increase).
More importantly, users should create a separate layer for each color used. Create additional layers with Ctrl / Cmd + N shortcut.
In this way, if you make a mistake and want to delete the brushes, you can use the History Brush Tool (shortcut Y) without worrying about accidentally deleting too many details. You can also delete an entire layer without affecting other colors.

If you want to completely avoid any color overlap, you can use many selection tools. The Quick Selection Tool and the Magic Wand Tool (using the same W shortcut) are useful for making quick selections, if the image has lines and clear parts. Just make sure you have the layer containing the image selected when using these tools.
If not, you will have to make a selection manually using Polygonal Lasso (shortcut L).
Note : To make multiple selections in different parts of the image, press and hold the Shift key on the keyboard and click on the area you want to select.
Add a shadow to the image
If you want to add depth and shading to the image, it's best to create additional layers for the shadow to easily remove unwanted additional details.
Select the color layer to add shadow and create a new layer using Ctrl / Cmd + N shortcut. In this way, the new layer will be created just above that layer.
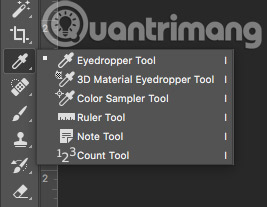
Use the Eyedropper Tool (keyboard shortcut I) to select the color in the image you want to add shadow and open the Color Picker. (You can also open the Color panel for faster access by going to Window> Color ).
After that, users can choose a slightly darker or lighter color than the original color. Choose where to put the shadow so that the image looks the most natural.
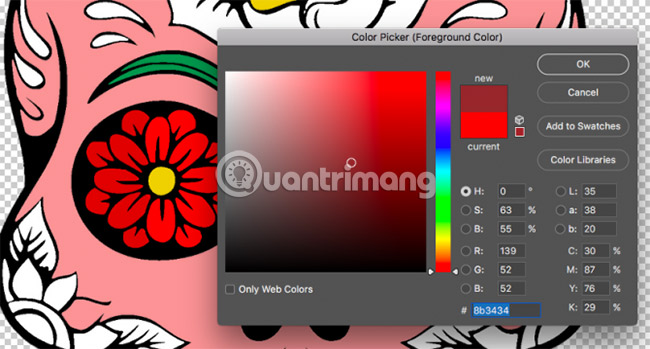
Can use multiple shades of the same color to give depth to the image.
Add background color
When coloring in images can easily add background colors with just one click. Collapse the group with image, mask and color layers, then click anywhere in the Layers panel to deselect the group.
Create a new layer with Ctrl / Cmd + N shortcut.
Select the color you want to add to the background and select the Paint Bucket Tool (G shortcut), then click anywhere in the background to color it.
You may also consider creating a template in Photoshop for later use.
Quick color change
After coloring, you can quickly change colors with one of the following two methods. Note that all colors can be changed at once or one color at a time.
To change the color on the entire image once, click Image> Adjustments> Hue / Saturation or use the Ctrl / Cmd + U shortcut. Optionally adjust three sliders to change the look of the image. Hue will change the actual color, Saturation will change the color intensity, and Lightness will lighten or darken the color of the image.

If you want to change a specific color in the image, click Select> Color Range . This will open a control panel and will activate the Eyedropper. Use the Eyedropper tool to select the color you want to change. All parts of the image with that color are highlighted in the control panel.
Note : You can select multiple colors at once by clicking the Eyedropper Tool button with the plus sign next to the Color Range control panel .
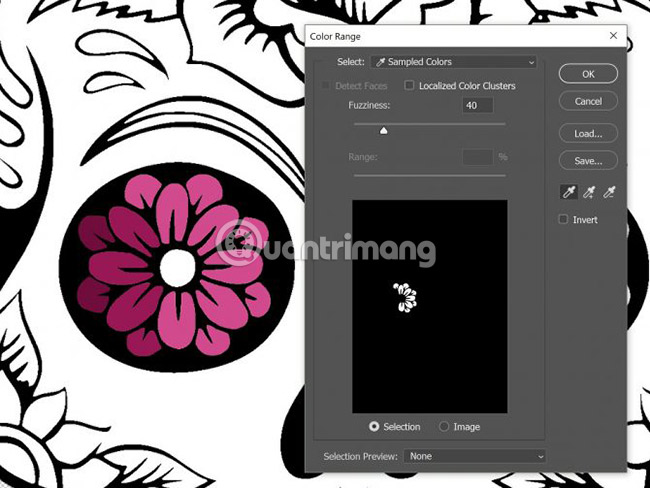
Click OK and any part of the image that contains that color will now be selected. Use Brush or Paint Bucket Tool to change color.
If you don't want to pay monthly fees to use Photoshop, readers may consider alternatives to Photoshop, but don't necessarily find powerful tools similar to those in Photoshop.
If you want to create a drawing from start to finish on your computer and look for a more advanced coloring process, you can use MS Paint to paint. GIMP also comes with some useful features worth considering.
Also, if coloring is just for fun, you don't even need a computer. Consider the coloring app on the iPhone or iPad instead.
Good luck!
See more:
- How to combine photos in Photoshop from 2 different images
- How to crop photos in Photoshop
- How to delete text on photos in Photoshop
Was this article helpful?
Your feedback helps us improve.
Related Articles
 Coloring gradients in Photoshop - Guidelines for using gradients in Photoshop6 minutes read
 How to use Photoshop CS5 - Part 6: Digital art8 minutes read
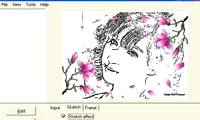 Turn the digital image into a sketch with Sketch Master3 minutes read
 Coloring pages for kids with many themes4 minutes read
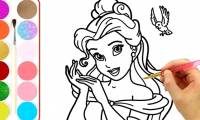 Synthetic princess coloring pictures for babies4 minutes read
 How to color images in Photoshop3 minutes read
Reader Comments 0
Sign in with email or Google to join the discussion.