How to manually tag faces in Google Photos
Have you ever tried to find someone's image to use at a graduation party or other occasion? It can take a lot of time to look through all the pictures before finding what you want. The Google Photos app now allows you to tag photos manually instead of relying on auto-tagging. Manual tagging allows you to tag more accurately.
Google Photos automatically tags faces (locates and recognizes faces in photos, then adds individual name tags to that face). However, until recently, Google Photos did not allow you to tag unrecognized or misbranded faces. If someone is in a photo that Google can't recognize for some reason, there's no way to tag that person.
The latest version of Google Photos allows you to manually tag faces in photos. This algorithm even locates your pet's face. You can fix identification errors by editing the Google tags that apply to images.
Google Photos will indicate which faces are available for tagging by placing a box around the faces. Unlike other photo tagging systems, like on Facebook, you can't select an area of a photo without a face and tag it. Google recognizes the presence of the face and makes it available for tagging. You can only tag recognized faces.
Turn on Face Grouping
Google only scans the image to find faces if you've turned on Face Grouping. To enable this feature, do the following:
1. Press Menu (three horizontal lines in the top left corner).
2. Select Settings.
3. Click Group similar faces .

4. Turn off or turn on Face Grouping.
To turn off Face Grouping for pets, disable the Show pets with people option .
Tag faces in photos
Once you've enabled Face Grouping, you can start tagging all the faces in your photos. You can do this on both mobile devices and computer browsers.
On mobile devices
1. Open Google Photos.
2. Locate an image you want to tag.
3. Swipe up until you see the profile picture of the people in the photo. People who have been tagged will have a name below their faces.

4. To name a person in the group, scroll right through the thumbnails until you find the person you want to tag.
5. Click thumbnail.
6. Click 'Add a name' and give the person a name.
7. If someone in the photo is not already in the group of people who created it before, click the pencil icon above the thumbnail.
8. Scroll down until you find that face. It is under 'Available to add' and will have a blue + sign in the top left corner.
9. Click the face.
10. Click the + sign in the upper right corner
11. Click Create.
12. That face will appear along with the other faces under the photo.
13. Click on the image and add a name.
On the PC
1. Open Google Photos.
2. Click the image you want to tag.
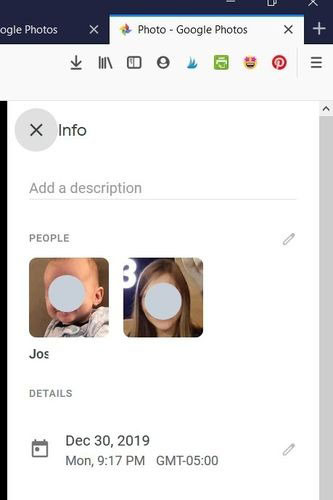
3. Click the image information icon (small i inside a circle).
4. You will see a section with existing groups of people.

5. If there is a person or pet in the unlabeled image, the information section will show how many faces you can create for a group of people.
6. Click the notification, then click the face image.
7. Click the + sign.
8. Click Create.
9. Click Done and you will be returned to the original information screen. Click the face image again.
10. Enter a personal name and press Enter .
After tagging people in a photo, you can search for photos of a specific person. Please enter a name in the search box and click on the result. All photos with that face will appear.