How to Manually Adjust Voice Using Audacity
This is an article showing how to use the audio correction effect on Audacity. You will use the free extension 'GSnap' to do this. Unlike what many people think, GSnap is available on Windows and Mac computers, but the installation process is relatively complicated..
Install GSnap on Windows
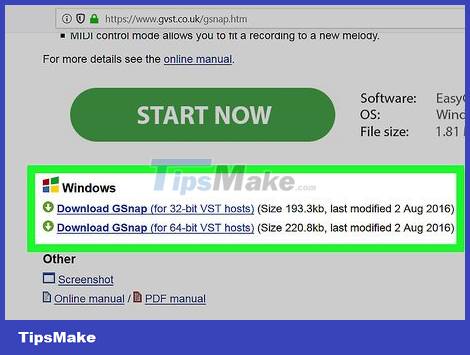
Download the GSnap extension. Go to http://www.gvst.co.uk/gsnap.htm in a web browser, then click the Download GSnap (for 32-bit VST hosts ) link. )) near the bottom of the page. The GSnap extension will be downloaded as a ZIP folder.
The 64-bit version has a software bug that prevents GSnap from displaying in the Effects menu.

Unzip the GSnap folder. Access the downloaded ZIP folder, then do the following:
Double click the ZIP folder to open it.
Click the Extract tab . It's at the top of the window.
Click Extract all .
Click Extract at the bottom of the window.

Copy the data in the GSnap folder. In the unzipped folder that is displayed, you will press Ctrl+ Ato select the folder's files, then press Ctrl+ Cto copy everything.

Click This PC . This is the folder on the left side of the File Explorer window. The This PC folder immediately opens.
You may have to scroll in the left part of File Explorer to find this folder.
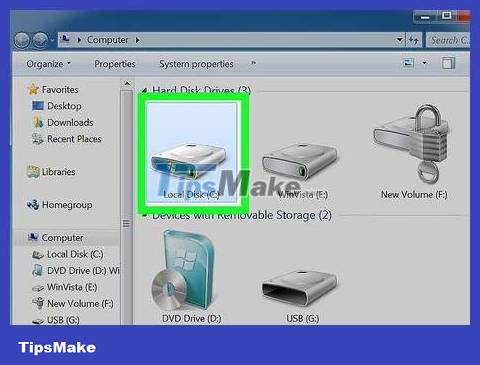
Double-click your computer's hard drive. This option is below the "Devices and drives" heading in the middle of the page, and is usually the OS (C:) option .
If you don't see any drives displayed here, first click the Devices and drives heading to see the information.
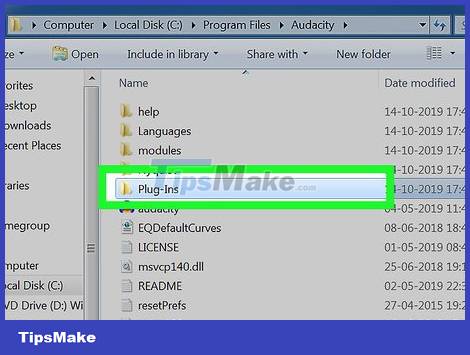
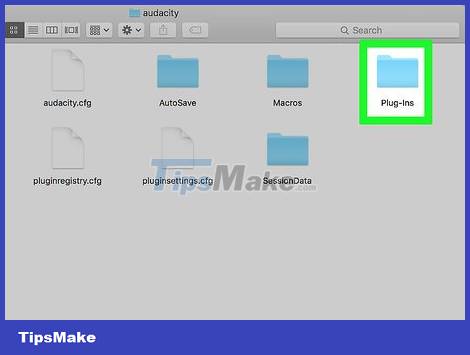
Go to the Audacity "Plug-Ins" folder. The operation is as follows:
Double-click the "Program Files (x86)" folder.
Double-click the "Audacity" folder.
Double-click the "Plug-Ins" folder.
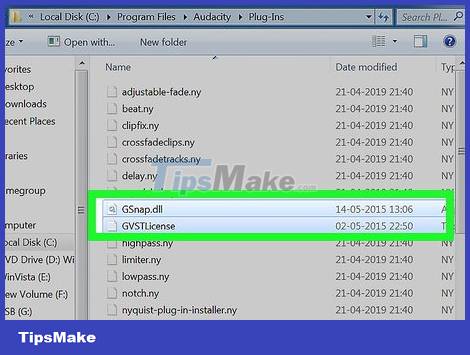
Paste the GSnap file. Click anywhere in the "Plug-Ins" folder, then press Ctrl+ V. You will see both copied GSnap files displayed in the "Plug-Ins" folder. Now that you have added the GSnap extension to Audacity, enable GSnap.
You'll need to click Continue if asked to paste the file into Audacity.
Install GSnap on Mac

Download the GVST expansion pack. Go to http://www.gvst.co.uk/portpage.htm in your web browser, then click the Download GVST plug-ins for Mac (for 32- and 64-bit VST hosts) link. expand GVST for Mac (for 32- and 64-bit VST hosts) under the "Mac OSX - BETA" heading.
Users cannot separately download GSnap for Mac computers, which is why you must download the entire VST extension here.

Open the downloaded ZIP folder. Double-click the ZIP folder of the downloaded GVST extension.
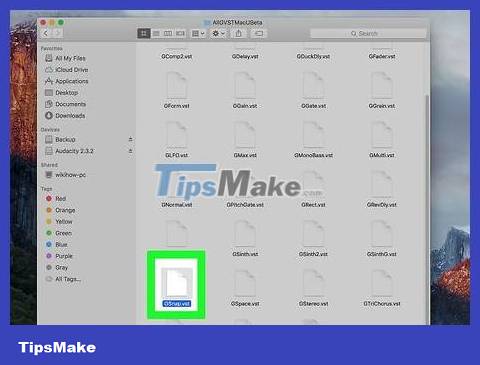
Copy file GSnap. Click the "GSnap" file, then press ⌘ Command+ C.
You can also click File and click Copy in the menu that appears.
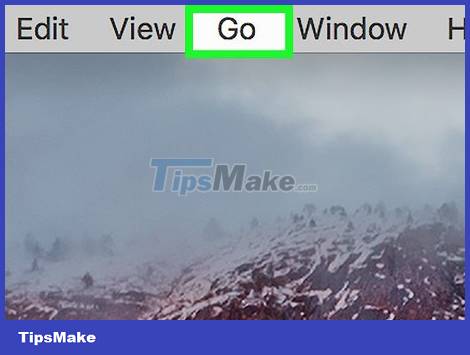
Click the Go menu . You will find it at the top of the screen. A menu will appear here.
If you don't see Go at the top of your Mac screen, click the desktop or open a new Finder window.
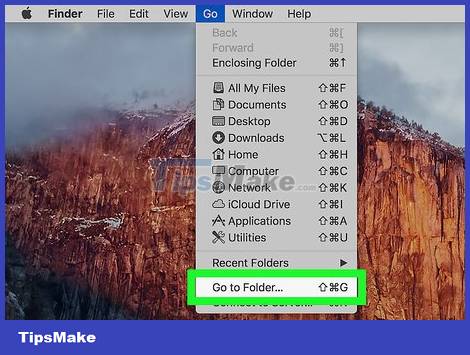
Click Go to Folder… (Go to folder…). This is an option under the Go menu . The screen immediately displays a new window.
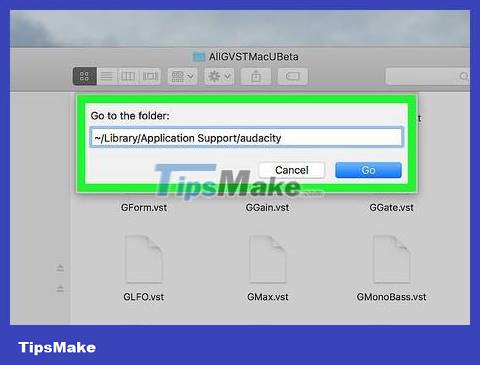
Access the Audacity Application Support folder. Type ~/Library/Application Support/audacityin the field in the window that appears, then click Go .
Open the "Plug-Ins" folder. You will see this option in the "audacity" folder.
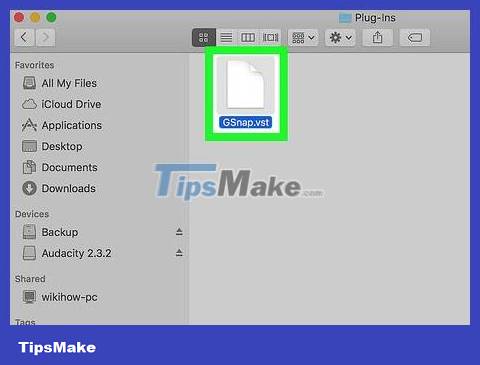
Paste the GSnap file. Click inside the "Plug-Ins" folder, then press ⌘ Command+ V. This will place the GSnap file in the "Plug-Ins" folder, and add it to Audacity. Now that you have added the GSnap extension to Audacity, enable GSnap.
You can also click File , then click Paste Item in the menu that appears.
Enable GSnap in Audacity

Open Audacity. This is the program with the orange sound wave icon with blue headphones on the outside. The Audacity audio editing interface will open in a new window.
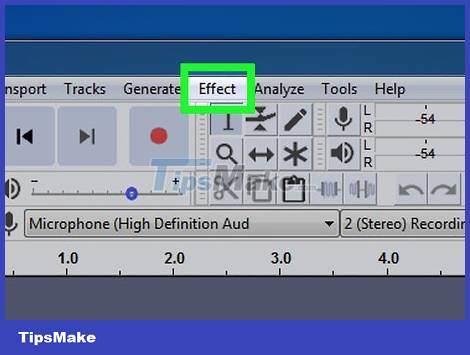
Click Effect . This is the tab at the top of the Audacity window. An immediate menu appears after you click it.
On Mac, the Effect menu is at the top of the screen.
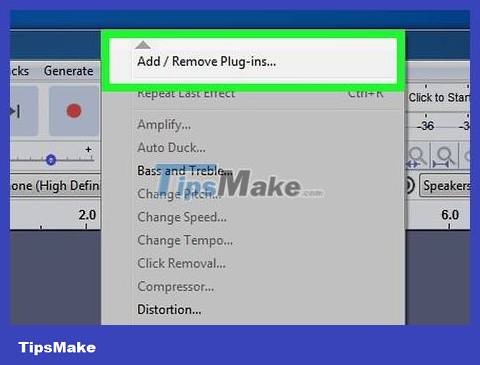
Click Add / Remove Plug-ins… (Add / Remove extensions…). You'll find this option above the Effect menu . The screen has a new window.
You may have to scroll up to find this option.
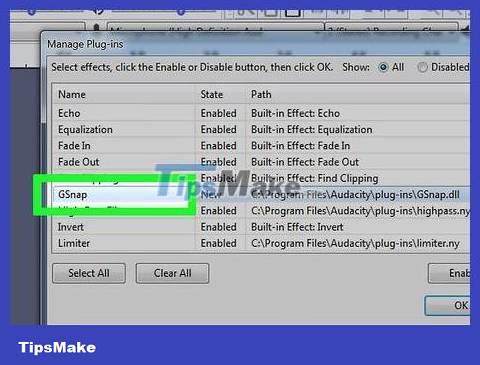
Scroll down and click GSnap . This is the "G" section in the window.

Click Enable . This button is below the list of available extensions. This will change GSnap's status from "New" to "Enabled".
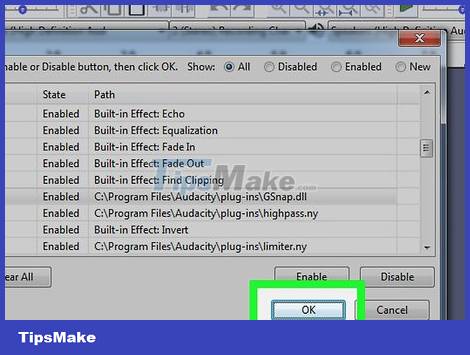
Click OK below the window. Clicking it will confirm the change and close the window.

Make sure GSnap is installed. Click the Effect tab , then scroll down until you see GSnap near the bottom of the menu. If you see GSnap , you can make audio adjustments in Audacity.
If you don't see GSnap here, you probably have the 64-bit version of GSnap installed on your Windows computer. You must delete the GSnap file in the Audacity "Plug-Ins" folder and reload the 32-bit version of GSnap.
Sound adjustment
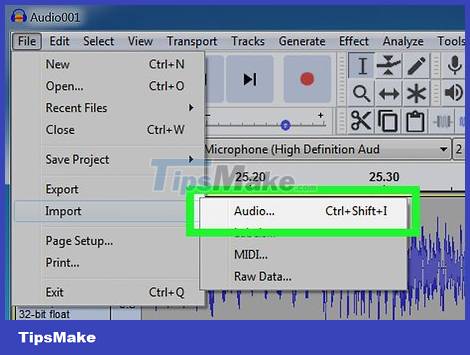
Import audio. Click File , select Import , click Audio. (audio), and double-click the audio file you want to edit.
If you haven't recorded your voice yet, you'll need to do so before continuing. This includes attaching a USB microphone to the computer.

Choose your voice. Click and drag the mouse over the voice you want to adjust.
You can select anything in Audacity by pressing Ctrl+ A.

Click Effect . A menu immediately appeared on the screen.

Click GSnap… . This is the option near the bottom of the Effect menu . The GSnap window immediately opens.
You will have to scroll down below the menu to find the GSnap. option .
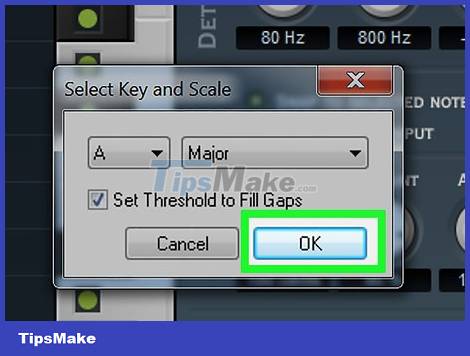
Select lock. Click the SELECT A SCALE. button at the top of the window, select the song's key (such as A ), select Major or Minor , and click OK .
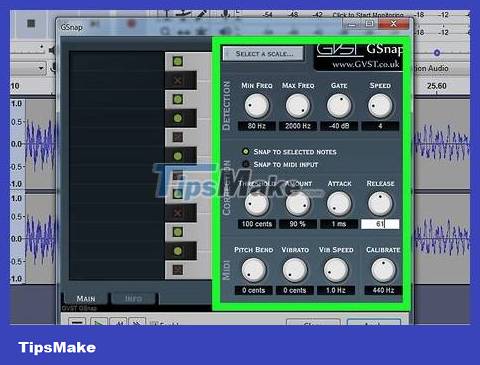
Customize buttons to adjust sound. Although you can customize these knobs until you get a unique sound, try using the following settings to get a "classic" tuned sound:
MIN FREQ (Minimum Frequency) : 80 hz
MAX FREQ (Maximum frequency) : 2000 hz
GATE (Gate) : -40 db
SPEED: Between 1 (broken sound) and 10 (smoother sound)
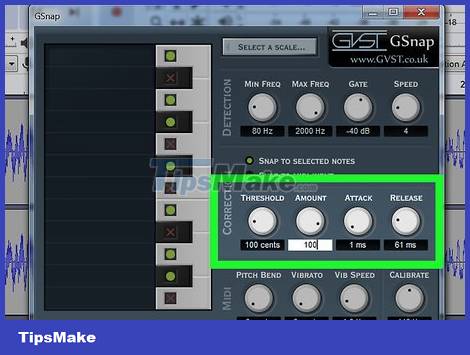
THRESHOLD (Threshold where all lower signals are filtered out) : 100 cents
AMOUNT (Adjustment level) : 100%
ATTACK (Time the gate is fully open after the audio signal exceeds the threshold) : 1 ms
RELEASE (Time the gate completely closes after the signal is lower than the threshold) : 61 ms

View your settings. Click the green "Play" button in the lower left corner of the window, then listen to the audio again.
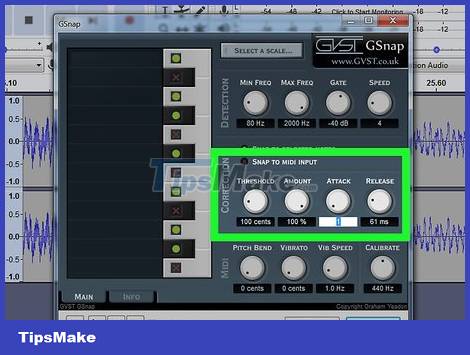
Make the necessary changes. The two main factors to control are the "AMOUNT" and "SPEED" values:
AMOUNT - Gives 100% results with the highest level of equalization, so reduce this value if the equalization effect is too obvious.
SPEED - Low speed will give a broken sound, similar to singer T-Pain's voice, while higher parameters will give smoother sound.
You can also delete sharps and flats by clicking the green circles on the black key on the left side of the window.
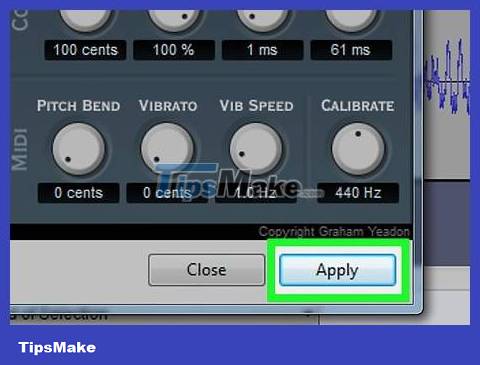
Click Apply . This is the option in the bottom right corner of the window. This will apply the selected settings to your audio.
Customize sound. Continue adjusting settings to get the sound you want, but remember the following:
The larger the "ATTACK" and "RELEASE" parameters, the more natural the voice will be.
Adding vibrato can make the voice sound more natural.
The lower the "THRESHOLD" value, the more robotic your voice will sound.
If the recording is out of tune, the tuning effect will be very obvious.
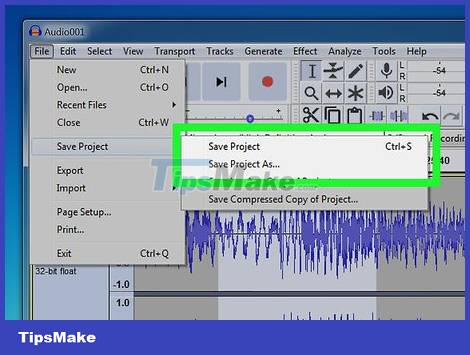
Save project as music file. You can export an audio clip by clicking File , clicking Export Audio. , entering a name and save folder, and then clicking Save .
If you're asked to add a tag (such as an artist's name), you can add or skip this step.