How to make videos with Microsoft's Clipchamp
Videos are very popular nowadays. You can find them in social media posts, YouTube, in advertisements, and they are even used to win customers. And while creating professional videos may seem complicated, in reality everything is easy with a simple video editor like Clipchamp.
Microsoft recently acquired the popular Clipchamp video editor and it's now available as a desktop app on the Microsoft Store on PCs running Windows 10 or 11. So let's explore how we can easily Create interesting videos with Clipchamp.
Start with Clipchamp
Clipchamp is very easy to get started even if you are new to creating and editing videos. This online video editor is faster because it processes video files in the browser itself.
Step 1. Download the Clipchamp app.
Step 2. Create a Clipchamp account (you can use a Microsoft, Google, Facebook, Dropbox or email account).
Step 3. Start editing and creating videos with the Clipchamp application.
Step 4. Whenever you want to use Clipchamp, use its shortcut in the Windows Start menu and it will open in your browser - Google Chrome or Microsoft Edge.
How to make a quick Instagram video for a new website
You can run a pizzeria from home, become a freelance graphic designer or become a talented singer. Isn't it great to create an Instagram promotional video for your new website? Let's see how specifically.
Once you're signed in to Clipchamp, the dashboard opens. Click the Create a video button to access Clipchamp's online video editor.
In the leftmost pane, you will find the main menu with many options that you can experiment with. Besides the menu, you'll find template categories, including premium categories that come with paid plans and free templates.
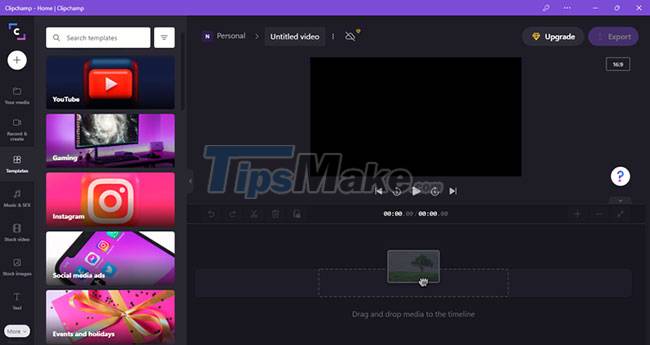
The premium plans come with higher resolutions, from 720p to 1080p. And there's also a Brand kit where you can create and store your brand's logo, fonts, and colors.
Although the video quality of the free plan only allows you to display up to 480p, it is still a good tool for personal use. The Basic plan comes with free audio and video templates, and you can still use the free version to do all your video editing. Therefore, even the Basic plan is well-suited for creating YouTube and social networking videos.
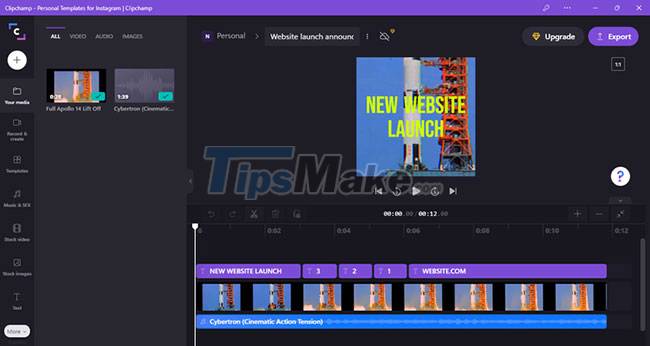
To get started, choose a free template for testing. Each template can be previewed by clicking. Once you select a template, the video and audio files of that template will load into the Your media section of the editor and on the timeline. You can play it in the preview window at the top of the timeline.
For this tutorial, the author chose a 1:1 scale Instagram website launch template. This template is a rocket launch as you can see in the image below. The author will use this video to create an introductory video for the website launch of an upcoming pizzeria.
How to add and change text in video template
To add text, click the purple text box above the video section in the timeline (each text that appears in the video will have its own text box). Editing options will appear above the preview window, namely Text, Transform, Colors, Filters, Adjust Colors and Fade.
Click the Text option to change the text and font.
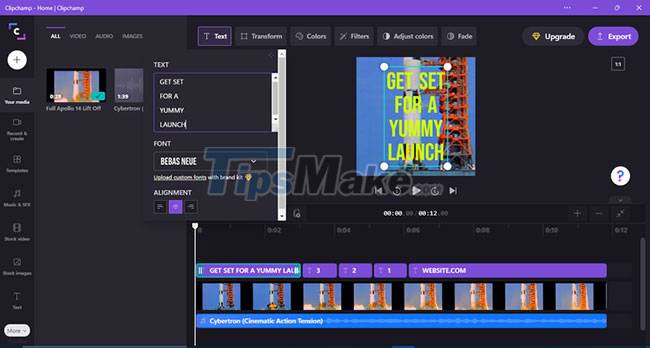
To change the text Website.com appears, click that in the purple text box, select the Text option to add your site's name.
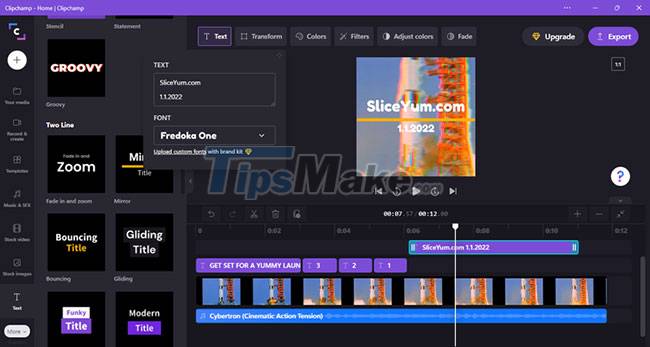
You can preview the video to see how it is. If you want to change the text style, select Text in the main vertical menu on the left to cycle through the options.
How to add music to video
You can add royalty-free music to your videos. To do that, select the Music & SFX option from the main menu. Select a free track, and then drag and drop it on the timeline from where you want the music to start.
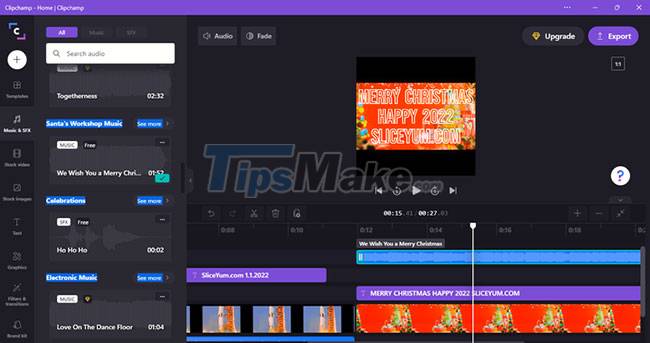
Similarly, you can trim the video to fit the music length. To trim a video clip, select it in the timeline (click to highlight), then click and drag the edges back and forth.
How to add transition effects in video
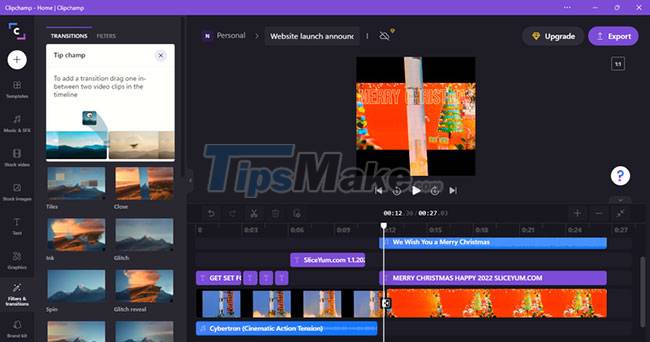
When you are using two or more clips in a video, the point where the clips convert can become an issue. To fix this, you can add transitions to make changes smooth.
Select Filters & transitions from the main menu. Then drag and drop a suitable transition between the two video clips. Preview the transition in the Preview window. If you don't like it, try other transitions until you find one you like.
Once done, you can click Export in the top right and the video will start exporting in the browser. You'll see options to save and share your videos like Google Drive, Dropbox, and OneDrive. You can even upload your videos directly to YouTube, Tik Tok or Pinterest.
Once done, you can get the link of the video to share with anyone you like. And finally, Clipchamp saves a copy of the video to your PC, allowing you to post the video anywhere or back it up on storage of your choice.