How to create and edit videos with Clipchamp's AI tools
With AI permeating every creative field, users of all skill levels can create artwork and media content with little effort. Clipchamp makes video editing easy by letting AI take over the controls. Here's how to create AI videos with Clipchamp.
How to create AI-generated videos with Clipchamp
If you want to start creating AI videos with Clipchamp, you can use the desktop version or the online version. The steps are the same between the two versions, so it doesn't matter which method you use for this tutorial.
1. Collect media files
Before you start, you need to find all the media files you want to add to your video. You can include both videos and images in your project. You should gather all your files into one folder for easy access.
When you're ready, open Clipchamp and click Create a video with AI.
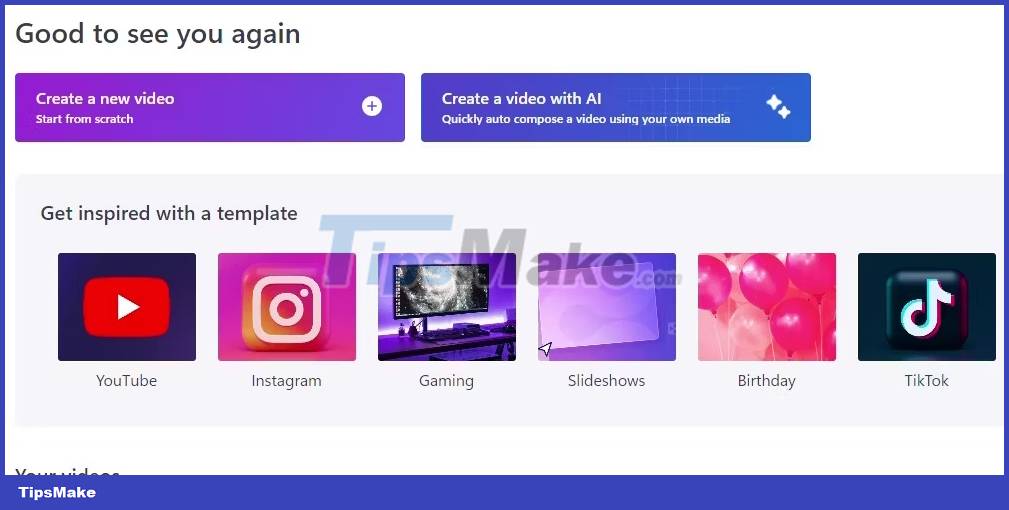
Clipchamp will now ask you for the video title. This name will be used for your video's tag, so give it an appropriate title for your viewers (e.g. "My trip to Spain").

Below the name, you can add the media you want to use in your video. If you have all the media in a folder, you can select them all and drag them into the upload window. When all your files are uploaded, click Get started.
2. Set the color tone for the video
Once all the media files are added to Clipchamp, you will move on to the Style section. During this stage, you will tell the AI what mood you want your video to express. Vacation and family videos are best suited for fun themes, while professional videos are best suited for more serious themes.
Clipchamp will show you the theme tag on the left side of the window. The tags at the bottom left of the theme tag describe what the theme represents, and the colors at the bottom right show you the main colors used in the theme.
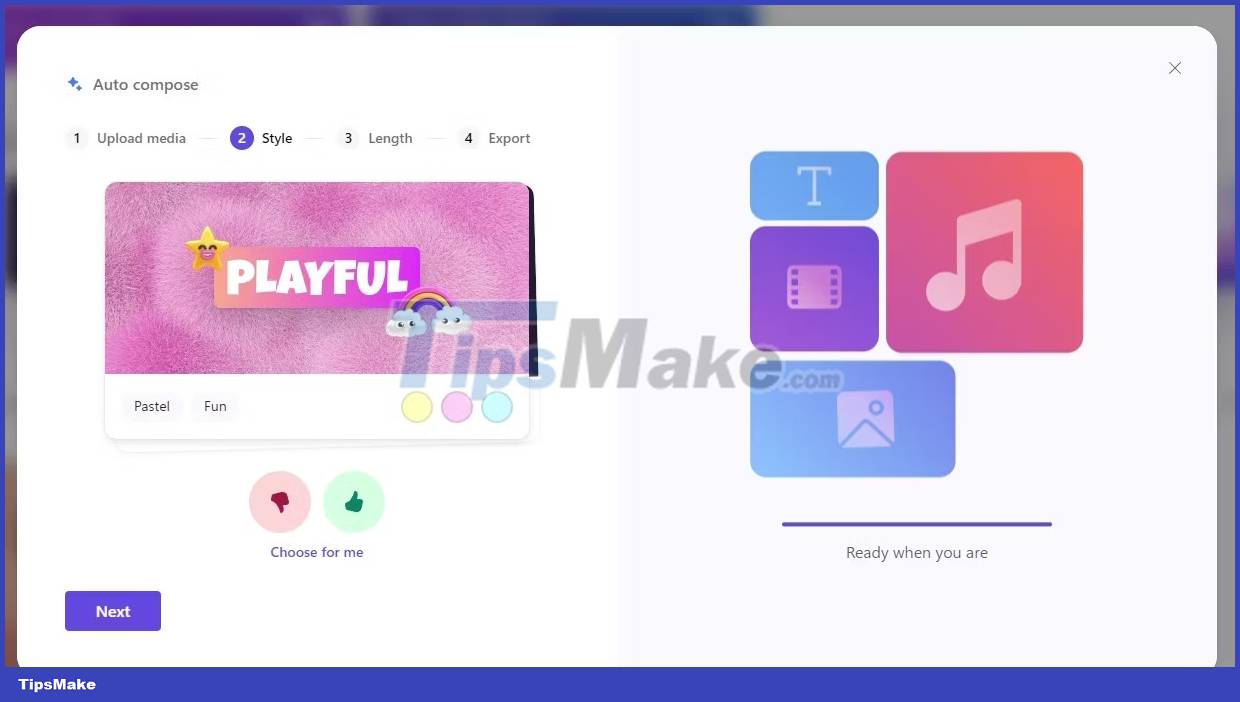
If the theme tag matches the mood you want in the video, click the like icon. If not, click the thumbs down icon. Clipchamp will then give you another theme card and this process will continue until Clipchamp knows what kind of mood you want for your video. If you feel lost, you can click Choose for me to let Clipchamp automatically choose a theme for you.
Once you've chosen the theme you want, Clipchamp will ask you if you want your video in landscape or portrait mode. Landscape is the best choice for displaying on TV, computer screen and uploading your video to a site like Youtube. Portrait is best if you plan to upload your video to YouTube Shorts or TikTok.
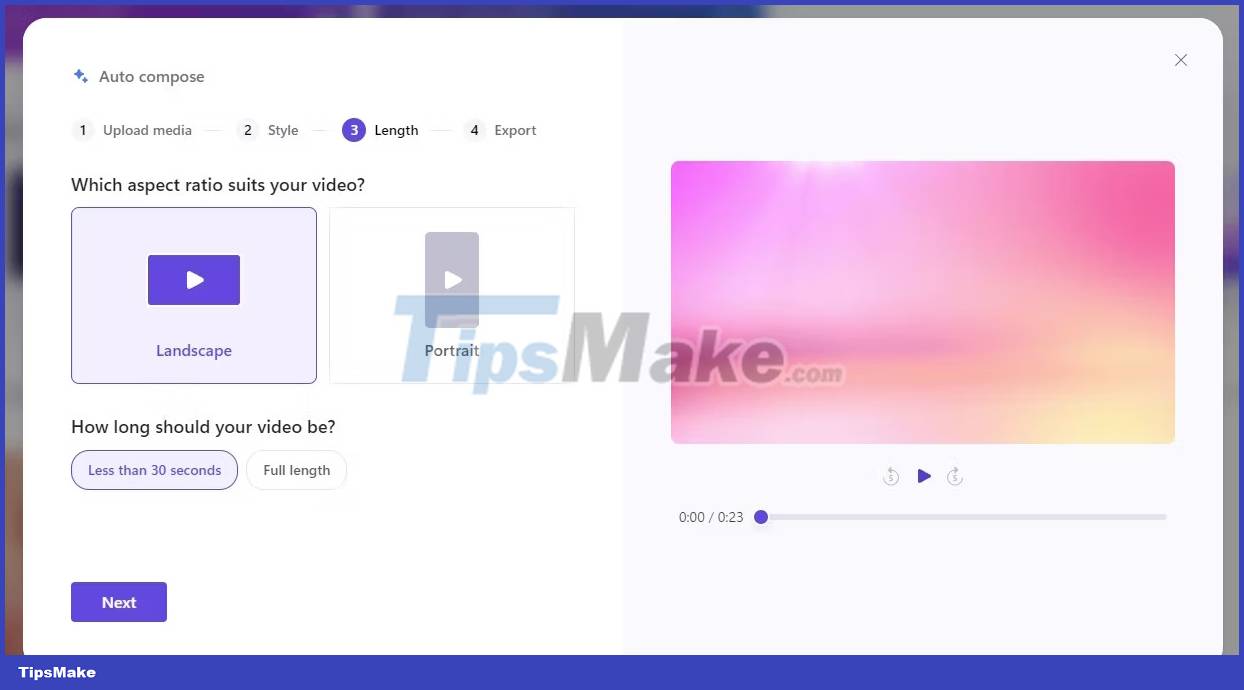
You can also choose the duration of your video. If you want a short and engaging video, choose Less than 30 seconds. If not, click Full length.
Next is the Export window. Here, you can choose songs and fonts that match the theme you chose earlier. You can press the Play button on the video player on the right to see how your video will look with the song and font you've chosen.
If you like what you see, click Export to turn it into a video. If you want to edit your video, click Edit in timeline.
How to edit AI-generated videos in Clipchamp
Clipchamp will try its best to create a good video. However, everything will not be 100% perfect. If there's something strange about the final version, you can edit the timeline and tweak your video.
1. Change title tags
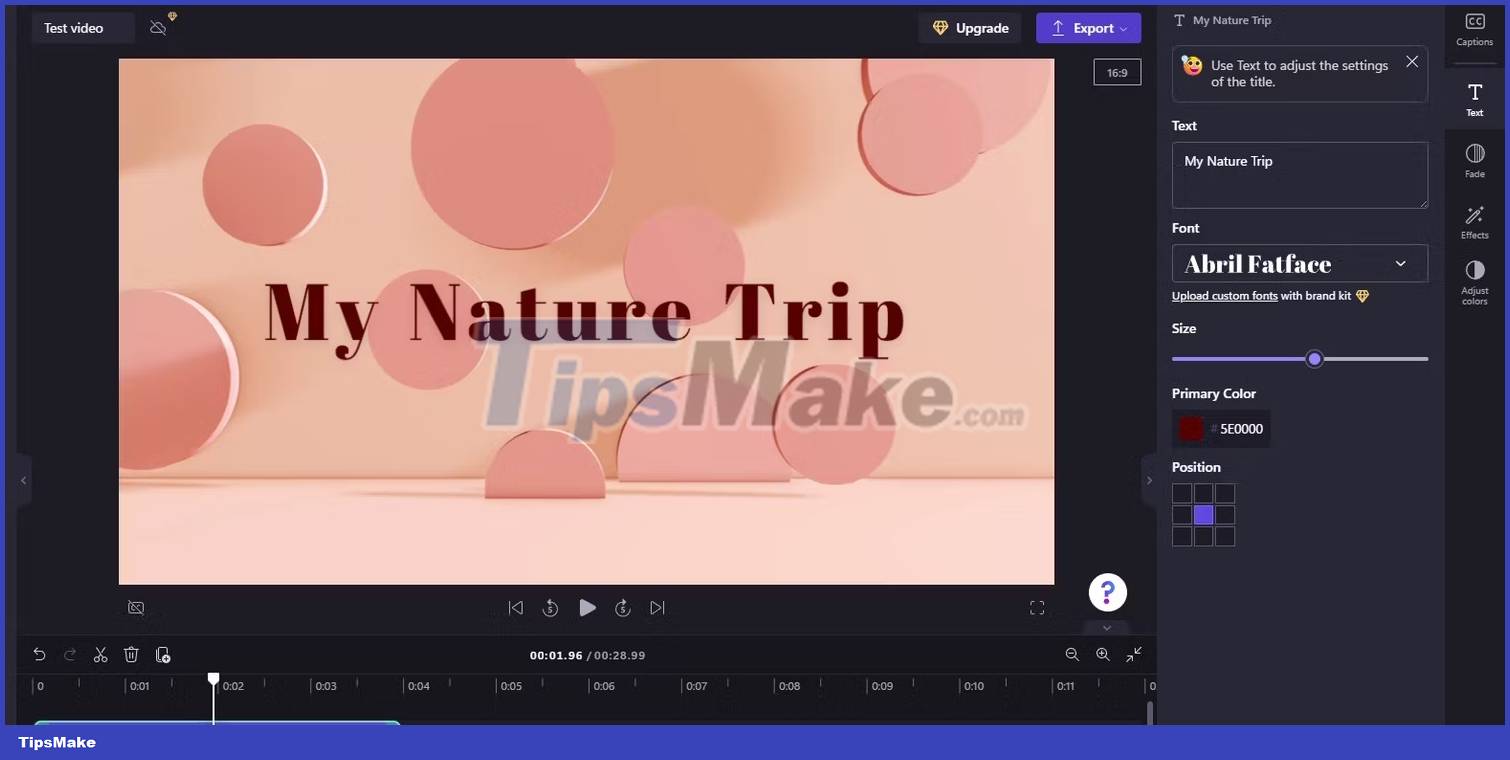
If the title tag isn't to your liking, click it on the timeline, then click Text in the top right. This will allow you to change the content, choose a new font, and adjust its size.
2. Adjust the media length
Sometimes Clipchamp will display a piece of media for just a second on the screen before continuing, and sometimes it will hang on a video or image for too long. If Clipchamp's timing is a bit off, you can manually adjust the clip's timing.
To adjust a clip, click it on the timeline. Then, grab one of the edges and drag it left or right to lengthen or shorten the clip.
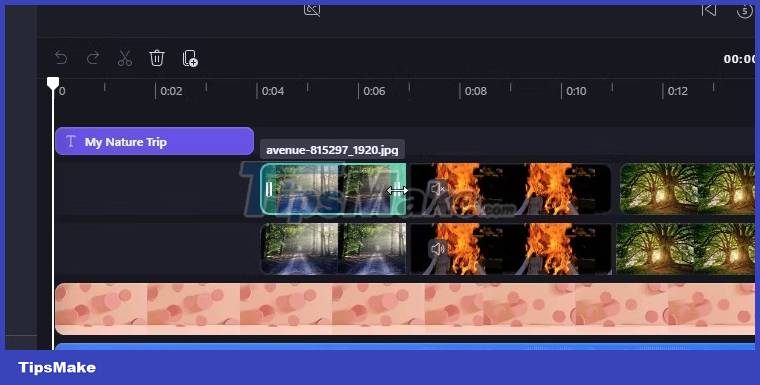
You will notice that Clipchamp sometimes adds two identical videos with the same media content. The second track is used to create a reflection effect that appears below the active video or image. Make sure you align these effects when adjusting your media, otherwise the video will look weird. You can also remove these effects if they cause too much trouble.
3. Change transition styles and effects
To adjust how long a photo or video fades, select the photo or video, then click Fade on the right. Adjust the sliders here to create the perfect blur duration.
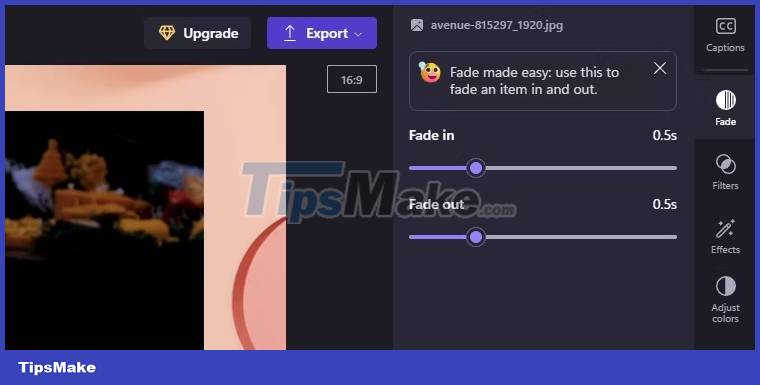
With the media still selected, you can also adjust other elements on the right sidebar. Filters let you adjust colors in different styles, and Effects let you experiment with some fun visual styles. You can also use the Speed option on the video to adjust the playback process.
Once you're done editing, click Export in the top right to create the video.
While Clipchamp's AI-powered video editor isn't perfect, it's still a quick and easy way to create videos online or on Windows, especially if you have a lot of photos or videos to look through. Next time you're staring at a blank video edit and wondering where to start, try Clipchamp's AI tool.
You should read it
- ★ How to make videos with Microsoft's Clipchamp
- ★ How to record video with a laptop without installing software
- ★ How to fix the error that ClipChamp cannot be installed on Windows 11
- ★ How to edit videos on Edit Videos Online without an account
- ★ Top online video editing websites, making online videos