How to host and share large files online with PicoShare in Linux
Picoshare is a lightweight and highly accessible file sharing web application for Linux. It provides an easy-to-use interface where you can upload and share files from your own server..
This article will show you how to install Picoshare and share files online using Docker in Ubuntu Linux.
Install the prerequisites for PicoShare
Assumptions : This tutorial is performed on an Ubuntu 24.04 machine with at least 2GB of RAM and 50GB of disk space. You will need to have a domain name to be able to create an 'A' record for that domain. Finally, this article will use DigitalOcean Spaces for the S3-compatible object storage backend.
Note : Although the instructions here are for Ubuntu, they also apply to most Linux distributions.
The first step in installing PicoShare is to prepare both Docker and Nginx for the host system (for other Linux distributions, here's how to install Docker on a Linux system). To get started, get the signing key for your Docker project's repository:
curl -fsSL https://download.docker.com/linux/ubuntu/gpg | sudo gpg --dearmor -o /etc/apt/keyrings/docker.gpg sudo chmod a+r /etc/apt/keyrings/docker.gpgCreate a new apt repository file using your favorite text editor:
sudo nano /etc/apt/sources.list.d/docker.listPaste the following line of code into the new repository file:
deb [arch=amd64 signed-by=/etc/apt/keyrings/docker.gpg] https://download.docker.com/linux/ubuntu noble stableSave the repository file, then update both the system's repository list and its current packages:
sudo apt update && sudo apt upgradeInstall Docker, Docker Compose and Nginx using apt in Ubuntu:
sudo apt install docker-ce docker-ce-cli containerd.io docker-compose-plugin docker-buildx-plugin nginxCreate cloud storage backups for PicoShare
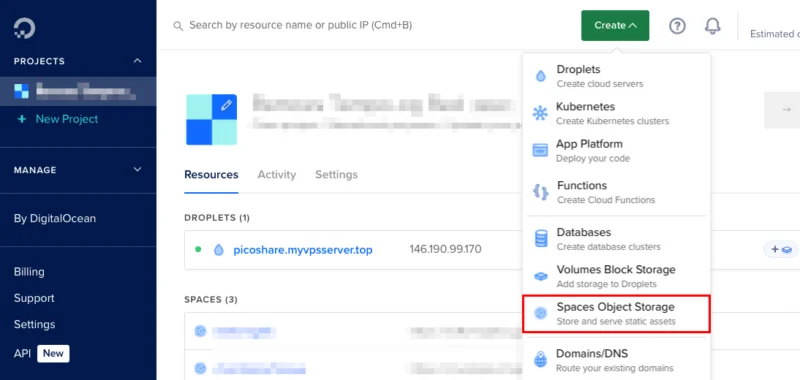
Go to an S3-compatible cloud storage provider, then create a new storage bucket. This case is using DigitalOcean Spaces so click Create -> Spaces Object Storage on the dashboard screen.
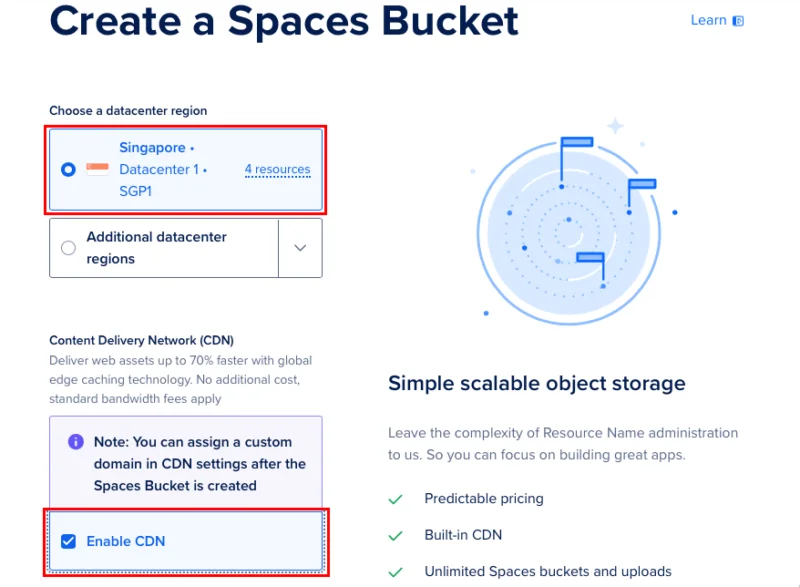
Select the Datacenter location for S3-compatible storage, then check the Enable CDN checkbox .
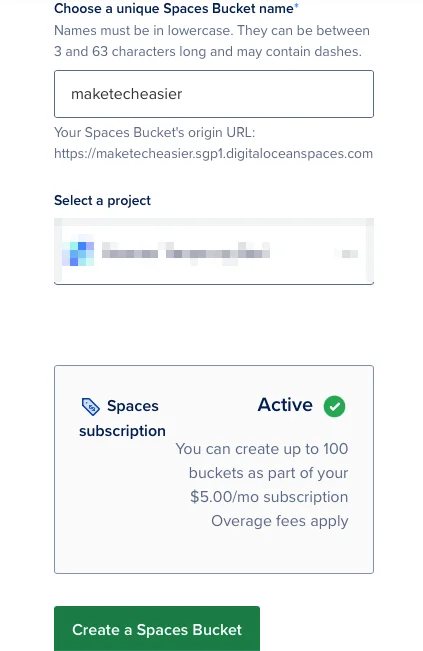
Name the new Spaces Bucket, then click Create a Spaces Bucket to initialize the group.
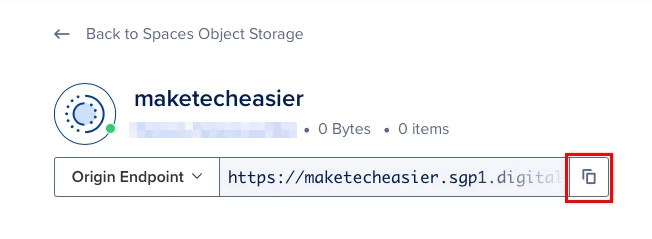
Click Copy Icon on the Origin Endpoint text box and paste it into a separate text file.
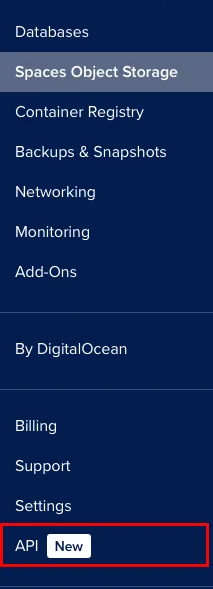
Scroll through the left sidebar of the DigitalOcean dashboard, then click the API category .
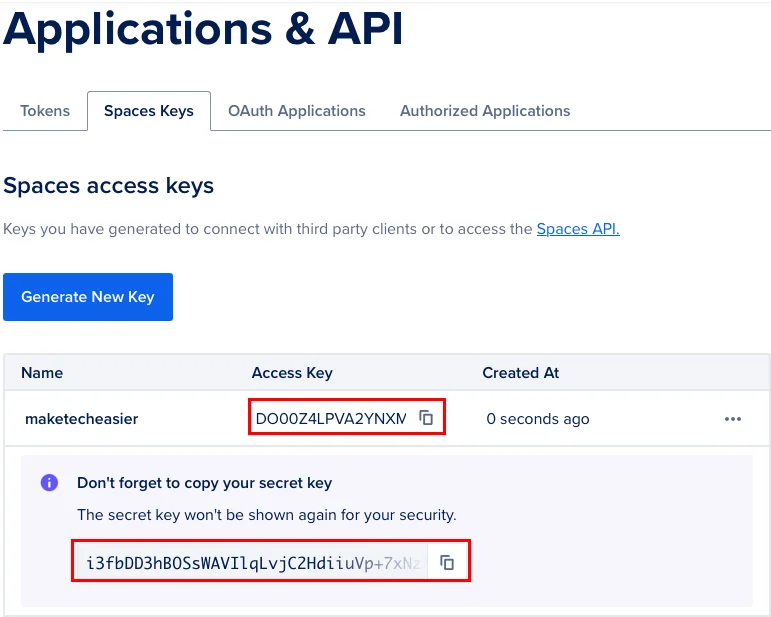
Click the Spaces Keys tab , then select Generate New Key .
Provide a name for the new key, then click Create Access Key .
Copy both 'Access Key' and 'Secret Key' from the page and paste into the text file.
Install and run PicoShare
Create a new folder for PicoShare inside the user's home directory, then go inside that folder:
mkdir ~/picoshare && cd ~/picoshareUse your favorite text editor to create a Compose file for PicoShare:
nano ./docker-compose.ymlPaste the following block of code into the new .yml file:
version: "3.2" services: picoshare: image: mtlynch/picoshare environment: - PORT=4001 - PS_SHARED_SECRET=RANDOM PASSWORD HERE - LITESTREAM_BUCKET="YOUR BUCKET NAME" - LITESTREAM_ENDPOINT="YOUR ORIGIN ENDPOINT HERE" - LITESTREAM_ACCESS_KEY_ID="YOUR BUCKET ACCESS ID HERE" - LITESTREAM_SECRET_ACCESS_KEY="YOUR BUCKET SECRET HERE" ports: - 4001:4001 command: -db /data/store.db volumes: - ./data:/dataReplace the value of the variable 'PS_SHARED_SECRET' with a random and sufficiently long password. This will be used as the password for PicoShare's web interface.
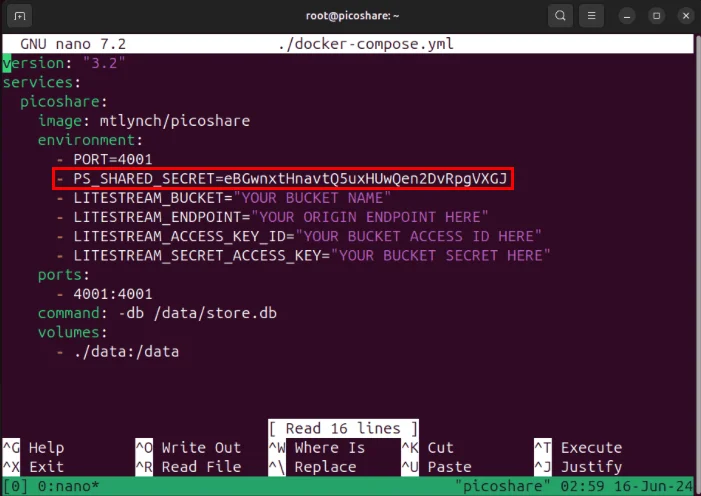
Note : You can generate your own random password by running: cat /dev/urandom | tr -dc 'A-Za-z0-9' | fold -w 32 | head -n 1 on a separate terminal session.
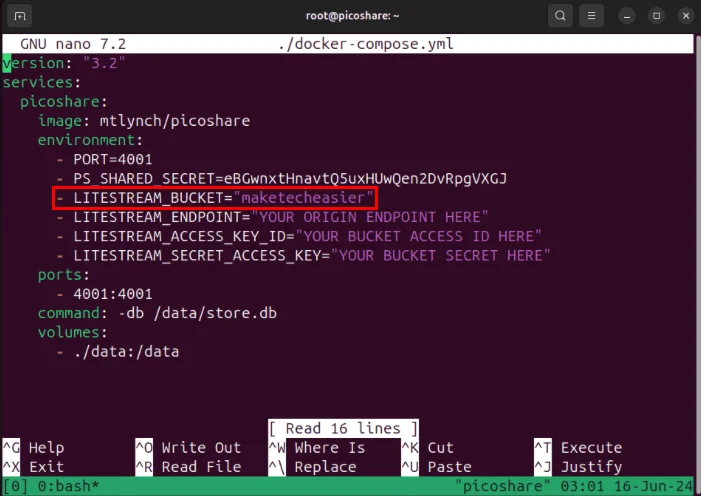
Change the value of the variable 'LITESTREAM_BUCKET' with the name of the Spaces Bucket.
Copy the region and domain part of the endpoint, then paste that as the value of the 'LITESTREAM_ENDPOINT' variable.
Replace the values of both 'LITESTREAM_ACCESS_KEY_ID' and 'LITESTREAM_SECRET_ACCESS_KEY_ID' variables with the Access Key and Secret Key of the DigitalOcean Spaces bucket.

Save the docker-compose.yml file, then run the following command to build and run the PicoShare instance:
sudo docker compose up -dA side note : You can also use Docker and Docker Compose to quickly host a Minecraft server on Linux.
Secure PicoShare with SSL Reverse Proxy
At this point, you should have PicoShare running at port 4001 on your local machine. To access it securely on the Internet, you need to ensure that all connections to it are encrypted via SSL.
Start by creating a new 'A' record for the domain pointing to the IPv4 address of the PicoShare server. This case will create an 'A' record with the value 'picoshare'.

Install 'core' snap package on Ubuntu system:
sudo snap install coreGet the certbot snap package from the Electronic Frontier Foundation (EFF):
sudo snap install certbot --classicCreate a new Nginx site configuration file using your favorite text editor:
sudo nano /etc/nginx/sites-available/picosharePaste the following code block into the website configuration file:
server { server_name SUBDOMAIN.YOUR-ROOT.DOMAIN; location / { proxy_pass http://127.0.0.1:4001; proxy_http_version 1.1; proxy_redirect off; proxy_set_header Upgrade $http_upgrade; proxy_set_header Connection "upgrade"; proxy_set_header X-Forwarded-Proto https; proxy_set_header X-Forwarded-For $proxy_add_x_forwarded_for; proxy_set_header Host $host; client_max_body_size 0m; } } Save the site configuration file, then create a symbol link from the '/etc/nginx/sites-available/' directory to the '/etc/nginx/sites-enabled/' directory :
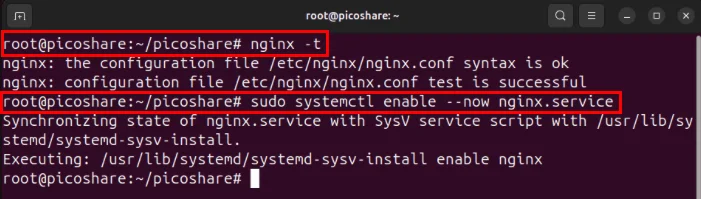
sudo ln -s /etc/nginx/sites-available/picoshare /etc/nginx/sites-enabled/Carefully check the Nginx configuration file to see if there are any errors, then start the Nginx webserver daemon using systemctl:
nginx -t sudo systemctl enable --now nginx.service
Register the PicoShare server using EFF's certbot utility:
sudo certbot register --agree-tos -m YOUR-EMAIL@ADDRESS.HERECreate a new SSL certificate pointing to the server domain:
sudo certbot --nginx -d SUBDOMAIN.YOUR-ROOT.DOMAIN