How to use the FFmpeg command to process audio and video on Linux
FFmpeg is a free and open source program that can convert any video format to another video format and change its codec.
Table of Contents
Almost anyone involved with video has probably heard of FFmpeg before. For those unfamiliar, FFmpeg is a free and open source program that can convert any video format to another and change its codec.
FFmpeg supports almost all audio/video codecs (H.264, H.265, VP8, VP9, AAC, OPUS, etc.), file formats (MP4, FLV, MKV, TS, WEBM, MP3, etc.) and even streaming protocols (HTTP, RTMP, RTSP, HLS, etc.).
Here's how you can install and use FFmpeg to process audio and video files on Linux.
Install FFmpeg on Linux
FFmpeg is a free and open source tool available in the default repositories of almost every major Linux distribution. You can also get the source code for free if you want to compile it yourself.
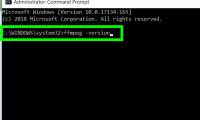
# Debian sudo apt install ffmpeg # Fedora sudo dnf install https://download1.rpmfusion.org/free/fedora/rpmfusion-free-release-$(rpm -E %fedora).noarch.rpm sudo dnf -y install ffmpeg # RHEL/CentOS yum install ffmpeg ffmpeg-devel # Arch Linux pacman -S ffmpegIf all went well during the installation, you should be able to see the FFmpeg version using the -version argument.
ffmpeg -version

Get video info with FFmpeg
The information of the video you want to edit with FFmpeg can be viewed using the -i flag :
ffmpeg -i example-video.mp4 -hide_bannerHere, the job of the -hide_banner parameter is to hide unnecessary information. You can remove this parameter and see the difference in the output.

As you can see, it is possible to get a lot of information such as the video codec type, creation date, metadata and encoder structure of the sample video.
Convert video or audio files to another format
One of the most useful features of FFmpeg is that it can convert video or audio to another format. You can do this with a simple command.
Convert MOV to MP4 with FFmpeg
You can convert MOV to MP4 video files using FFmpeg with the command below:
ffmpeg -i input-mov-video.mov output-video.mp4First, use the -i parameter , which stands for input video. Then, import the file you want to convert. Finally, enter the format you want to convert to. You can give your output any name you want.
While FFmpeg is running, the command will show you the changes it made on the command screen. Your output file will be stored in the current working directory.
Convert WAV to MP3 with FFmpeg
Similar to video, you can do the same conversions for audio files. For example, you can convert WAV to MP3 audio files as follows:
ffmpeg -i example-wav.wav -vn -ar 48000 -ac 2 -b:a 256 output.mp3This command has more parameters than the video conversion method, but they are not difficult to understand. These can be explained as follows:
- -vn : Sometimes the audio files you hear have images. These images are often derived from videos. If you don't want such images in the output, you can use this parameter.
- -ar : This parameter allows you to set the frequency of the audio file you want to convert. You can adjust the audio quality and frequency with values like 8kHz, 44.1kHz or 48kHz.
- -ac : You may have heard the terms mono and stereo before. This parameter can help you to set the number of audio channels.
- -b:a : This parameter allows you to set the audio bitrate per second. The higher the kilobit, the higher the sound quality.
Audio operation with FFmpeg
FFmpeg can also separate audio from video. For this, just use the -vn parameter :
ffmpeg -i example-video.mp4 -vn output.mp3If you want to separate audio from video, now you can try to remove audio from video. The difference here is the -an parameter . You should keep this parameter in mind if you want to mute any audio in the video:
ffmpeg -i example-video.mp4 -an output-mute.mp4Handling video sizes with FFmpeg
Video size can sometimes be quite annoying, especially when you want to upload them somewhere. You don't need to download programs to trim them anymore because FFmpeg can do this for you. However, there are some parameters you need to know about this:
- -ss : Use this parameter to set the start time of the clip
- -to : Allows you to specify the end time of the clip
- -c : Set the codec for your clip using this parameter
- -t : Use this parameter to set the duration of the clip
You can get many examples using these parameters. For example, if you wanted to trim the video, you could use something like:
ffmpeg -i example-video.mp4 -ss 00:02:25 -to 00:03:50 -c copy output-trim.mp4It is also possible to crop only the image inside the video, but not the entire video. For this you can use something like:
ffmpeg -i example-video.mp4 -filter:v "crop=w:h:x:y" output-crop.mp4Here are the parameters used in the aforementioned command:
- -filter:v : This parameter specifies the filter you will apply to the video
- crop : This parameter to specify that a crop operation should be performed
- w:h:x:y : As you might have guessed, the variables w, h, x and y represent the width, height and position of the crop box respectively
Edit Videos on Linux with FFmpeg
Video editing isn't just about cutting. Sometimes you also need to change the aspect ratio of the video. The following command will resize the video to the size you want:
ffmpeg -i example-video.mp4 -vf scale=1920:1080 output-scale.mp4- -vf : This parameter works like the -filter:v argument seen above
- scale : You can specify the scale sizes you want in your output using this parameter
FFmpeg also allows you to combine multiple videos. Imagine you have multiple clips encoded with the same codec. Import the video list you want to merge into a .txt file. Then run the following command:
ffmpeg -f concat -i my-video-list.txt -c copy sum-output.mp4The concat parameter here combines your files. It is also possible to rotate a video using FFmpeg:
ffmpeg -i example-video.mp4 -vf "transpose=2" output-rotate.mp4- transpose=0: Flip vertically (default)
- transpose=1: Rotate 90 degrees clockwise
- transpose=2: Rotate 90 degrees counterclockwise
- transpose=3: Flip vertically
To rotate a video 180 degrees clockwise, you need to specify the transpose parameter 2 times:
ffmpeg -i example-video.mp4 -vf "transpose=2,transpose=2" output-rotate.mp4FPS and GOP . Operation
As you know, FPS means frames per second. GOP (group of pictures) is the distance between two keyframes. FFmpeg is also useful for changing several parameters, including FPS and GOP. If you use the command below, FFmpeg will change the initial FPS to the value you set:
ffmpeg -i example-video.mp4 -vf "fps=60" output-fps.mp4For GOP you can use the -g parameter and set its value to whatever you want. Note that forcing too many keyframes can harm the transition algorithms of some encoders.
ffmpeg -i example-video.mp4 -g 200 output-gop.mp4Create animated GIFs with FFmpeg
FFmpeg is also ideal for converting videos to animated GIFs. You can use a simple switch command to do this:
ffmpeg -i example-video.mp4 output-gif.gifBut sometimes, you might want to customize the GIF. You can use different parameters discussed above to achieve this:
ffmpeg -ss 00:01:15 -i example-video.mp4 -to 10 -r 10 -vf scale=250:-1 output-gif.gifThe -r parameter here means the frame rate. As you can see, many different customizations are possible in a single line command.
Extract frames from video with FFmpeg
In addition to converting one or more images to video, you can also extract frames from the video. The following command will extract one frame per second from your input video. In addition, these extracted images will have two-digit names like 01.jpeg, 02.jpeg, etc. If desired, you can also add other parameters that you have learned.
ffmpeg -i example-video.mp4 -r 1 image-%02d.jpegYou can also use other formats like PNG and BMP for the extracted images.
Was this article helpful?
Your feedback helps us improve.
Related Articles
 How to Convert Media with FFmpeg13 minutes read
 How to Install FFmpeg on Windows6 minutes read
 How to Install FFmpeg on Windows6 minutes read
 5 Free FFmpeg Apps That Can Convert Anything4 minutes read
 5 best applications to convert audio and video files on Linux8 minutes read
 How to reduce video file size with FFMPEG from Linux Terminal5 minutes read
Reader Comments 0
Sign in with email or Google to join the discussion.