How to Install, Configure, and Test Windows Server 2012 R2 Single Subnet DHCP Server
Part 1 of 4:
Installing the DHCP Server
- Add Roles and Features.
- Boot w12r2a10, if it is not running.
- Log on to the server when it completes booting.
- Notice that Server Manager is displayed upon a successful login using the Administrator account at the console logon prompt.
- Click Add Roles and features to display Add Roles and Features Wizard, Before you begin; it is this wizard that helps you manage roles, role services, and features.
- Click Next to display Select Installation Type.
- Review Select Installation Type options.
- Note that this is a role-based and feature-based installation.
- Click Next to display Select destination server.
- Choose a Destination Server.
- Note that this selection lets you select the server on which you want to do the installation. However in this example, there is only one server so there is only one option.
- Click Next to display Server Role and Feature Wizard so you can make a server role selection.
- Select roles.
- Note that you can highlight a name in the center pane, so you can read the description in the right pane.
- Click the checkbox next to DHCP Server.
- Click Next to display Add Roles and Features.
- Select features.
- Observe this popup is informing you that for DHCP Server to be installed, additional features, not already on the machine, needs to be installed.
- Click Add Features, the popup disappears, and you are shown the DHCP Server checkbox checked.
- Click Next to display a list of features from which you can select.
- Note that in this step no additional selection is needed.
- Click Next to display a screen that gives an overview of DHCP Server.
- Click Next to display the Confirmation installation selections.
- Review the Confirmation installation selections.
- Observe the confirmation step, gives you a chance to make changes to the items previously configured, or continue to accept the selection.
- Click install.
- Click Close when it completes.
- Move on to Configure DHCP Server, and keep learning.
Part 2 of 4:
Configuring the DHCP Server
In this part you will use DHCP Manager to configure DHCP Server.
- Start DHCP Manager
- Click Start, the Windows logo bottom left.
- Click Administrative Tools.
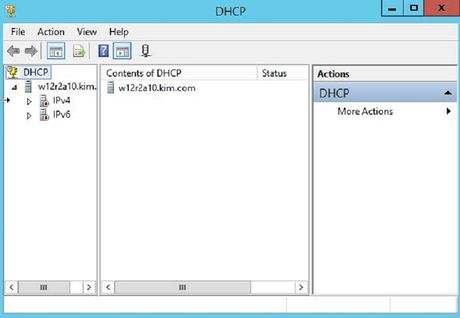
- Double click DHCP to display DHCP Server root.

- Expand w12r2a10.kim.com to display DHCP branches.

- Create scope name
- Expand IPv4 to display a list of folders.

- Right click IPv4.
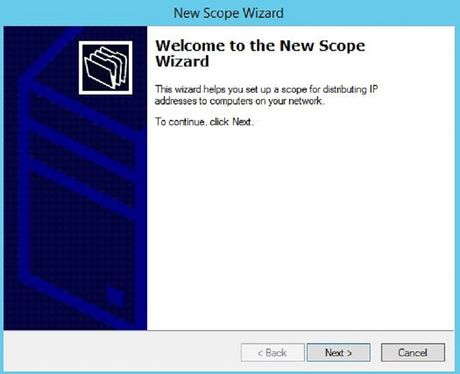
- Click New scope to display the New scope wizard.

- Click Next to display Scope Name.

- Type net17216150, in Name.
- Type Scope for 17216150 subnet, in Description.
- Click Next to display IP Address Range.

- Expand IPv4 to display a list of folders.
- Specify IP Address Range, the range of addresses to allocate
- Type 172.16.150.1 In Configuration settings for DHCP server, Start IP address.
- Type 172.16.150.100 In End IP address.
- Change Length to 24 in Configuration settings that propagate to DHCP clients.
- Click Next to display Add Exclusions and Delay, leave the default.
- Click Next to display Lease Duration, leave the default.
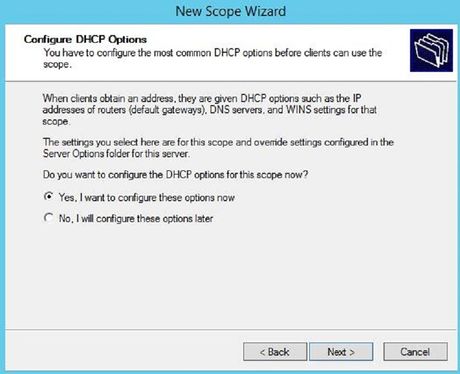
- Click Next to display Configure DHCP Options.

- Click No, I will configure these options later, because in this example, there are no additional parameters to configure.
- Click Next on Completing the New Scope Wizard.
- Click Finish to display Authorize the DHCP Server.
- Authorize the DHCP
- Note that you can widen the left pane by dragging the divider.

- Right click your DHCP Server root, w12r2a10.kim.com, and click Authorize DHCP, if necessary.
- Right click your DHCP Server root, w12r2a10.kim.com, and verify it says Unauthorize.
- Note that you can widen the left pane by dragging the divider.
- Activate Scope
- Expand IPv4, If necessity in the left pane.
- Click Scope[172…] to display Contents of Scope.
- Click each item under IPV4 and view it in the center pane.
- Notice that there are populated and unpopulated ones.
- Right click Scope[172…]
- Click Activate.
- Right click Scope[172…]
- Notice it says Deactivate.
Part 3 of 4:
Testing the DHCP Server Allocation
In this part, you will reconfigure w7a15 to be a DHCP client and verify that the DHCP Server assigns it an IP address and subnet mask. You will also test the server using release and renew.
- Verify w7a15 static address.
- Power on w7a15, if it is off.
- Type ipconfig, to see the IP settings you configured at the start of the lab.
- Ping 172.16.150.10, which should be successful.
- Verify w7a15 dynamic address
- Reconfigure IP settings to Obtain an IP address automatically.
- Type ipconfig and verify a valid address is displayed and it is not .15.
- Type ipconfig/release, if not valid.
- Type ipconfig/renew, which displays a valid address that is not .15.
- Go to DHCP Manger on w12r2a10 and verify that w7a15 is listed in Address Leases.
- Right click the white area and click Refresh, if w7a15 is not listed.
Part 4 of 4:
Configuring and Testing DHCP Optional Parameters
- Configure DHCP Exclusions.
- Click Address Pool and notice the address range you allocated is listed
- Right click Address Pool
- Click New Exclusion Range
- Note that you can configure a range of addresses or single addresses neither or both
- Type 172.16.150.1 in Start IP address and 172.16.150.30 in End IP address
- Click Add.
- Click Close.
- Click File.
- Click Exit.
- Verify DHCP Exclusions.
- Type ipconfig and verify a valid address is displayed.
- Type ipconfig/release.
- Go to DHCP Manger on w12r2a10 and verify that w7a15 is not listed in Address Leases.
- Right click the white area and click Refresh, if w7a15 is listed.
- Type ipconfig/renew, which displays a valid address that is greater than .30.
- Go to DHCP Manger on w12r2a10 and verify that w7a15 is listed in Address Leases.
- Right click the white area and click Refresh, if w7a15 is not listed.
- Configure DHCP options for DNS server.
- Type ipconfig/all.
- Take a screenshot of the result and save it.
- Verify that the IP address for the DNS server is not displayed.
- Type ping kim.com which should not be successful.
- Notice that this fails, because the DNS server is unknown to w7a15.
- Expand Scope on w12r2a10.
- Right click Scope Options.
- Click Configure Options.
- Click checkbox 006 DNS Server, in Available Options.
- Type w12r2a10 Server name.
- Click Resolve to populate the IP address field.
- Click Add.
- Click OK.
- Type ipconfig/release.
- Type ipconfig/renew.
- Type ipconfig/all.
- Compare this display with the one you previously captured, and notice that the DNS server is shown.
Share by
Samuel Daniel
Update 04 March 2020


