How to install Kali Linux on macOS
Since the release of Kali Linux 1.0.8, Kali Linux supports EFI. This additional feature simplifies the process of installing and running Potassium on various Apple MacBook Air, Pro and Retina models.
Requires installation of Kali Linux
Modeling the device will determine the level of success in the user's experience, ie newer devices have a better chance of working. REFInd preinstallation can also increase the success rate on older devices.
This tutorial will show you how to replace OSX with Kali Linux, with a partition encryption option. However, if you want to keep OSX, please read the instructions How to install Kali Linux dual boot on macOS.
Prerequisite installation conditions
- Minimum disk capacity of 20 GB for Kali Linux installation.
- Minimum RAM is 1 GB, but it is best to use 2 GB or more.
- For devices older than the end of 2012, you will need a blank DVD.
- USB boot may not work if rEFInd is not installed.
- For newer devices, you will need a blank DVD or USB drive.
- OSX 10.7 or higher.
Prepare for installation
- Download Linux Kali.
- Burn Kali Linux ISO image to a DVD disc or copy the image to a USB drive.
- Back up any important information on the device to external media.
Procedures for installing Kali Linux
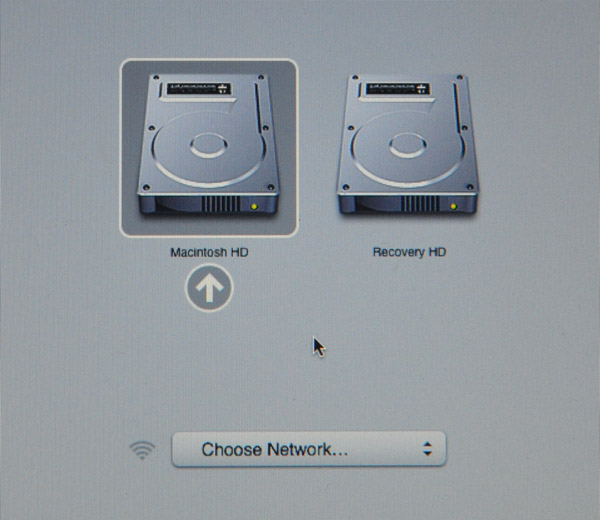
1. To start the installation, power on the device and immediately press and hold the Option key until you see the boot menu.

2. Now insert the installation media you selected. If everything succeeds, you will see two volumes (EFI & Windows). Although Kali Linux is based on Debian, Apple still considers it Windows.
Select the Windows volume to continue.
- If you only see one drive (EFI), the installation media is not supported for this device. You need to install rEFInd and try again.
- If you choose EFI volume , the boot process will hang at this point and you will not be able to continue.

3. You will be greeted with Kali boot screen. You are free to choose one of the ' Live ', ' Graphical Install ' or ' (Text-Mode) Install ' options to install. In this example, we will select ' Graphical Install '.

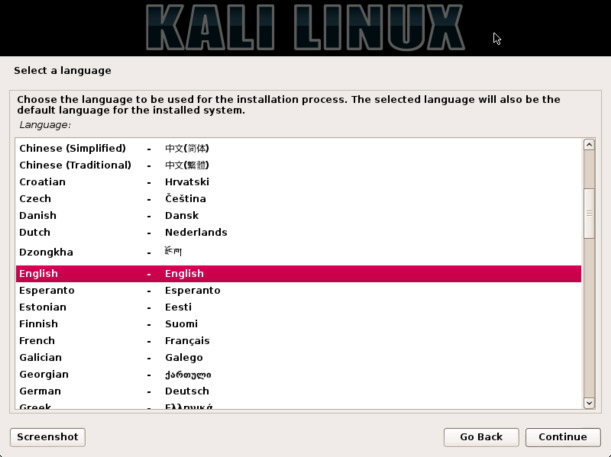
4. Select your preferred language and then select your country location. You will also be prompted to configure your keyboard using the appropriate keyboard diagram.

5. The installer will copy the image to the hard drive, explore the network interface, and then prompt you to enter the server name and domain name for the system. In the example below, we will enter ' Kali ' as the server name.
- If setup detects multiple NICs, it may prompt you to use which NIC to install.
- If the NIC is selected as 802.11, you will be asked to provide wireless network information before being prompted to enter the server name.
- If there is no DHCP service running on the network, it will ask you to enter network information manually after searching for the network interface.
- If Kali Linux does not detect your NIC, you need to import drivers when prompted or create a customized Kali Linux ISO with them first.

6. Enter a strong password for the root account.

7. Next, set the time zone.

8. The installer will now explore the drive and give you five options. In the example below, we will use the entire drive on the computer and do not configure LVM (reasonable volume manager), so we will choose ' Guided - use the entire disk '.
Experienced users can use the ' Manual ' option for more detailed configuration options. This option will also allow you to set up encrypted LVM, so Kali Linux will be completely encrypted. The screen will then prompt you to enter a password. You will have to enter the same password every time you start Kali Linux.
Kali will automatically wipe the hard drive before requesting LVM password. This may take some time (about a few hours) depending on the size and speed of the drive. If you want to take the risk, you can skip this step.

9. The installer will ask you to confirm which drive to delete. Check back then confirm your choice.

10. The next stage is to select the partition structure you want to use. We will continue to use the default option and have everything on a partition. After that, the installer will show an overview. If you agree with what it suggests, click the Continue button.

11. Next, you will have the last chance to review the drive configuration before the installer makes irreversible changes. After you click Continue , the installer will work and the installation will be almost complete.

12. This screen configures the use of Internet network mirrors. Kali can use online central repository to distribute applications that store updated packages and allow additional programs to be installed more easily. If you need to enter the appropriate proxy information, the next screen will allow you to enter details.
If you select ' NO ' in this screen, you will NOT be able to install packages from the Kali repository until you change your sources.

13. Next, install the GRUB boot loader.

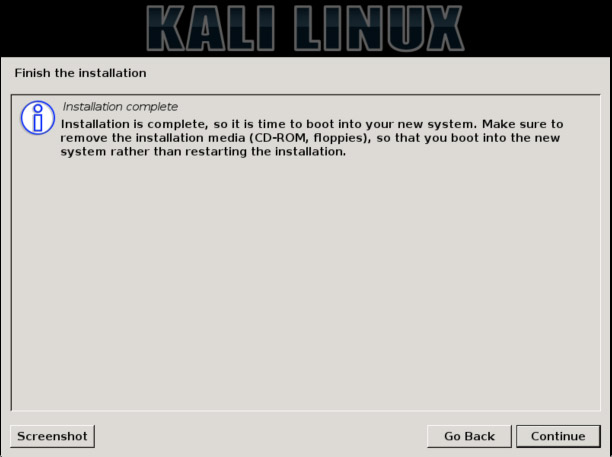
14. Finally, click Continue to finish installing Kali Linux. You should restart the computer at this stage.
When the installation process finishes, repeat the first few steps to reboot into ' Live mode ' again.

15. If the gdisk package does not have ISO Kali Linux, you need to install it. If you have enabled network storage during setup, this can easily be done as follows:
 apt-get update
 apt-get install gdisk
16. Now we will convert MBR into a hybrid, allowing Apple's EFI to detect and start GRUB.
 root @ potassium: ~ # gdisk / dev / sda
 zsh: correct 'gdisk' to 'fdisk' [nyae]? n
 GPT fdisk (gdisk) version 0.8.5

 Partition table scan:
 Protective MBR: protective
 BSD: not present
 APM: not present
 GPT: present

 Found valid GPT with protective MBR; using GPT.

 Command (? For help): p
 Disk / dev / sda: 976773168 sectors, 465.8 GiB
 Logs sector size: 512 byte
 Disk identifier (GUID): B6A4398E-3590-4BB7-AA57-D64EF74860D0
 Partition table holds up to 128 entries
 Sector first usable is 34, thành viên cuối cùng là 976773134
 Partitions sẽ được sắp xếp trên 2048-sector boundaries
 Total free space is 4077 sectors (2.0 MiB)

 Số Đầu (rãnh ghi) End (rãnh ghi) Size Code Tên
 1 2048 4095 1024.0 KiB EF02
 2 4096 943585279 449.9 GiB 0700
 3 943585280 976771071 15.8 GiB 8200

 Command (? For help): r

 Recovery / transformation command (? For help): h

 WARNING! Hybrid MBRs are flaky and dangerous! Nếu bạn quyết định không dùng một,
 just hit the Enter key vào dưới đây khi prompt và bảng phân vùng của bạn MB
 be untouched.

 Loại từ một để 3 số phân vùng GPT, đã phân tách bởi gian, cần phải
 added to the hybrid MBR, in sequence: 2
 Place EFI GPT (0xEE) first in MBR partition (good for GRUB)? (Y / N): y

 Tạo mục nhập cho GPT phân vùng # 2 (phân vùng MBR # 2)
 Enter an MBR hex code (default 07): 83
 Set the bootable flag? (Y / N): y

 Unused partition space (s) tìm thấy. Dùng một để tạo một phân vùng nhiều? (Y / N): n

 Recovery / transformation command (? For help): w

 Final checks complete. About để ghi GPT dữ liệu. THIS WILL OVERWRITE EXISTING
 PARTITIONS !!

 Bạn có muốn tiếp tục? (Y / N): y
 OK; đang ghi bảng phân vùng GUID (GPT) để / dev / sda.
 Cảnh báo: Máy nhân này đang dùng một bảng phân vùng mới.
 Tập tin mới sẽ được dùng ở tiếp tục khởi động.
 Hành động đã được thực hiện successfully.
 root @ potassium: ~ #
Once completed, the final step is to reboot, complete the installation of the media, and experience the Kali.
See more:
- How to install Kali Linux on your computer
- Things you need to know about Kali Linux Image
- How to install Kali Linux on Android using Linux Deploy