Kali Linux installation instructions on VMware virtual machine in the most detailed
Hello friends. Continuing to serises KaliTheKey article, in the last article, we have learned about how to install Dualboot Kali Linux with Windows operating system.
By installing directly onto the hard drive, Kali Linux will get the most out of your computer's hardware. However, for those of you who do not have too high requirements for performance or just use Kali Linux for simple learning and discovery purposes, the Dual Boot installation is sometimes unnecessary and moreover if done incorrectly. the other way can lead to conflicts that cause errors during the installation process that make the machine unbootable.
That's why in today's article I would like to introduce to you a second method to run Kali Linux on your PC, which is how to install Kali Linux on a VMware virtual computer.
I. Advantages and disadvantages of using Kali Linux on a virtual computer?
Here are some advantages and limitations of the method of installing on a virtual computer compared to installing directly on a physical hard drive:
1. Advantages
- Implementation in a familiar Windows environment, you can use at the same time Windows operating system, or even many other operating systems in VMware virtual computer.
- More secure because it does not directly interfere with the physical hard drive. You can feel free to experiment without worrying about system failures, not worrying about virus invading .
2. Disadvantages
- Like any other emulator / virtual machine, running Kali Linux on a virtual machine will significantly reduce its performance, and the base system (here Windows) due to system resources. sharing for two different operating systems and the system of emulation scripts is not completely optimized.
- Installation is more complicated because the virtual machine has to be set up.
II. What needs to be prepared?
Analysis is boring. Now is the time to act, guys!
- Windows computers have pre-installed software to create VMware virtual machine. If you have not installed the VMware software, you can see the instructions here!
- The .ISO file installs Kali Linux operating system, you can download it directly here.
In this article, I use VMware Workstation 14 and ISO Kali Linux installer version 2018_1. You can do the same for other versions of VMWare and Kali Linux software.
1. Start setting up your virtual computer to install Kali Linux
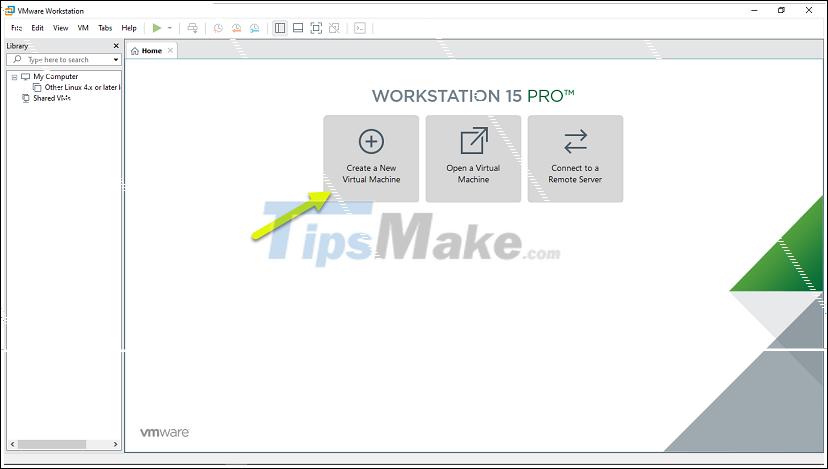
+ Step 1: Launch the VMware Workstation software from the Start menu or a Shortcut on the Desktop. At the first interface => click Create a new Virtual Machine.
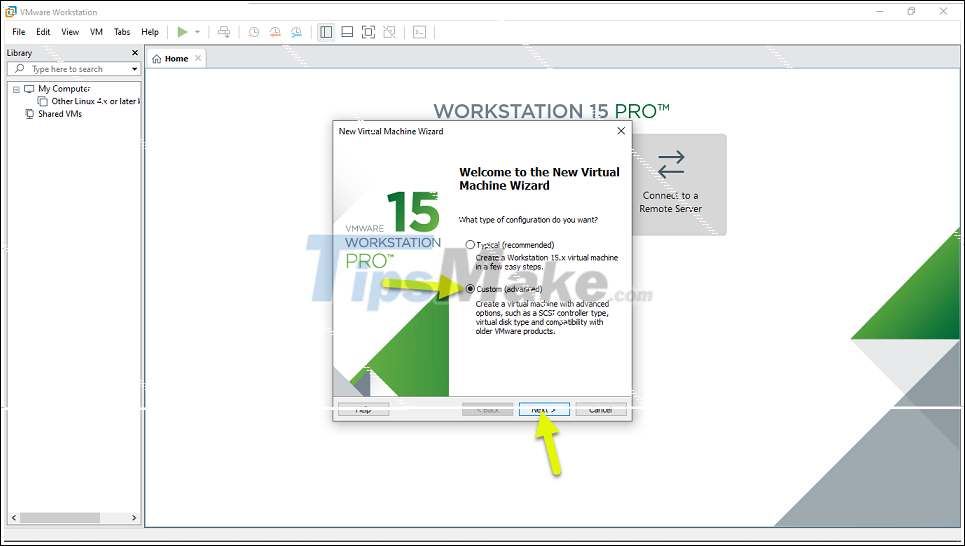
Step 2: A dialog box appears asking the user to choose between standard and custom installation.
For those of you who do not have much experience setting up virtual computers, I recommend Typical to simplify the installation process and avoid errors, while still being able to modify your settings. when needed.
Also in this article I choose Custom to always configure => Click Next to start setting up the virtual machine.
+ Step 3: Keep the default option => then click Next to skip this step.

+ Step 4: The next dialog box asks to choose the source of the installation file.
You tick the second option (Installer disc image file iso) => and click Browse . to point to the downloaded Kali Linux .ISO file in the above step. Usually the default Downloads folder.
Here I am saving this ISO filie in a folder with the path D: / Data / . => after selecting, click Next to continue.

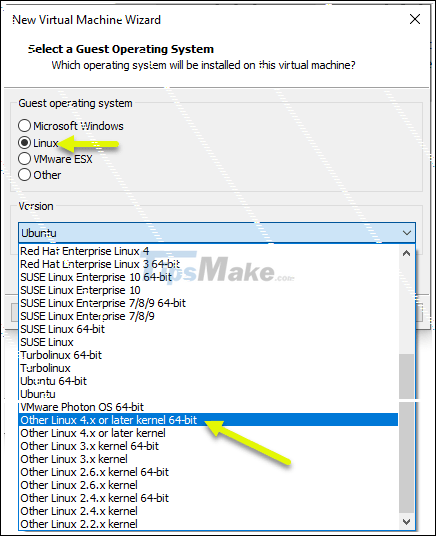
+ Step 4: In the next dialog box, you tick the option Linux => and at the drop-down options of the Version tab => choose Other Linux 4.x or later 64-bit kernel => continue to click Next to to the next step.
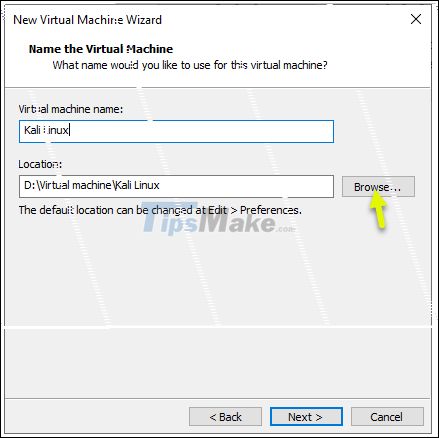
+ Step 5: In this step you name the virtual machine and select the partition on the drive to store the virtual machine. I call it Kali Linux.
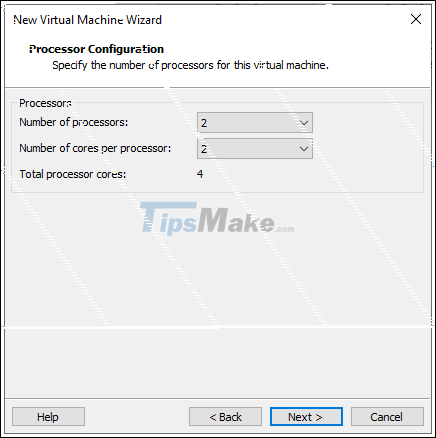
. At the configuration step, you in turn select the number of physical CPU cores used (Number of processors) and the number of virtual Threads (Number of cores per processor) running on each core.
Note that these values have no product in excess of the maximum number of threads on your physical CPU. With my machine using Intel Core i7-3740QM Chip with 4 physical cores and 8 Threads based on Hyperthreading, this number should not exceed 8!
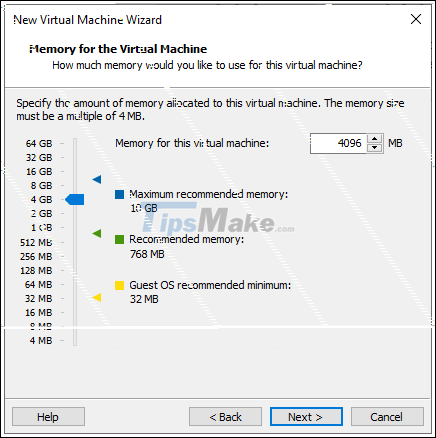
+ Step 6: Select the amount of RAM for the virtual computer by dragging the slider on the left. Or you can also enter it directly in a blank cell.
This step depends on each device. Depending on the amount of RAM on your PC. You should leave virtual RAM equal to 1/2 or 1/3 of the physical RAM.
For example, if your computer has 4 GB of RAM, you leave virtual RAM about 2GB, the real computer RAM is 8 GB, then you give virtual RAM about 3 GB. If your real computer has 16 GB of real RAM then choose 4GB Ram or more for the best performance.
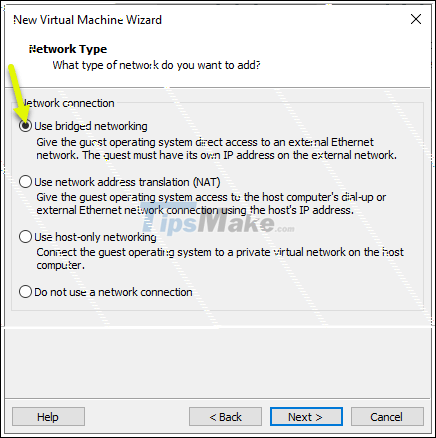
Step 7: In the network settings, use the option Use bridged networking to grant direct access to hardware such as the Wifi Card for Kali Linux.
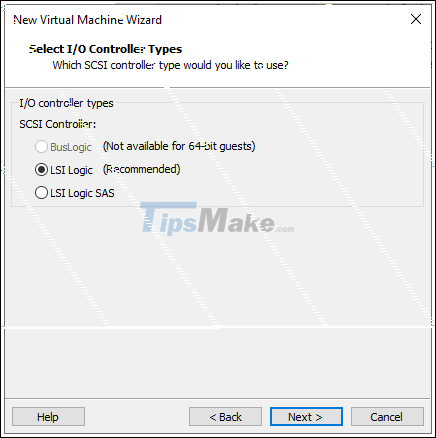
+ Step 8: In the next steps, you keep the recommended default options as shown above.
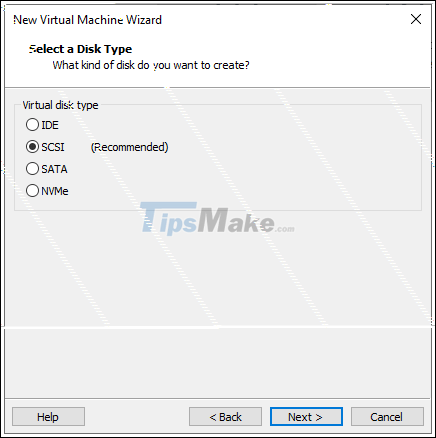
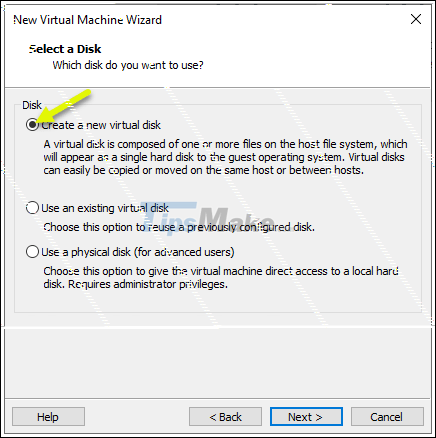
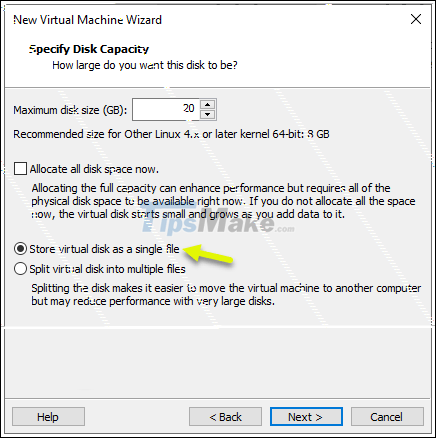
+ Step 9: At the step of setting up virtual machine capacity, choose at least 20 GB of space so that Kali Linux can launch and install other software.
If your computer has a lot of free space, you should leave a little more.
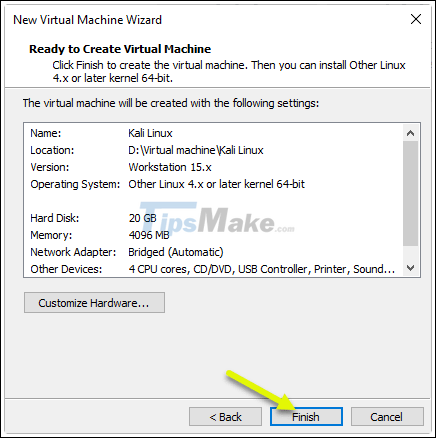
+ Step 10: In the last step you will see and check the last time the options you have set for the virtual machine.
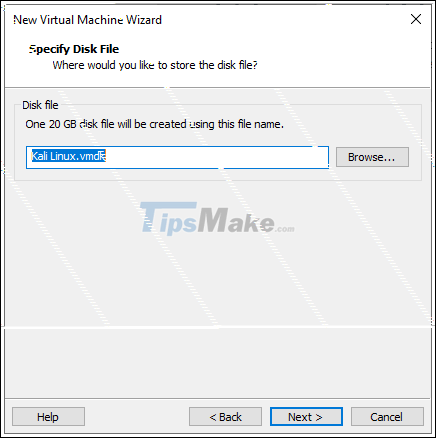
Click Finish to complete the initialization process.
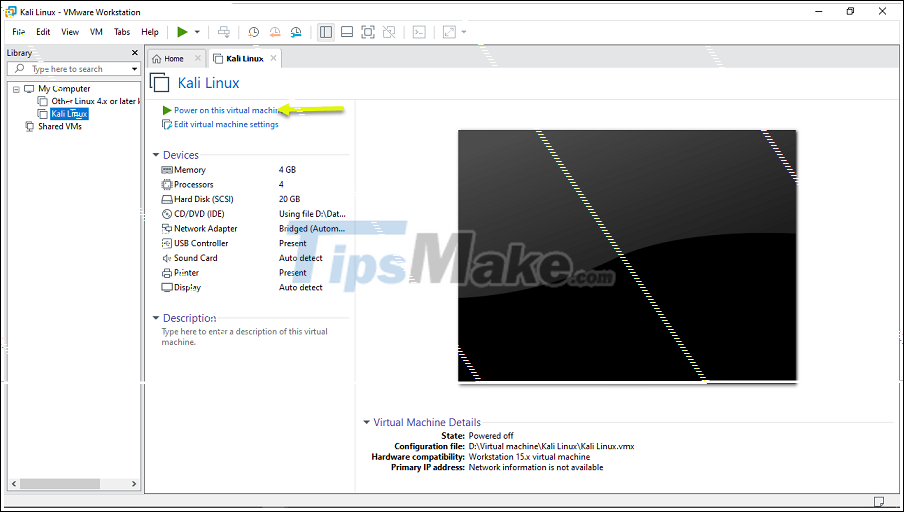
Step 11: After the successful initialization, a Kali Linux virtual machine has been added to VMware.
Now you just need to start this virtual machine normally and choose to run Live-directly without installing or completely installing Kali Linux on a virtual drive.
Complete the installation of Kali Linux on the VMware virtual computer
+ Step 12: The detailed installation method, I have carefully guided in the previous article, you can find and read the steps here.
Detailed instructions on how to install Kali Linux in that article>

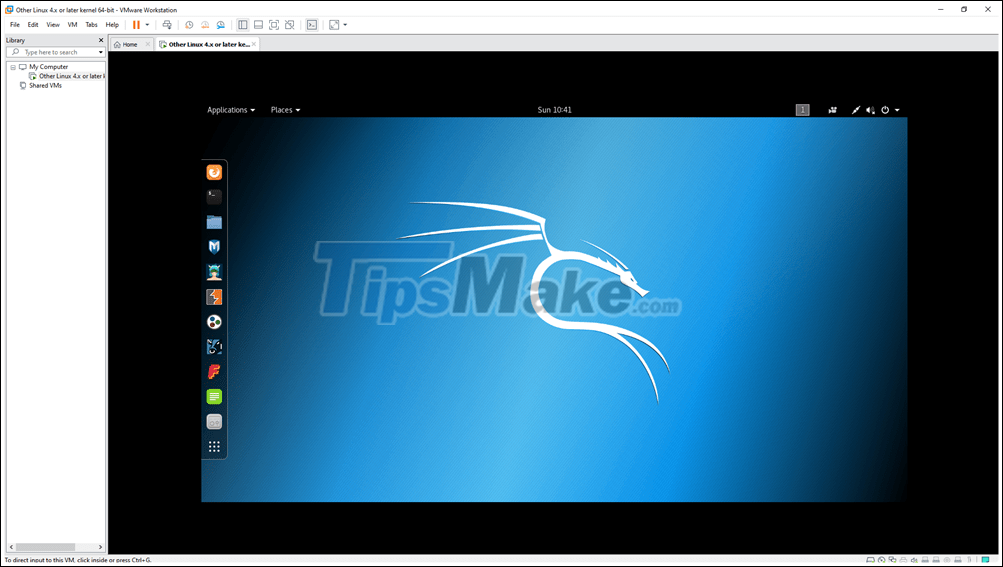
Here are the results after the installation process.
So through two recent articles I have introduced to you the method to install and run Kali Linux on a Windows PC.
It can be seen that the process of installing Kali Linux on this VMware virtual machine is a bit more complicated than the way to install Windows that we normally do. However, I believe that with the interests and abilities of the people who love technology, these difficulties are negligible.
Good luck.