How to install and configure backups in Windows Server 2012
In this article, we will learn how to install and configure backups, which are not too different from previous versions..
In this article, we will learn how to install and configure backups in Windows Server 2012, which is not much different from previous versions.
Install backup feature
To install the backup feature, follow the steps below:
Step 1 - Access Server Manager> Manage> Add Roles and Features> Next > Select Role-based installation or Feature-based installation > Then select Select a server from the server pool, then click Next.
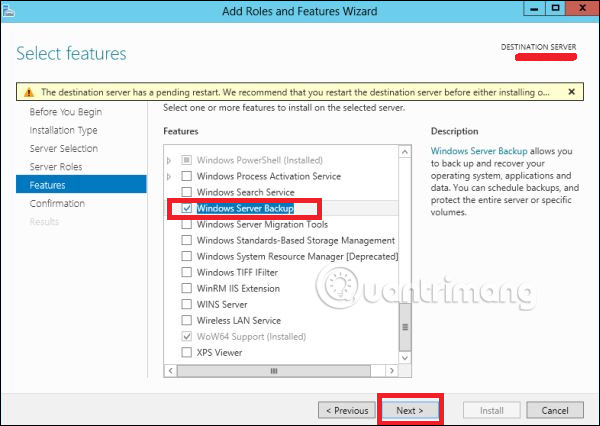
Once all of this is done, select Windows Backup Server and then click Next, as shown in the following screenshot.
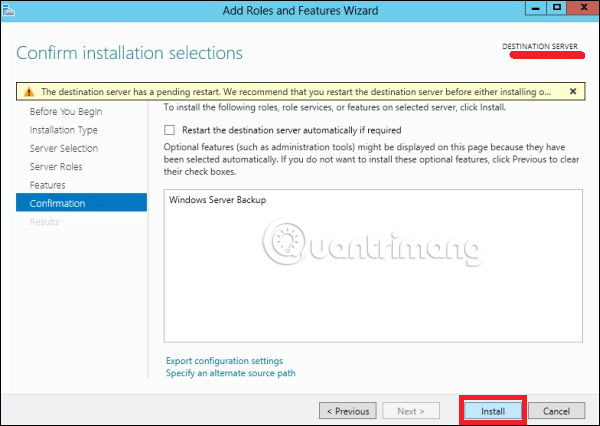
Step 2 - Click Install and wait for the installation process to finish.
Configure backup feature
Now, configure the backup feature according to the steps below:
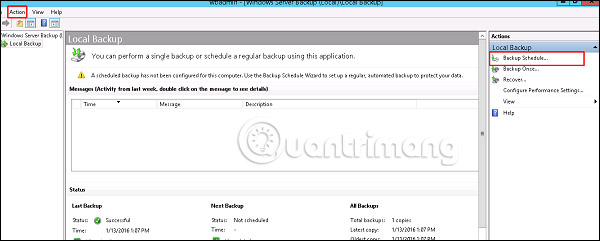
Step 1 - Go to Server Manager> Tools> Windows Server Backup .

Step 2 - Click Backup Schedule . in the left panel or click Action on the top of the screen as shown in the picture below.
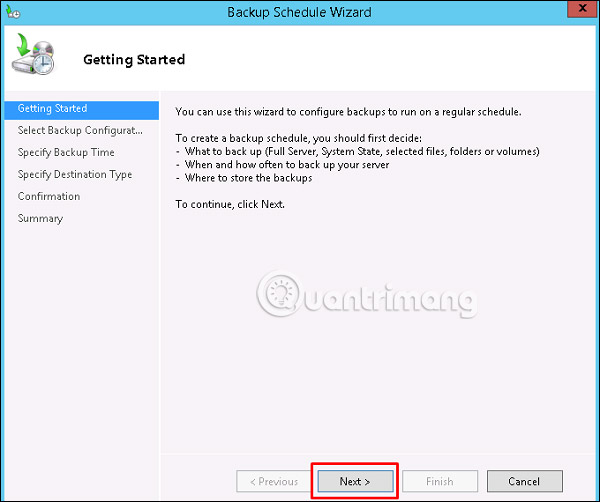
Step 3 - Click Next.
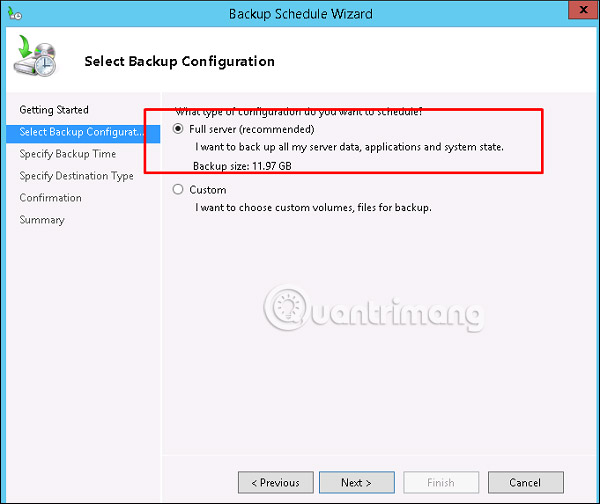
Step 4 - If you want to backup a file or a folder, you can click on the customized file, but in this case, the author wants to make a full backup for the server. Therefore, the first option Full server (recommended) is selected and then click Next.
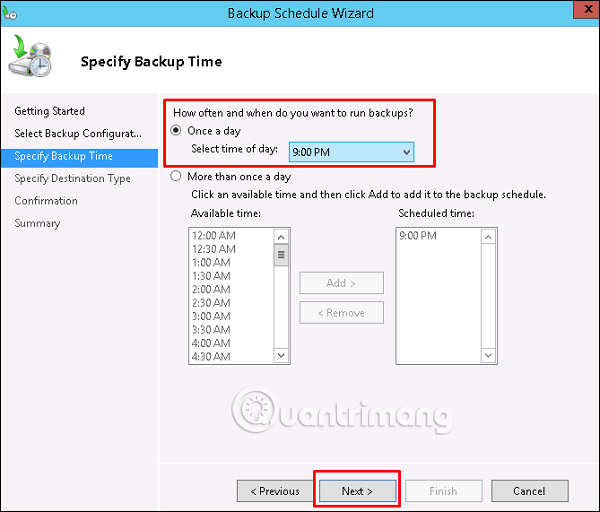
Step 5 - You should make backups once a day, so choose the first option and the appropriate time, usually recommended at night, and then click Next.
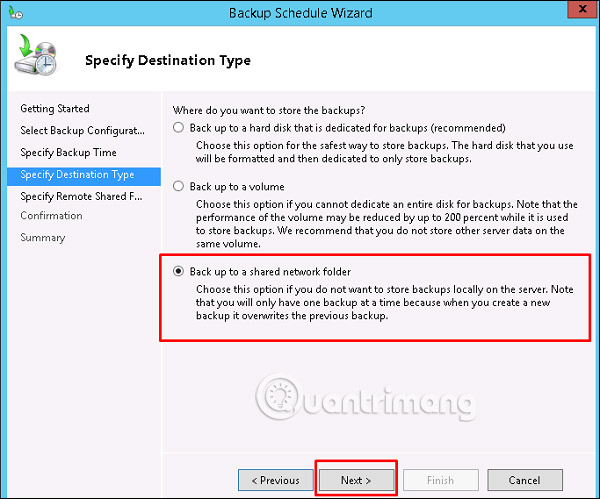
Step 6 - You should not click the Back Up option to share network folder, because the backup should be saved somewhere outside the server that is being backed up and then click Next.
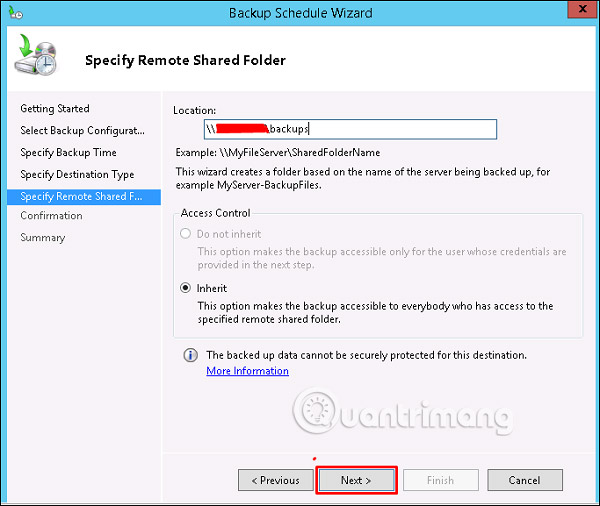
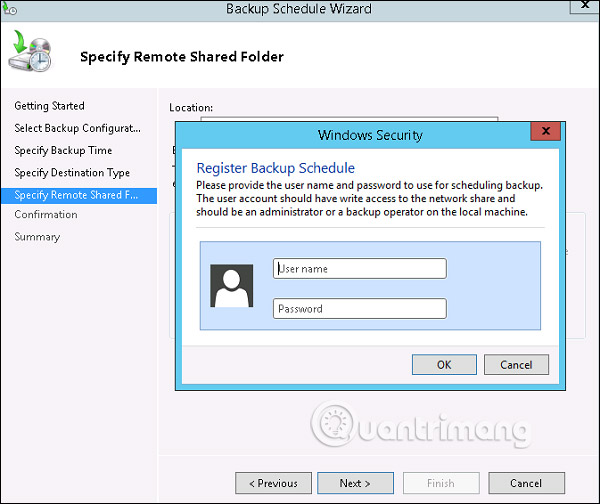
Step 7 - At this location, set the shared folder path and then select Next.
Step 8 - The computer will display a table of information, asking you to enter the username and password of the shared folder that you should put here, and then click OK.
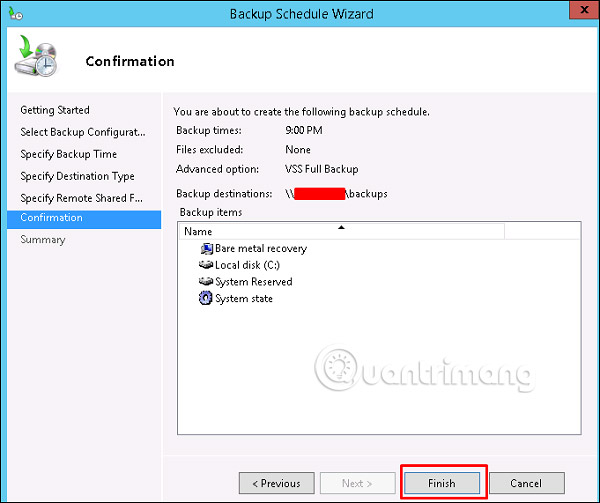
Step 9 - Click the Finish button .
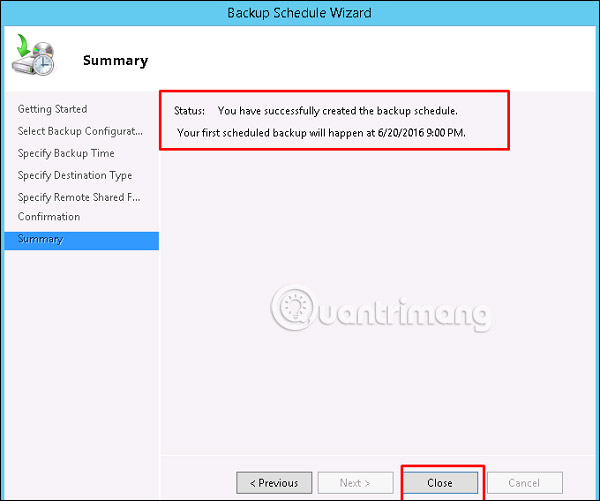
Step 10 - You will now receive a status display window, to see if the backup has been successfully created, as can be seen in the following screenshot:
See more:
- How to use Windows Server 2012 as a router
- Configure Print Driver in Windows Server 2012
- Learn about Easy Printing in Windows Server 2012