Table of Contents
To increase bass in Audacity, import the audio, select the section you want to change, open Effect > EQ and Filters > Bass and Treble, and raise the Bass control gradually. Preview the result and lower the effect’s Volume control if the stronger low frequencies cause clipping. Work on a copy and keep the original file unchanged.
Before you edit the song
Bass boosting cannot restore low-frequency detail that is missing from a recording. It increases the bass already present, and too much gain can make the track sound muddy or distorted. Use headphones or speakers that reproduce low frequencies accurately, and compare the edited audio with the original at a similar listening volume.
If the file is important, choose File > Save Project > Backup Project or duplicate the track before applying effects. Audacity projects preserve your work, but exporting creates the finished audio file.
1. Import the audio
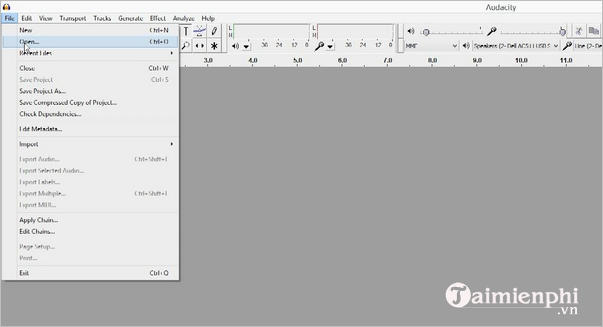
Open Audacity and choose File > Open, then select the song or audio file. You can also drag the file into the Audacity window. Wait for the waveform to appear before editing.
2. Select the audio to change
Press Ctrl+A on Windows or Linux, or Command+A on macOS, to select the entire track. To boost only one section, drag across that part of the waveform instead. Applying the effect to a short test selection first makes it easier to find a suitable setting.
3. Open Bass and Treble
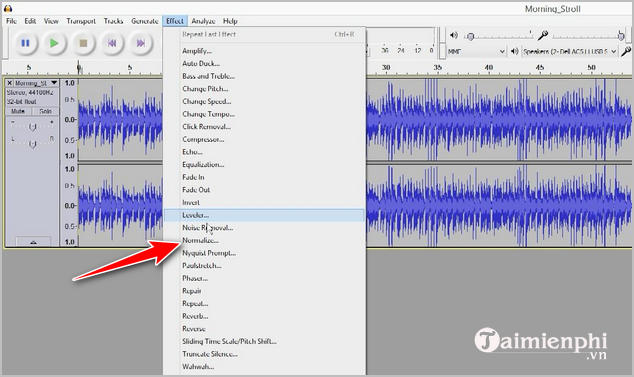
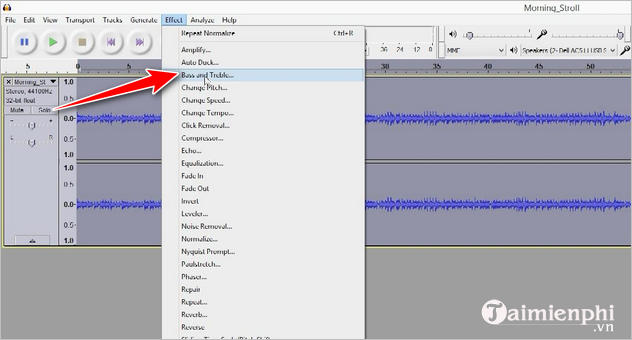
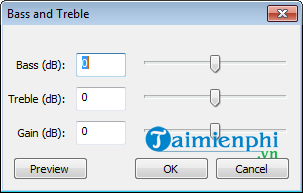
Choose Effect > EQ and Filters > Bass and Treble. In older versions of Audacity, the effect may appear directly in the Effect menu. The Bass control changes lower frequencies, while Treble changes higher frequencies. The Volume control compensates for the overall level change.
4. Increase bass gradually
Start with a modest positive Bass value, such as +3 dB, and leave Treble at 0 dB unless the track also needs a tonal adjustment. Use Preview to compare the result. If the change is too subtle, increase the bass in small steps rather than jumping to an extreme value.
Boosting low frequencies also raises the signal level. Reduce the Volume setting in the effect when necessary so the output does not overload. The exact amount depends on the recording; a dense, already-loud master usually has less headroom than a quiet recording.
When the preview sounds balanced, click Apply or OK, depending on your Audacity version.
5. Check for clipping and muddiness
Play the loudest section and watch the playback meter. Harsh crackling, flattened waveform peaks, or a meter reaching the maximum level can indicate clipping. Undo the effect, use a smaller bass boost, or reduce the effect’s Volume control and try again.
Also listen to vocals, kick drums, and bass instruments. If they become difficult to distinguish, the boost is probably too broad or too strong. In that case, use a smaller change or Audacity’s Filter Curve EQ for more precise frequency control.
6. Normalize only when needed
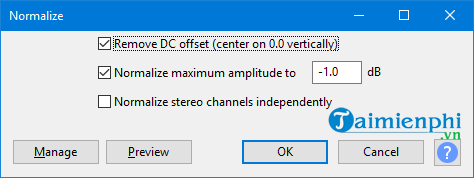
Normalizing is not required before a bass boost. Audacity’s Normalize effect sets peak amplitude; it does not specifically increase bass. If you want consistent final headroom, apply Effect > Volume and Compression > Normalize after the tonal edit and set the peak below 0 dB. A small amount of headroom helps prevent clipping during later conversion or playback processing.
7. Export a new copy
Choose File > Export Audio, select the required format, and use a new filename so the source is not overwritten. WAV or FLAC preserves lossless quality; MP3 creates a smaller, lossy file. Review the exported file in another player before deleting any working files.
Better results in three quick checks
- Compare before and after at the same perceived volume; louder audio can seem better even when the tone is worse.
- Test on more than one pair of headphones or speakers, because bass response varies widely.
- Use small adjustments and preserve headroom instead of maximizing every control.
For a description of each control, see the official Audacity Bass and Treble manual. If Audacity cannot access your speakers or microphone, follow the guide to fix Audacity sound-device errors. You can also compare other options in this list of free audio editors.
Related Articles
 How to Separate Lyrics from a Song Using Audacity4 minutes read
 How to Use Audacity to Reverse Audio in Windows6 minutes read
 How to Adjust the Bass on a Computer9 minutes read
 How to Enable Bass Boost on Windows 113 minutes read
 What Is Bass?8 minutes read
 How to Drive a Bass Boat: Step-by-Step Guide12 minutes read
Reader Comments 0
Sign in with email or Google to join the discussion.