How to set up a microphone for karaoke, recording, and speaking on a computer or laptop.
Installing a microphone makes it easier to sing karaoke, record your voice, and chat on your computer. If you're looking to install a microphone, the following article is essential.
Table of Contents
Not everyone can afford to go to karaoke bars every week, as time is a significant factor, and money is another important consideration. However, with just a Windows computer, a microphone, and a few simple setup steps, you can sing karaoke at home.
Refer to the step-by-step instructions below for setting up a microphone for speaking on your computer.

How to connect a microphone to a computer
Instructions for installing a microphone on a Windows 10 or 7 computer.
Step 1: First, connect your device with a 3.5mm microphone jack to your computer (headphones, external microphone, etc.) as shown below. Plug the pink microphone jack into the pink port, and the green audio jack into the green port. You should connect recording devices that use a 3.5mm jack to get the best microphone and singing quality on your computer.

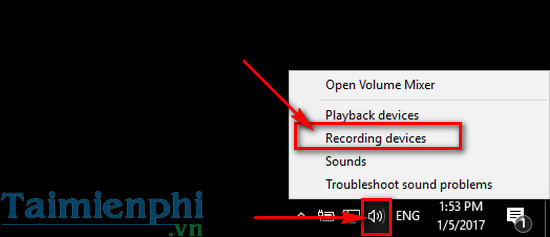
Step 2: Right-click on the speaker icon in the system tray and select Recording devices.
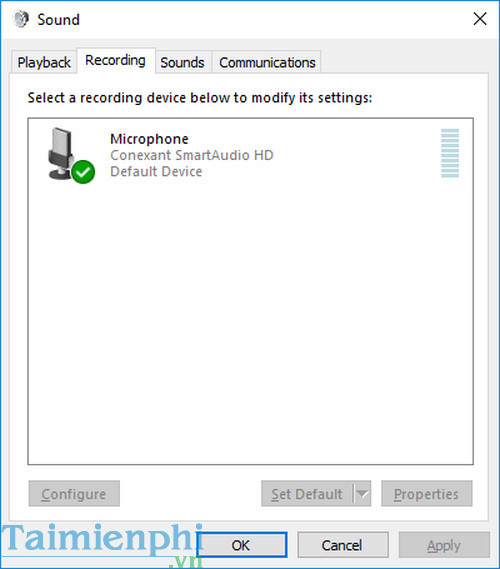
Step 3: In the Sound window , on the Recording tab, right-click on an empty space and check the two options Show Disabled Devices and Show Disconnected Devices if you don't see your recording device. Then double-click on the microphone icon to set up the microphone.
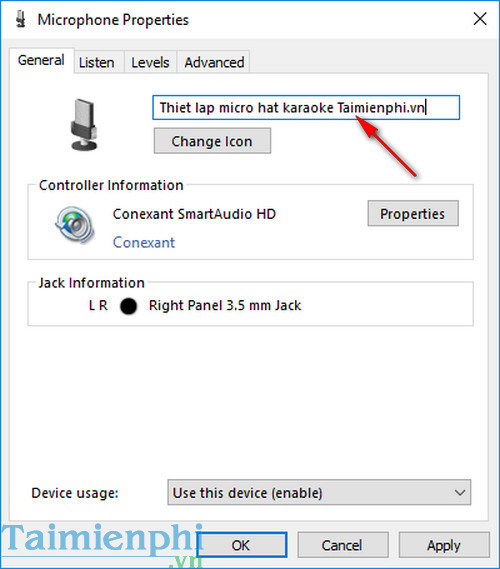
Step 4: In the General tab , you can change the microphone icon and change the microphone name if you are using multiple microphones simultaneously for easier identification.
Step 5: In the Levels tab , you can adjust the microphone's sound volume by dragging the slider in the Microphone section , and Microphone Boost will increase the maximum microphone volume limit. Then click OK to complete the changes.

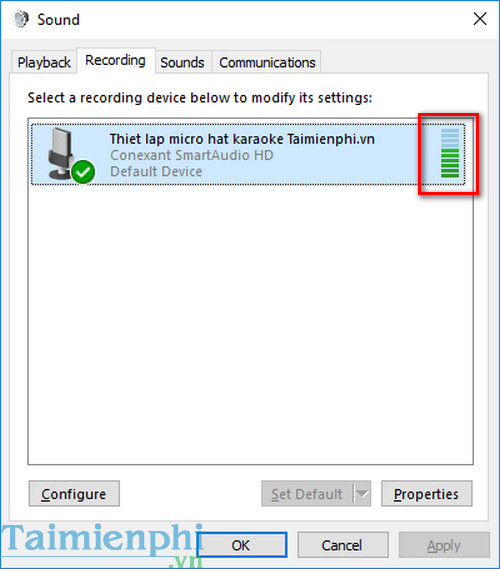
Step 6: Return to the Recording tab and try gently blowing on your microphone. The green signal bar indicates whether your microphone signal quality is good or poor.
You can use the built-in Speech Recognition feature on your system to help Windows more easily recognize the sound if you feel your signal wasn't quite right after testing in Step 6.
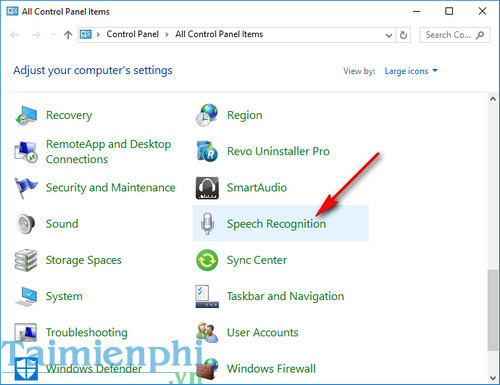
Step 7: Access the Control Panel through the Start Menu and find the Speech Recognition section.
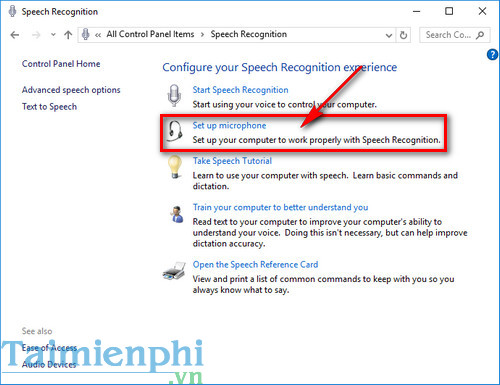
Step 8: Select Set up microphone to configure the microphone and set it up according to the instructions.
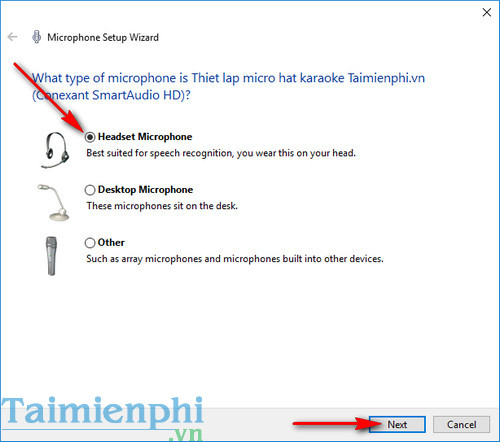
Step 9: Here you select the microphone settings based on the device connected to your computer:
Headset Microphone : Built-in microphone, located inside the headset.
Desktop Microphone : A microphone used for recording sound and placed on a desk.
Microphone : The standard microphone that we usually connect to karaoke systems for singing.
After selecting the appropriate device, click Next .
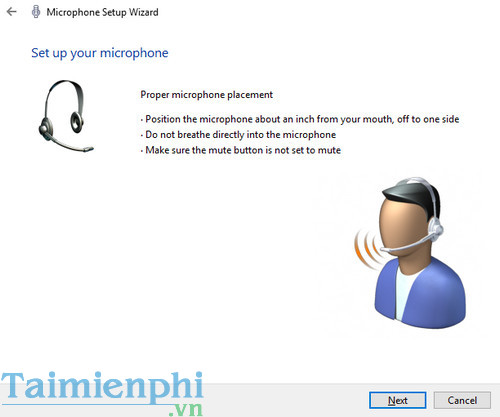
Step 10: As shown in the TipsMake image, select the microphone settings on your headphones; a window will guide you through the process.
Position the microphone about 1 inch (2.54 cm) from your mouth, to one side.
Avoid breathing too heavily or directly into the microphone.
Make sure you are not muted.
Then continue by clicking Next .
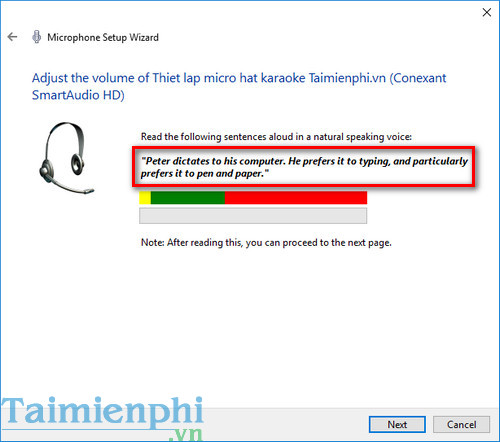
Step 11: Read aloud clearly the highlighted English sentence as shown in the image so that the system can receive, process, and adjust your microphone accordingly, then click Next.
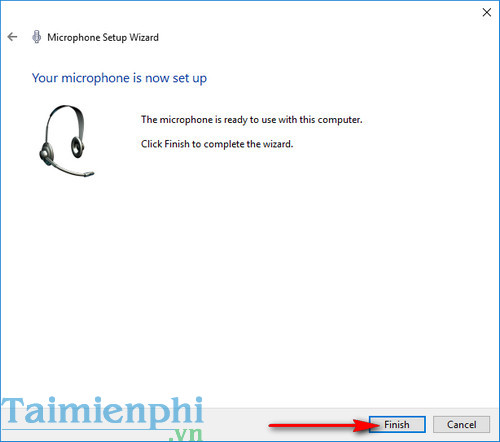
Step 12: The system will notify you that the microphone installation is complete. Click Finish to complete the process.
That's how to set up a microphone for karaoke on your computer. If you love singing, check out the top 3 best free karaoke software programs so that in your free time, you can simply open these karaoke programs and show off your singing talent.
In addition, if you want to create your own karaoke videos, you can make karaoke music directly on your computer. Making karaoke music and videos requires patience because it takes quite a lot of time.
Was this article helpful?
Your feedback helps us improve.
Related Articles
 Karaoke karaoke microphone of any kind, should buy the most today?12 minutes read
 How to choose a good computer recording microphone to use7 minutes read
 Causes and how to fix laptop microphone not speaking6 minutes read
 What to do when karaoke microphone is howling?9 minutes read
 Tips for using Android phones to replace Microphones for computers2 minutes read
 Top 3 free online utilities to support karaoke online with recording3 minutes read
Reader Comments 0
Sign in with email or Google to join the discussion.