How to fix LogiLDA.dll error message in Windows
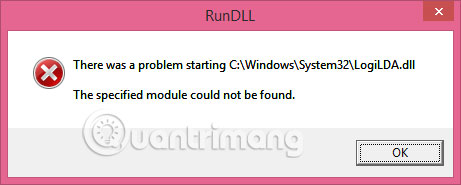
LogiLDA.dll error messages on Windows 10 laptops, desktops, and tablets may appear in various formats but they usually look like this:
There was a problem starting c: windowssystem32logilda.dll / The specified module could not be found.
The Windows 10 LogiLDA.dll error message usually appears during or right after the device boots up, 'wakes up' from the Sleep state or restarts. If the computer is quite old or has many tasks running at the same time, the LogiLDA.dll warning may appear minutes after the Windows 10 device is up and running.
Note : The instructions and troubleshooting tips in this article apply to Windows 10 as well as Windows 8 and 8.1.
LogiLDA.dll Error in Windows - Cause and how to fix it
- The cause of the LogiLDA.dll error
- How to fix LogiLDA.dll error in Windows 10
- 1. Restart your Windows 10 device.
- 2. Install the latest Windows 10 update.
- 3. Reinstall the mouse device driver.
- 4. Disable LogiDA on startup.
- 5. Uninstall Logitech program.
- 6. Reinstall the Logitech program.
- 7. Try Logitech Gaming Software instead.
The cause of the LogiLDA.dll error
The LogiLDA.dll file is usually associated with a program like Logitech Download Assistant, which is located on a Windows 10 device after installing a new Logitech hardware, such as a gaming mouse or keyboard.

Note : Some Windows 10 computers may come with Logitech Download Assistant software installed.
The main purpose of the Logitech Download Assistant is to automatically find new device drivers and update software for any Logitech products detected at startup. If there are problems starting LogiLDA.dll, this could mean this specific file:
- Not properly installed and missing in the program.
- A recent Windows update may have caused the program to start looking for this file in the wrong location.
How to fix LogiLDA.dll error in Windows 10
This issue and related fixes mostly apply to Windows 10 computers, laptops, and tablets. However, users of Windows 8 or Windows 8.1 may also find this information useful. , because the causes and solutions for LogiLDA.dll errors on these Windows operating systems are very and often the same.
1. Restart your Windows 10 device.
Restarting a Windows 10 computer, tablet, or device like the Surface, can fix a variety of issues, and it's always the first thing to try.
Tip : It may be a good idea to restart your Windows 10 device after trying all of the following tips and solutions to ensure that the changes you make apply.
2. Install the latest Windows 10 update.
In addition to adding new features and improving device protection against malware and viruses, Windows 10 updates can also fix any file errors you might encounter.
Tip : Make sure your Windows 10 computer or tablet is connected to a power source before installing updates, as some updates may take more than an hour to download and install completely.
3. Reinstall the mouse device driver.
Although the LogiLDA.dll error may be caused simply by the Logitech program installed on the computer, it may also be triggered by the driver installed for the mouse. Open Device Manager> Mice and other pointing devices , right-click on the mouse name, and select Uninstall Device .
After the process is complete, disconnect the mouse, restart the Windows 10 device, and then reconnect the mouse.
4. Disable LogiDA on startup.
Press Ctrl + Alt + Del , click Task Manager , then Startup. Right-click LogiDA from the list of programs that are set to run on startup and select Disable.
Note : This will not fix any program related issues but it will prevent Logitech Download Assistant from running automatically when you turn on the computer and give the error message missing LogiLDA.dll.
5. Uninstall Logitech program.

If the computer keeps telling you that there was a problem starting LogiLDA.dll in Windows C drive, another way to fix the problem is to simply uninstall the program. This can be done by opening Start> All apps , right-clicking on the Logitech program and selecting Uninstall.
Note : The affiliate program may be called the Logitech Download Assistant or something similar. In most cases, programs like these are downloaded and installed when using the new product for the first time, but they are not strictly necessary. Windows 10 generally does a great job of helping additional hardware work properly without third-party apps.
6. Reinstall the Logitech program.
If you prefer to use the program provided to install device drivers or update software, you can reinstall from the original installation disk after uninstalling.
Note : Uninstalling and then reinstalling the same program can fix any errors generated during the initial installation.
7. Try Logitech Gaming Software instead.

Logitech Gaming Software is a newer Logitech program, which can be used for hardware updates and also allows you to customize device functions for specific use cases.
Please uninstall Logitech Download Assistant by following the method outlined above and then downloading Logitech Gaming Software from the Logitech website.
Hope you are succesful.
 Learn about error code 0xc0000001
 How to repair and recover corrupted CD and DVD data
 How to scan a hard drive with Error Checking
 How to fix error 0x80071ac3
 What is Windows 8024402c update error? How to fix 8024402c error?
 Learn about error code 0x8007045d and how to fix it