Especially when users print PDF documents through software like [ Adobe PDF ] or other tools, it is very easy for you to get the error message 'invalidfont' on the screen. This error may occur due to an error in the printer configuration or you are using an old version of the file reader software.
So if you unfortunately encounter the same errors as above, here are some ways to fix errors so you can fix this error on the printer with the instructions that will be introduced below.
1. Check for updates of the printing software
First, the first method that you try to do is to update your Adobe PDF software to see if they fix this problem.

The steps are as follows:
Step 1: Open the PDF viewer or Adobe Acrobat Reader DC.
Step 2: Click Help from the toolbar and select Check for updates.
Step 3: At this time, Adobe Acorabter Reader software will update the pending updates. If you find a new update, click Install updates to download and install it. If there is no new update, you are using the latest version of the software.
Step 4: Close and restart Adobe PDF and check for new updates and see if the error has been fixed 'invalidfont'.
2. Reset Adobe Acrobat
This method will reset the options in Adobe Acrobat Reader, to recreate the necessary folders after being reset. The steps are as follows:

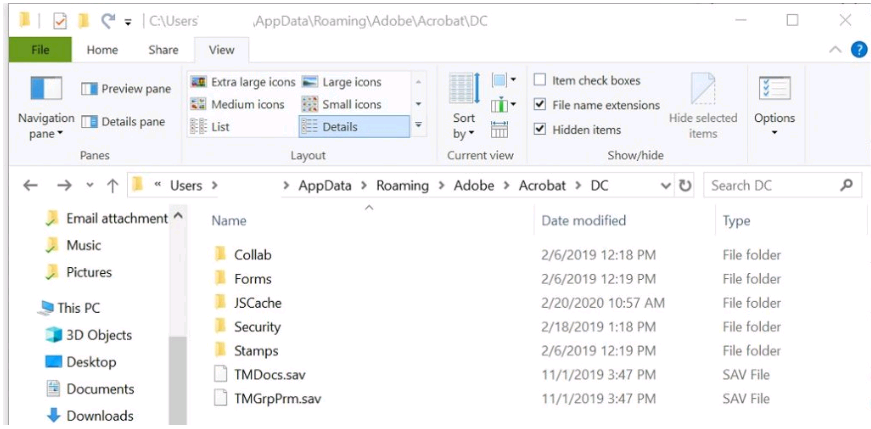
Step 1: Open File Explorer and navigate to the following folder:
C: Users [username] AppDataRoamingAdobeAcrobat [version]
Step 2: On the computer [ Windows 10 ], rename the following folders:
- JSCache
- Security
If you are using [ Windows 7 ], move the Preference folder to another location. If the Preference folder is hidden, open the View tab (in File Explorer) and select the Hidden Items section. This will display all hidden files contained in that directory.
Step 3: Once the Preference folder has been moved, close this window and restart Adobe Acrobat Reader.
Now try reprinting the PDF document to check if the error 'invalidfont' has expired.
3. Disable the Rely on system font only option
The steps are as follows:
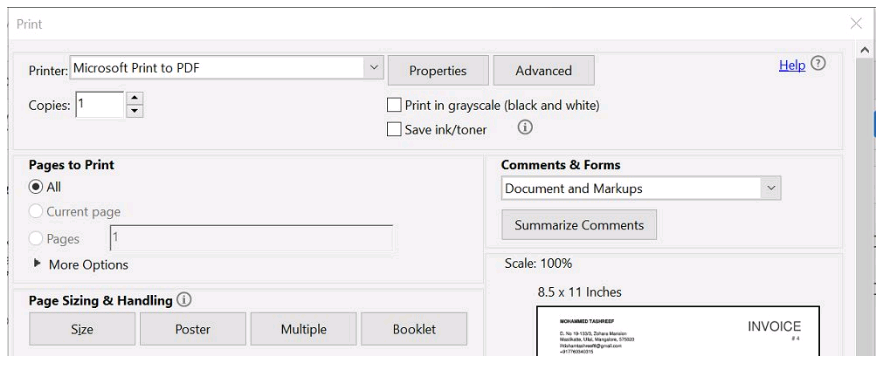
Step 1: Open up Adobe PDF, and open the document file you want to print and then press Ctrl + P.

Step 2: In the print window, select the printer and click the Properties button .
Step 3: Open the settings on Adobe PDF. Now make sure that the Rely on system font only option is selected ; do not use document fonts do not have a checkmark there.
Step 4 : Click OK to save these changes. And restart Adobe PDF and check if the error 'invalidfont' has expired.
4. Print as image
The steps are as follows:
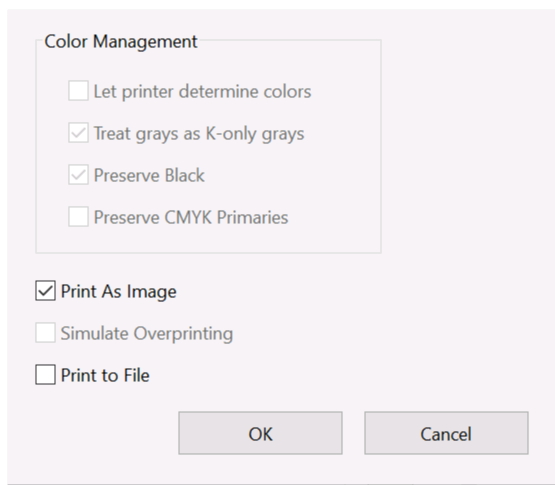
Step 1: Open a PDF document in Acrobat Reader, and click File> Print> Advanced.

Step 2: Click the checkmark in the Print as Image box , then click OK to save the changes. Now try to print the document and check if the error 'invalidfont' is still present.
5. Save the file as a PDF with MS Word
To apply the method to save the file as a PDF in MS Word, follow these steps:
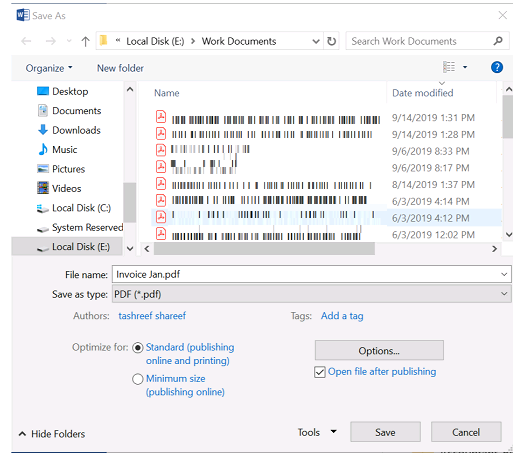
Step 1: Open your PDF document file in [ Microsoft Word ] software . Make sure you have enabled editing by clicking the Enable editing button at the top.

Step 2: Now click on File and choose Save as , then choose a folder to save. Now you will proceed to save the file as a PDF and click Save to save.
Step 3: Now try to open the PDF file and try to print to see if the error still appears 'invalidfont'.
If the error persists, try installing the PSL driver for your printer, by visiting the manufacturer's support website to search and download the driver version compatible with your printer.
So I have shown you how to fix the 'invalidfont' error on the easiest printer. Hopefully this article will be helpful to you. I wish you successful implementation!