A shared printer for multiple PCs is a very common thing in an office environment. However, a very common error that interferes with the printing process is 'Windows cannot connect to the printer' (most common in Windows 7). In the following article, Phong Vu would like to share with you how to fix errors that cannot connect to the above printer.
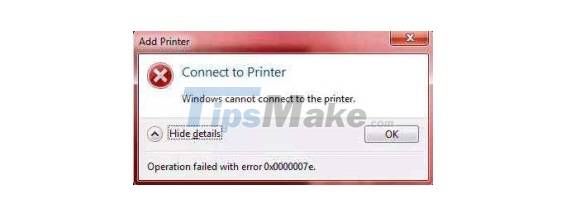
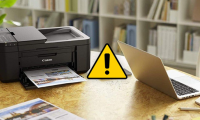
The error ' Windows cannot connect to the printer ' is most likely accompanied by specific lines of code like 0x0000007e .
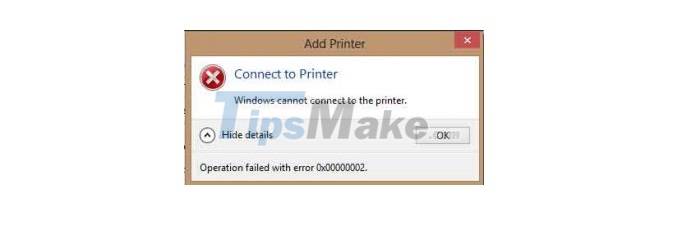

Windows Cannot Connect to the Printer - Operation Failed with Error 0x0000007a
Method 1: Restart the Printer Spooler Service
- Use the Windows + R key combination to open the Run dialog box.

- Type the services.msc code line and click OK.
- Search for the Print Spooler item and double-click the selected item icon.
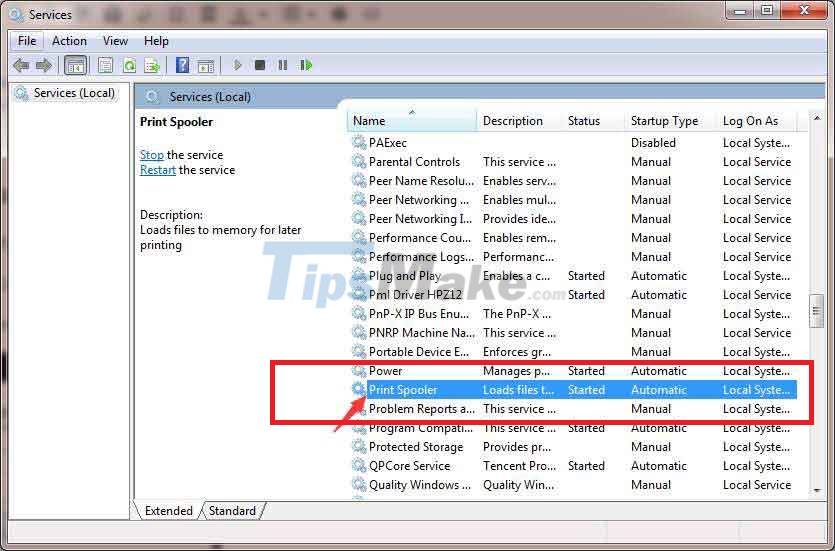
- Select Stop at Service status and then click Start again shortly.

- Select OK and check the printer's normal operation.

If the error ' Windows cannot connect to the printer ' has not been fixed, you can switch to the following 2 ways.
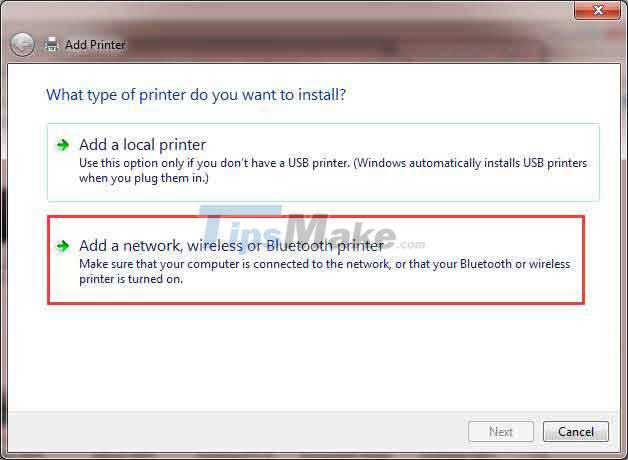
Method 2: Create a new Local Port
- Open Control Panel .
- Select Devices and Printer .

- Continue to click on Add a printer .

4. Select Add a network, wireless or Bluetooth printer .
5. Select Create a new port , change the ' Type of port' configuration to Local Port and Next .
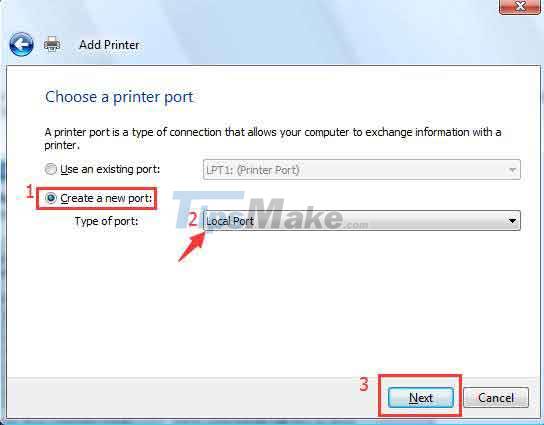
6. For Enter a port name in the box that appears, you need to fill in the address of the printer. This parameter works as follows: your IP address or PC name Printer name.

7. Select the publisher and printer model and then follow the instructions to complete the printer.
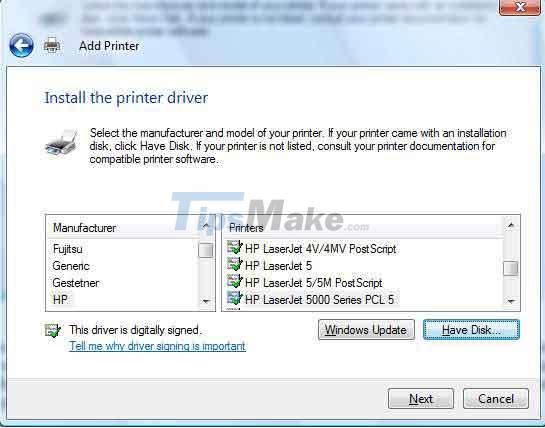
Method 3: Delete and reinstall the printer driver to fix the error ' Windows cannot connect to the printer '
-
- Windows + R to open the Run dialog box .
- Type the code line printmanagement.msc and confirm.
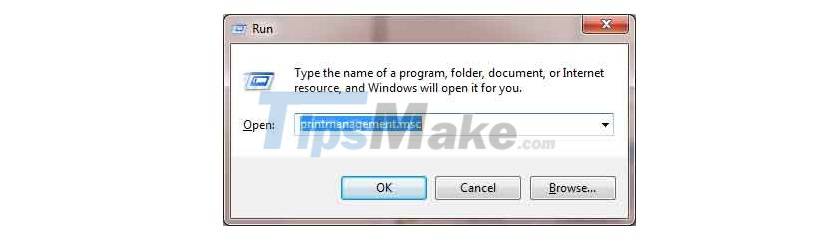
- Click on All Drivers .

- Find the printer driver in the middle pane, right click and select Delete . If you find more than one driver, repeat the steps above and delete them one by one.

- Add to the printer driver again. The best download address is the official website of the printer publisher that you are currently using.
Method 4: Copy system file ' mscms.dll '
- Navigate to C: Windowssystem32 folder and search for mscms.dll file
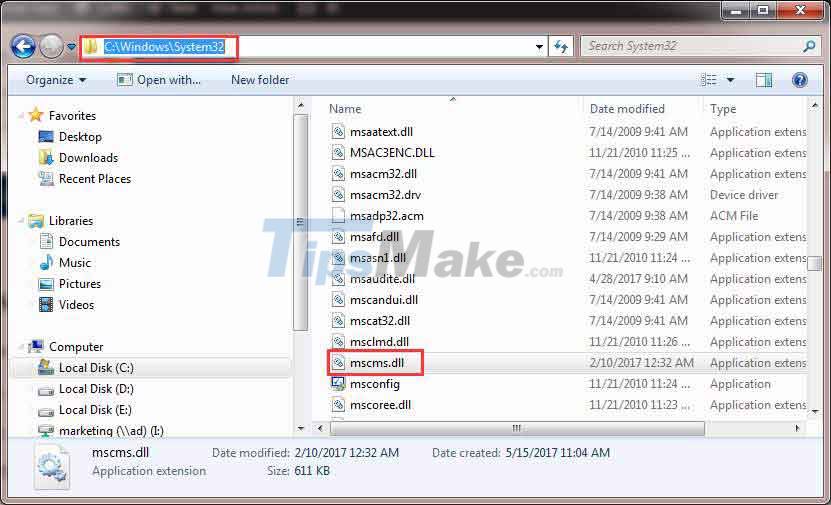
- Copy the above file to the following location
C: windowssystem32spooldriversx643 If you are using a 64-bit operating system.
C: windowssystem32spooldriversw32x863 If you are using 32-bit operating system.
3. Reconnect again to the printer.
With these 4 ways, Phong Vu Technology hopes you can handle the error 'Windows cannot connect to the printer' by yourself. Feel free to leave a question if something goes wrong and we're happy to help.


Reader Comments 0
Sign in with email or Google to join the discussion.