How to encrypt Windows system drive with VeraCrypt
Some devices running Windows 10 have built-in 'device encryption', but the rest require you to pay extra to use the Windows Pro BitLocker feature to encrypt the entire disk for security reasons.However, you can absolutely use the free VeraCrypt software and open source to encrypt all drives on your computer with any Windows version.
In a bit of meaning, the hard drive is the place to store your important files.So what if the drive has problems or worse is stolen?If you have not created a backup, all the important data is at high risk of loss or even falling into the wrong hands.In this case, encryption is the best way to ensure strangers or attackers will not be able to read the data in your drive.It will tamper with your files according to different rules and you will need a secret key to access the encrypted data.So even if someone has access to your physical hard drive, they must have an additional password (or keyfile) to actually see what you store on the drive. .

VeraCrypt is a free and open source security tool that you can use to set up encryption for all drives on any Windows computer.This software works well on Windows 10, 8, 7, Vista and even XP.
Using VeraCrypt is not as complicated as many people think: After a successful setup, you only need to enter the correct password every time you start your computer and use your computer as usual after booting.VeraCrypt handles encryption in the background and everything else happens in a transparent way.In addition, it can also create encrypted file containers, but here we will only focus on how to encrypt your system drive.
VeraCrypt is a project based on the source code of the old TrueCrypt software, which has stopped working.VeraCrypt has many bug fixes and supports modern PCs with the EFI system partition, configuration that many Windows 10 computers use.
How to install VeraCrypt and system drive encryption?
Of course, first you'll need to download VeraCrypt to your computer, run the installer and select the Install option.You can retain all the default settings in the installer just click agree to the terms (next) until VeraCrypt starts installing on your computer.
Download VeraCrypt

After VeraCrypt is installed, open your Start menu and launch the VeraCrypt shortcut.
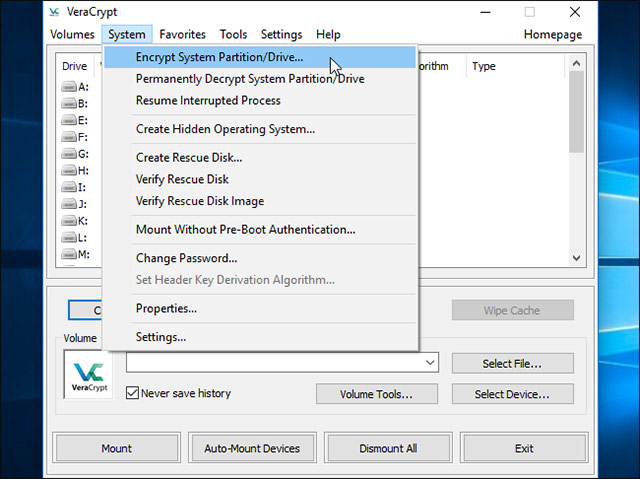
Click System> Encrypt System Partition / Drive in VeraCrypt window to start setting up encryption for the drive.
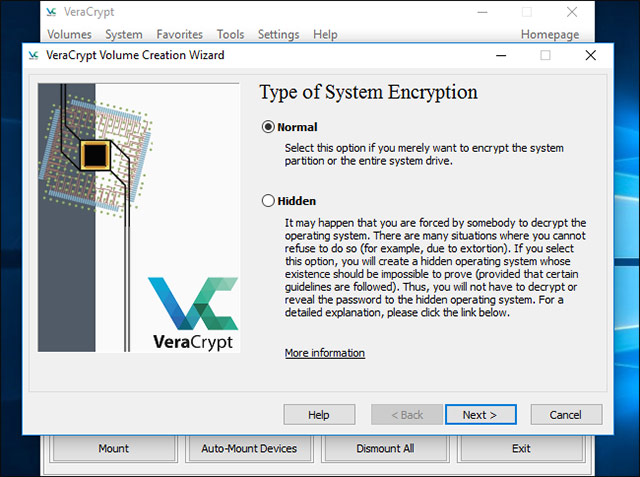
You will be asked if you want to use Normal (or normal) or Hidden (hidden) system encryption.
Normal option will encrypt the system or drivers partition normally.When you start your computer, you will have to enter the encryption password to access the system.No one will be able to access your file system if you don't know the password.
The Hidden option will create an operating system in a hidden VeraCrypt block.At this point, you will have both the 'real' operating system (hidden) and the 'decoy' operating system created by VeraCrypt.When you start your computer, you can enter a real password to boot the hidden operating system or normal password to boot and access the decoy operating system.So, how is this Hidden option to serve the situation?If someone forces you to give them access to your encrypted drive, such as extortion, for example, you can give them the password of the bait operating system and they won't be able to know. that the real operating system is hidden.
On the coding side, using normal encryption will still be able to keep your data safe.The hidden option is only useful when you are forced to disclose your password to someone and you want to reasonably reject the existence of one or more of the files in your system.
If you are not sure which option you should use, it is best to select Normal and click continue.Next, we will go through the process of creating a normal encrypted system partition, which is also one of the most important stages in the process.Also, you can consult some VeraCrypt documents for more information about hidden operating systems.
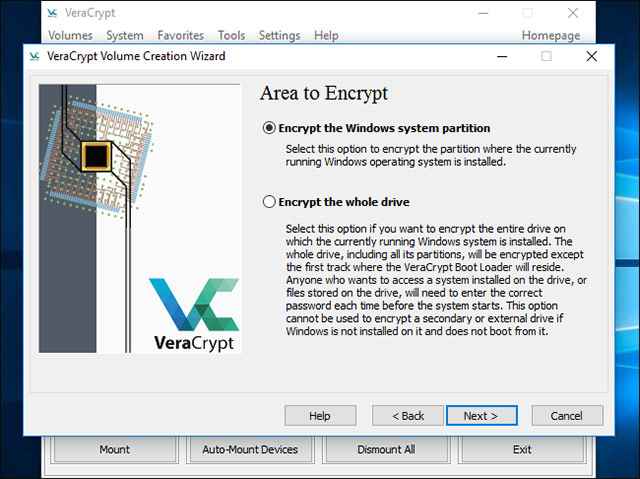
You can select Encrypt the Windows system partition (encrypt the Windows system partition ) or Encrypt the whole drive , depending on your personal preference!
If the Windows system partition is the only partition on your drive, the options will basically be the same.If your system has many different partitions and you just want to encrypt the Windows system partition , select Encrypt the Windows system partition.
In case you have multiple partitions with sensitive data, such as the system partition at drive C: and partition the file at drive D: . please select Encrypt the whole drive to make sure that all Your Windows partition will be encrypted.
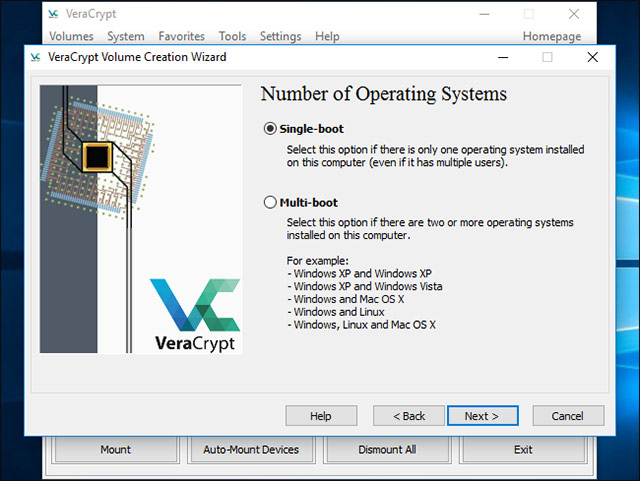
VeraCrypt will ask you how many operating systems are running on your computer.Most people will have only one operating system installed on the system and in this case they will choose Single-boot . If you have more than one operating system installed and can choose between these operating systems when booting your computer, click on Multi-boot .
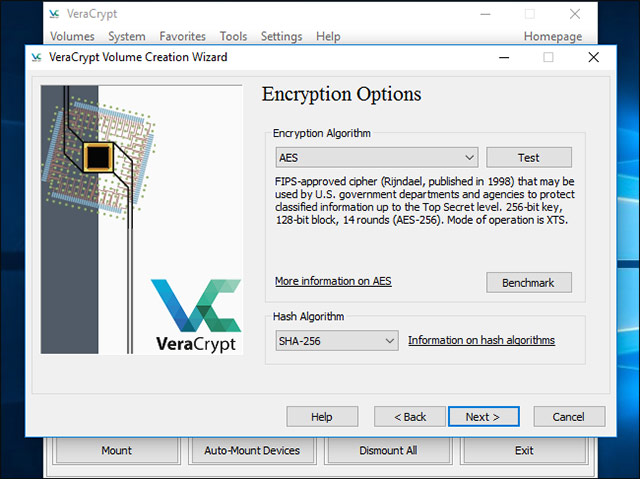
You will then be asked to choose the encryption method you want to use.Although there will be many different options, but if you are not a person with really deep knowledge of data encryption, it is best to stick with the default settings.In this case, the default encoding will be AES .AES encryption and SHA-256 hashing algorithm can be said to be a bad choice.
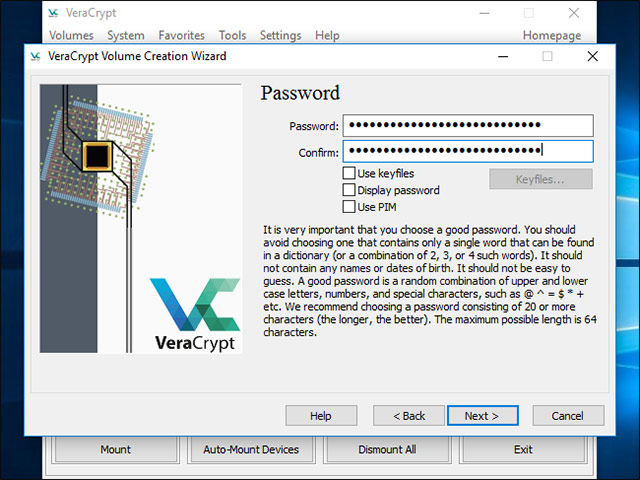
After that, you will be asked to enter a password.According to VeraCrypt's note, choosing a good password is also an especially important factor that you will have to take note of.Choosing a clear, familiar or too simple password will make your encryption easily brute-force attacks.
The wizard recommends that you choose a password with at least 20 characters.You can enter a password with up to 64 characters.An ideal password is a random combination of different types of characters, including upper and lower case letters, as well as numbers and symbols.Note that you will lose access to your files if you lose your password, so setting a strong enough password is already important, but how to make sure you remember it carefully more important.
- Summary of how to create strong passwords and manage the most secure passwords
There are a few options for setting up other passwords here, but they are not necessary.These are only options for your reference, if you do not need to use them, you do not necessarily need to apply these options:
- Use keyfiles: You can choose to enable Use keyfiles and provide some necessary files.For example, on a USB drive when you unlock your drive.If you lose the keyfiles, you will lose access to your drive.
- Show password: This option will allow display only for password fields in this window, thereby helping you confirm that the content you entered is correct.
- Using PIM (Privileged Identity Management): VeraCrypt allows you to set the 'Personal Iterations Multiplier' by activating the Use PIM option.Higher values can help prevent attacks more effectively.You will also need to remember the numbers you entered and enter that number with the password, so you'll have some other information you need to remember besides your password.
You can choose any of these options if you want and then click Next .
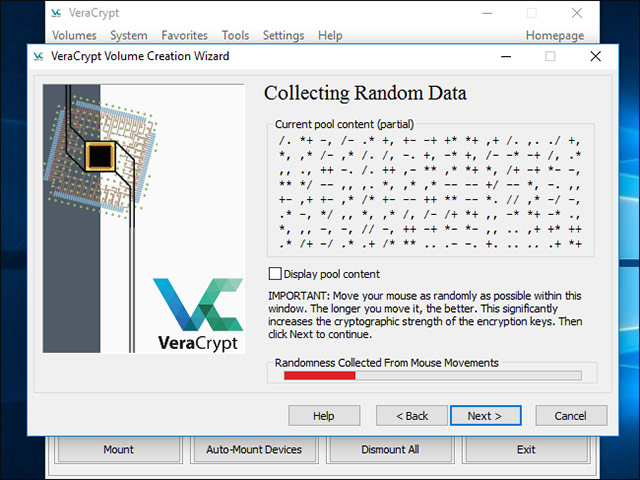
VeraCrypt will ask you to move the mouse randomly within the window inside.It will use these random mouse movements to power your encryption keys.When you have made enough requests, click Next .
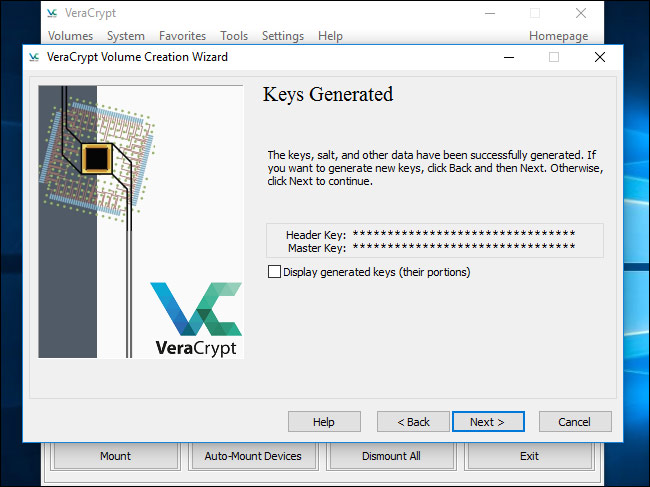
Next, the wizard will notify you that it has created encryption keys and other necessary data.Click Next to move on to the next section.
The VeraCrypt wizard will ask you to create an image of Rescue Disk VeraCrypt before moving on to the next item.
If your bootloader or other data set is corrupted, you will have to reboot the system from the Rescue Disk if you want to decrypt and access your files.Rescue Disk will also store a backup image of the original contents of the drive, allowing you to restore when needed.
Note that you will still need to provide your password when using Rescue Disk, so this will not be the 'golden key' that allows access to all your files.VeraCrypt will only create a Rescue Disk ISO image at the address C: UsersNAMEDocumentsVeraCrypt Rescue Disk.iso by default.You will need to manually burn the ISO image to the disc.
Make sure you have written a copy of Rescue Disk to access your files if there is a problem.You will not be able to reuse the same Rescue Disk VeraCrypt on multiple computers but need a single rescue disk for each PC!

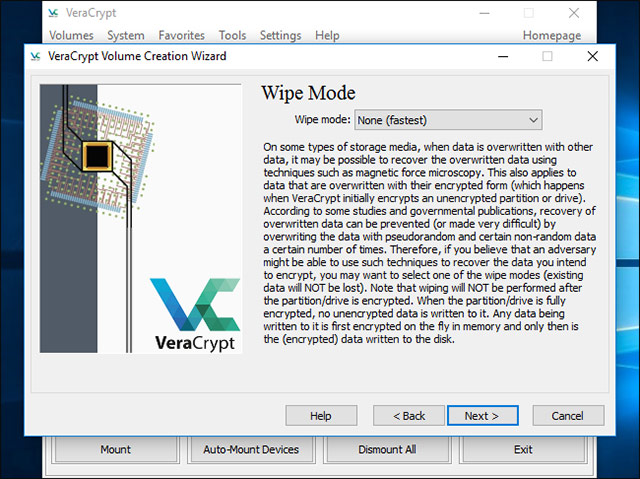
Next, you will be asked to select the delete mode you want to use.
If you have sensitive data on the drive and are concerned about someone being able to check the drive and restore it, you should choose at least 1-pass (random data) to overwrite the data. Its not encrypted data on random data, making it difficult to recover.
If you are not interested in this, select None (fastest) .This option helps to erase the drive faster.The larger the number of deletions, the longer the encryption process will take.
This setting applies only to the initial setup process.After your drive is encrypted, VeraCrypt will not need to overwrite any encrypted data to protect against data recovery.
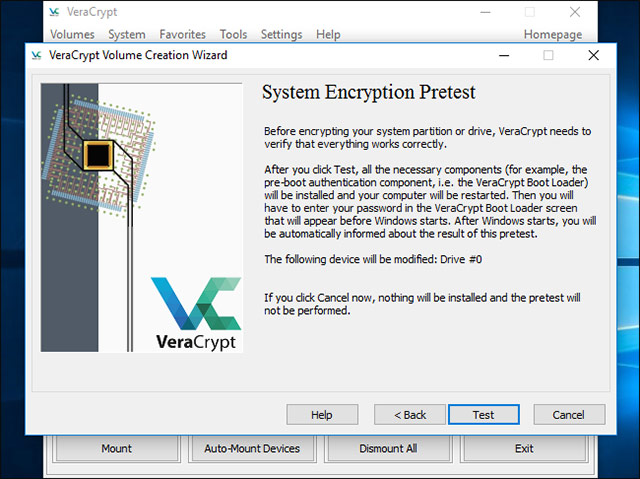
Now, VeraCrypt will verify if everything is working correctly before it starts encrypting your drive.Click on Test and VeraCrypt will install the bootloader on your PC and then reboot.You will have to enter the encryption password when it starts.
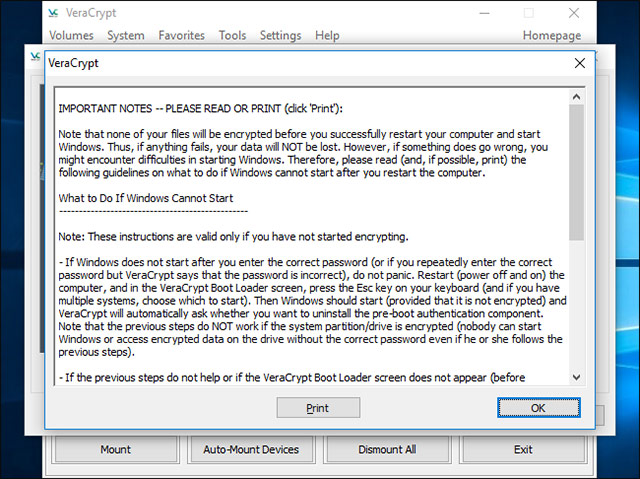
VeraCrypt will provide information about what you need to do if Windows cannot start automatically.If Windows does not start correctly, you should restart your PC and at VeraCrypt's bootloader screen, press the Esc key on the keyboard.Windows will start and ask if you want to uninstall VeraCrypt's bootloader.
If this doesn't work, you should install the VeraCrypt rescue disk on your PC and boot from it.Choose Repair Options Options> Restore Original System Loader in the interface of Rescue Disk.Then restart your PC.
Click OK and then click Yes to restart your PC.
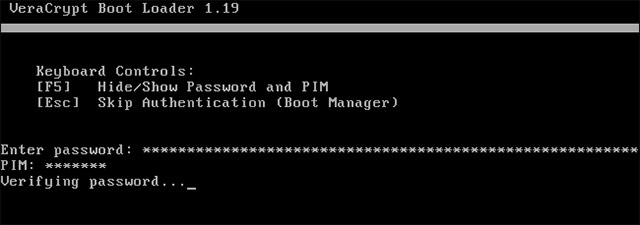
You will have to enter the VeraCrypt encryption password when the PC starts.If you do not use a custom PIM number, simply press Enter at the PIM prompt to accept the default value.
Log in to your computer when the welcome screen normally appears.You will see the appearance of the Pretest Completed window.
VeraCrypt also recommends that you back up both files that are being encrypted because if the system is disconnected or suspended, some of your files will be corrupted and unrecoverable, so backing up important files, Especially when encrypting the system drive is also a very important note.If you need to back up your files, click the Defer button and back up the files. You can then restart VeraCrypt and click System> Resume Interrupted Process to continue the encryption process.
Click the Encrypt button so that PC system drive encryption is actually started.
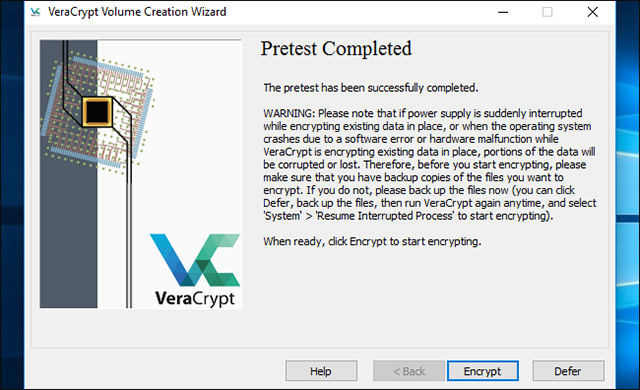
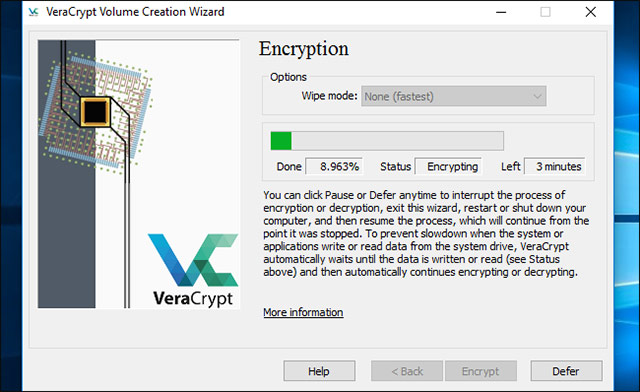
First, VeraCrypt will provide information about when you should use Rescue Disk.Then it will start the process of encrypting your hard drive.
When the process is complete, your drive is encrypted and you will have to enter the password each time you start your computer.
If you decide to remove the system encryption in the future, launch the VeraCrypt interface and click System> Permanently Decrypt System Partition / Drive.
Above is the entire process of encrypting Windows system drives with VeraCrypt.Good luck!
See more:
- Instructions for USB encryption with VeraCrypt
- Top 20 best encryption software for Windows
- How to encrypt files on Windows using Simple Encryptor
- How to encrypt files on Google Drive with Syncrypto