Windows 11 hard drive encryption steps
This means that, in addition to securing the system with anti-virus programs, users must know how to keep their local files safe and secure.
Thankfully, Microsoft has addressed the great need of users in protecting sensitive data, by providing them with a built-in option to encrypt the hard drive. In this article, TipsMake will discuss two methods of enabling device encryption on your Windows 11 PC so that you can better secure your system.
How to Encrypt a Windows 11 Hard Drive
- 1. Using Device Encryption
- How to enable Device Encryption on Windows 11
- How to turn off Device Encryption on Windows 11
- 2. Using BitLocker
- How to enable BitLocker on Windows 11
- How to turn off BitLocker on Windows 11
- 3. Using Group Policy Editor
You have two ways to encrypt your hard drive on Windows 11: through Device Encryption or BitLocker. Both are security features that help users protect their sensitive information. The Device Encryption feature uses one or more mathematical techniques to protect your data, while BitLocker encryption uses 128-bit XTS-AES encryption to secure files.
1. Using Device Encryption
Unfortunately, only some Windows 11 devices support the Device Encryption feature because it requires a device that supports Modern Standby. If you want to know if your computer can use Device Encryption, follow the steps below:
Step 1: Open Windows Search by pressing and holding the Win + S key.
Step 2: In the search bar, type system information and click Run as Administrator.
Step 3: Then, scroll to the bottom of the System Summary window and find Device Encryption Support. If the value says Meets prerequisites, then you can use device encryption on your PC. If you don't see this message, go to the next method to encrypt the hard drive.
How to enable Device Encryption on Windows 11
Step 1: Open Settings by pressing and holding Win + I. Or click Start and select Settings from the menu.
Step 2: Then, go to the Privacy & Security option in the left navigation.
Step 3: Under Privacy & Security, click Device Encryption. If you don't see this option on your settings, the feature isn't available on your device.
Step 4: Once you are on the Device Encryption page, turn on the switch for the Device Encryption option.
Step 5: Once enabled, wait a few seconds for the encryption to finish.
Step 6: Close the Settings window. Your Windows 11 hard drive is now encrypted.
How to turn off Device Encryption on Windows 11
To turn off Device Encryption:
Step 1: Hit the Start menu and click the Settings app. You can also open Settings by pressing and holding Windows key + I.
Step 2: Next, click Privacy & Security in the left menu.
Step 3: On Privacy & Security, select Device encryption.
Step 4: Then, turn off the switch found to the right of the Device encryption option.
Step 5: When the pop-up screen appears, select Turn off to confirm your action.
Step 6: Next, wait for the decryption process to finish. It may take a while, depending on your device.
Step 7: Finally, close Settings.
2. Using BitLocker
If your Windows 11 device doesn't have the Device Encryption feature, you can use BitLocker instead. BitLocker is also available in most Windows 11 devices, especially those with TPM 2.0. In addition to protecting sensitive information, you can also use it to prevent unauthorized people from accessing your device.
How to enable BitLocker on Windows 11
To enable BitLocker:
Step 1: Press and hold Win + S key to open Windows Search.
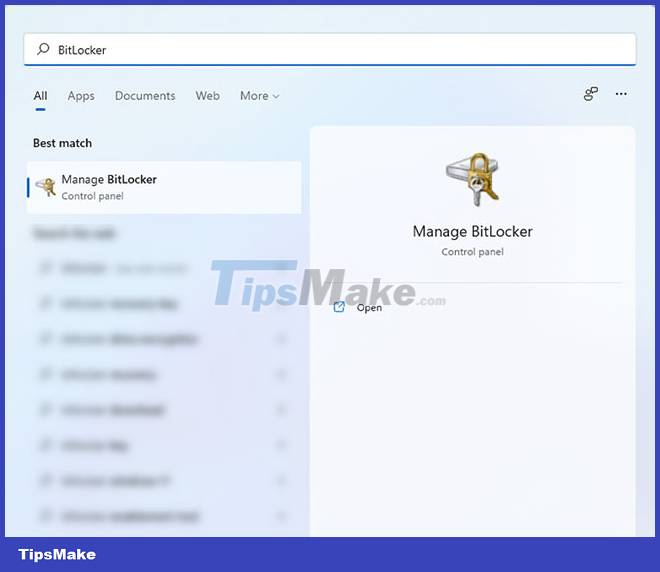
Step 2: Next, type BitLocker in the Windows Search bar and press the Enter button. This will open the BitLocker Drive Encryption window.

Step 3: Then, select the drive you want to encrypt.
Step 4: Now, click Turn on BitLocker to start encrypting the hard drive.

Step 5: On the window that appears, you will be asked how you want to unlock the hard drive at startup. The article recommends using the password method because it is more convenient to use. However, you can also choose to open with USB if that's what you prefer.

Step 6: Then, enter twice the password you want to unlock the drive and click Next.
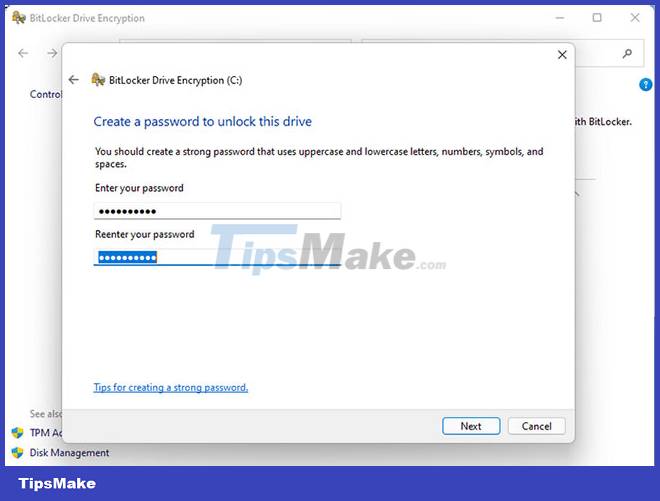
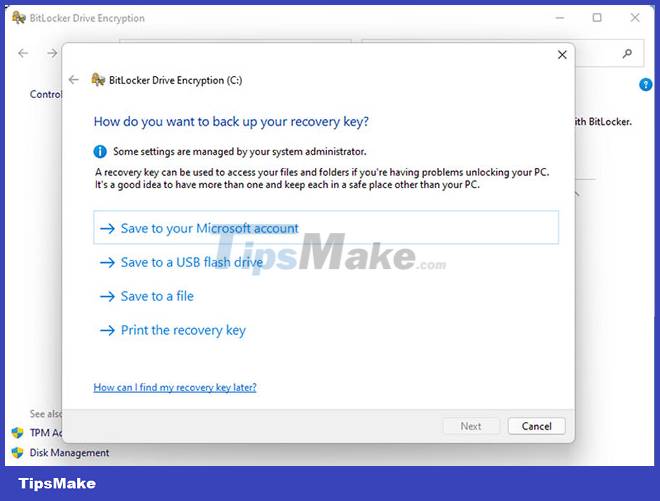
Step 7: In the next window, you will be asked to choose a recovery option in case you forgot your password. The best option is to save it to your USB or Microsoft account, so that it can be accessed by another computer in case you forget your BitLocker password and cannot access your PC.
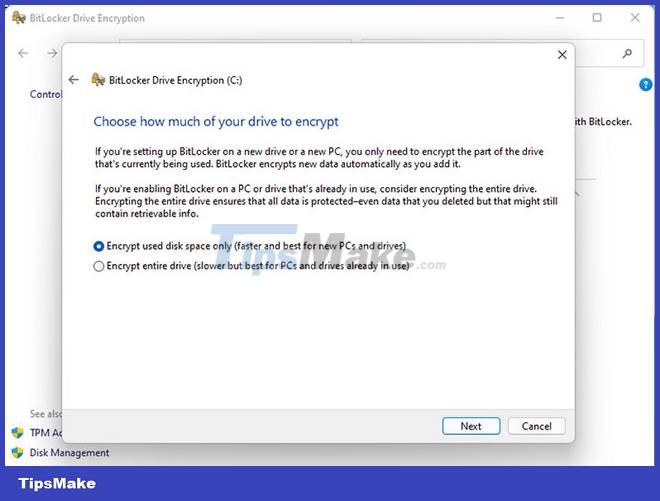
Step 8: Then you need to choose whether you want to encrypt the entire hard drive or just the used parts of it.
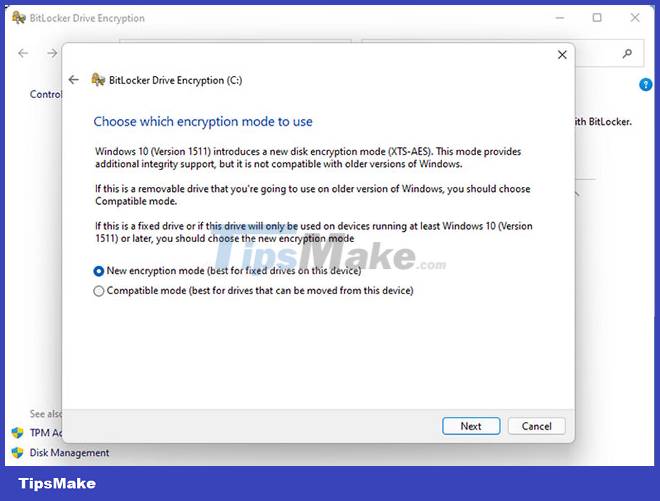
Step 9: Next, choose how you want to encrypt the drive. You can choose the first option if you are using a fixed drive. But if you are going to move your hard drive, choose the second option.
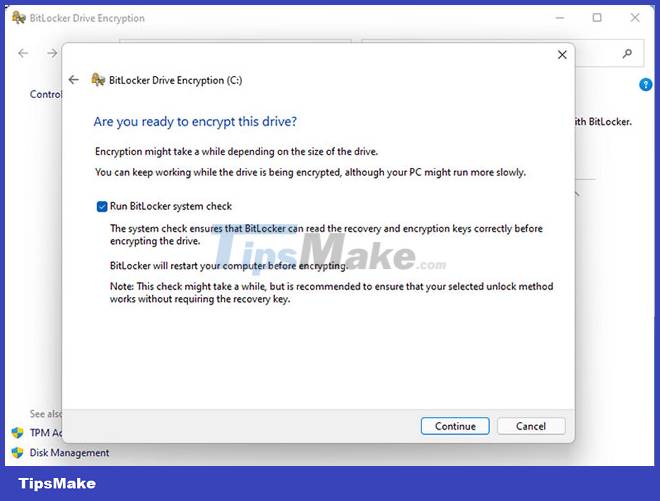
Step 10: Finally, tick the option Run BitLocker system check and click Continue.
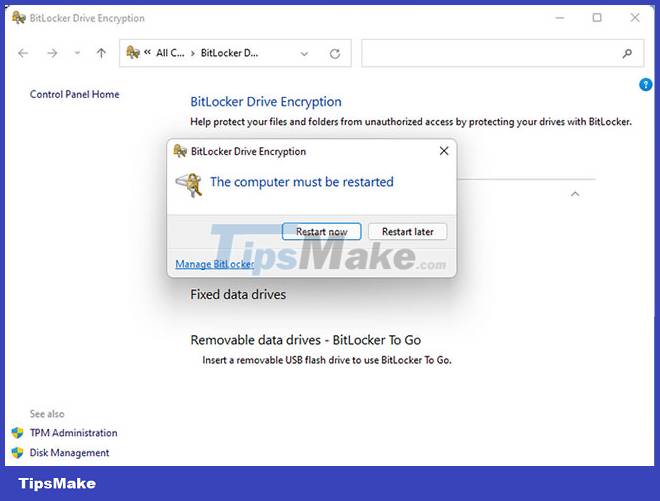
Step 11: After the encryption is finished, you will be asked to restart the computer. If you want to check if the encryption is working, click Restart now. Otherwise, click Restart later if you still need to get something done on your device.
How to turn off BitLocker on Windows 11
To disable BitLocker again:
Step 1: Open Windows Search by pressing and holding the Win + S key.
Step 2: Type BitLocker in the Windows search bar and press Enter.
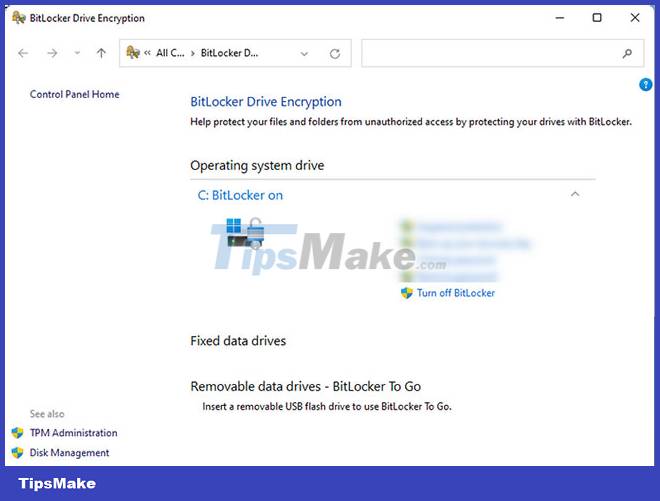
Step 3: Next, select the drive you want to decrypt and click Turn off BitLocker.
Step 4: Then, confirm your action by clicking Turn off BitLocker again on the pop-up window.
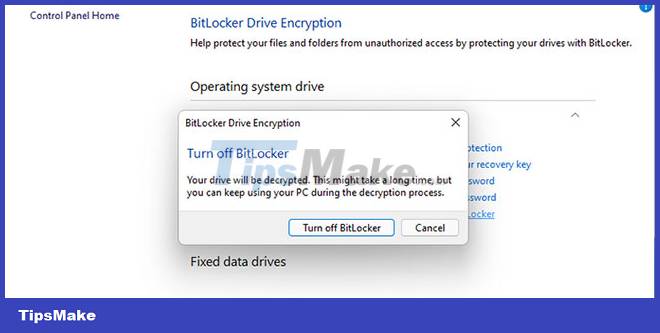
Step 5: Wait for the decryption process to finish before shutting down or restarting the computer.
3. Using Group Policy Editor
If after enabling BitLocker on your device and you find it is not available for your Windows 11 device, this means that your computer does not have TPM 2.0 available. But don't be discouraged. You can still enable BitLocker even if you don't have a compatible TPM using the Group Policy Editor. Here's how to do it:
Step 1: Open Run by pressing and holding the Win + R key. Then, type gpedit.msc and press Enter to open the Group Policy Editor.
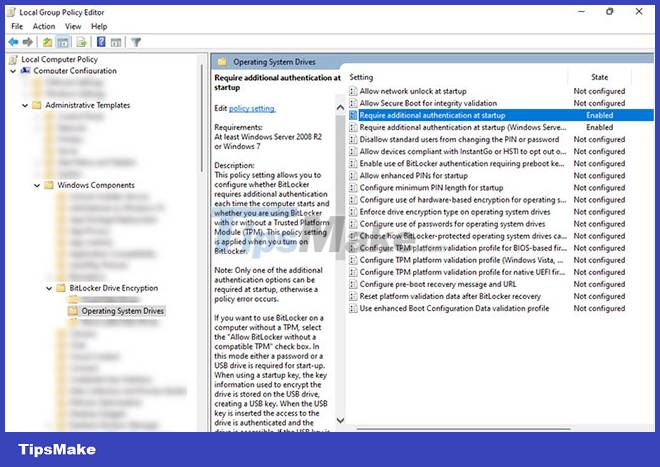
Step 2: In the Group Policy Editor, follow the path Local Computer Policy > Computer Configuration > Administrative Templates > Windows Components > BitLocker Drive Encryption > Operating System Drives found in the left navigation.
Step 3: Next, double-click the Require additional authentication at startup key key found on the right pane. This will open a new window.
Step 4: On the new window, make sure to select the Enabled option in the top left corner of the window, then select the option Allow BitLocker without compatible TPM (requires a password or a startup key on a USB flash drive) and Click Apply > OK. .
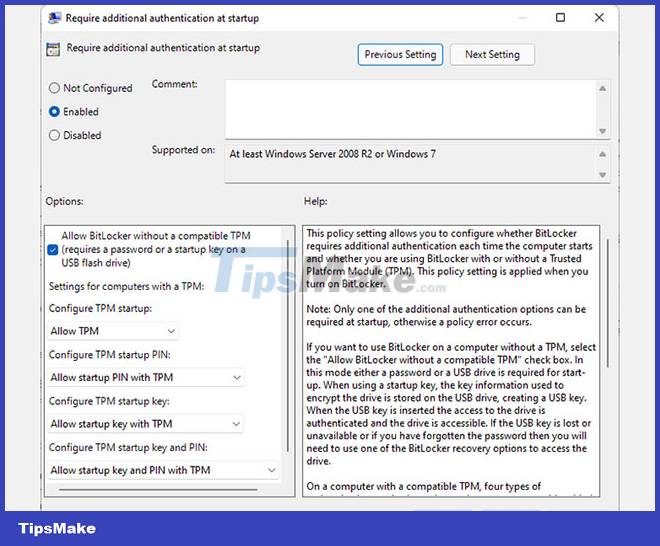
Step 5: Now, BitLocker is enabled on your device. Follow the steps above to enable this feature on Windows 11.
Hard drive encryption keeps all your sensitive data safe and secure. At the same time, it adds another layer of protection against threats and malicious actors. However, you need to be careful when enabling this feature because if you are not careful in managing your passwords or keys, you will lose access to your precious data.