How to Edit Photos in Paint from the Snipping Tool
If you take a screenshot using Snipping Tool and want to edit it further, the available tools may not be enough for you. Therefore, users can completely edit screenshots in Paint from Snipping Tool. You do not need to save screenshots from Snipping Tool to edit on Paint, but can open them directly on Paint from Snipping Tool. Below are instructions for editing screenshots in Paint from Snipping Tool.
How to edit photos in Paint from Snipping Tool
Step 1:
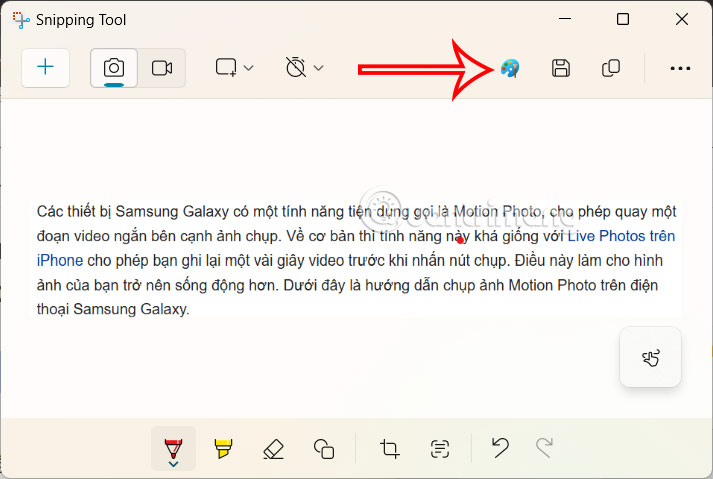
First, you take a screenshot of your computer screen using Snipping Tool as usual. Then in the photo editing interface on Snipping Tool, the user clicks on the Paint icon in the upper right corner of the toolbar as shown below.

Step 2:
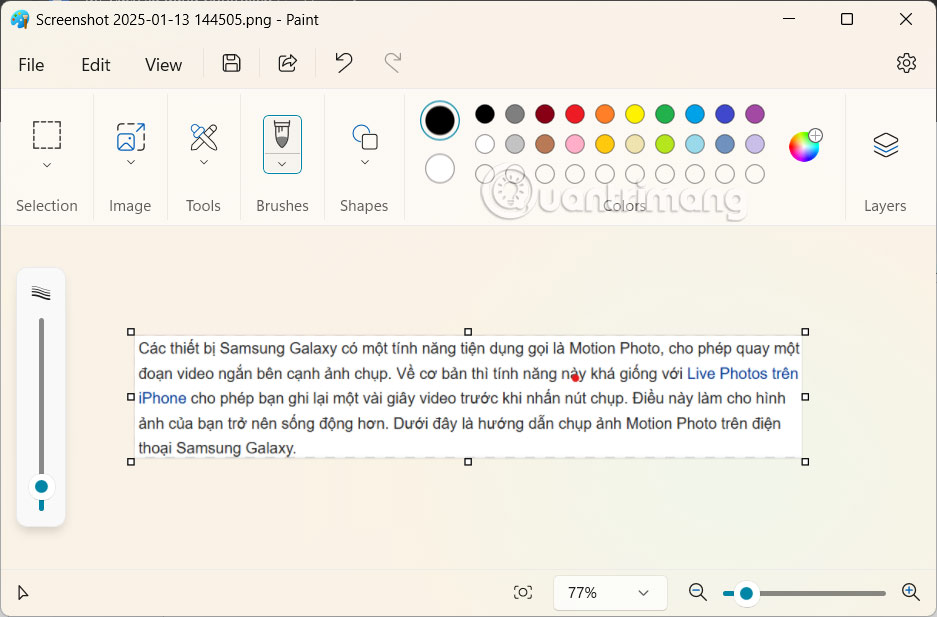
Immediately after that, the Paint application interface along with the screenshot from Snipping Tool. Here users have more tools to edit images.

Step 3:
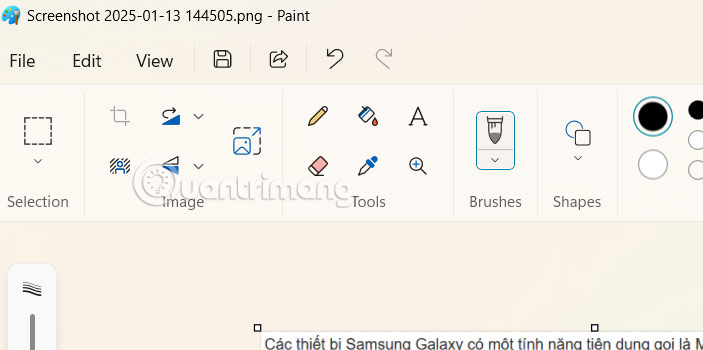
Here we use the tools in Paint to edit the image. There are groups of editing tools in Tools for you to edit the image.

Step 4:
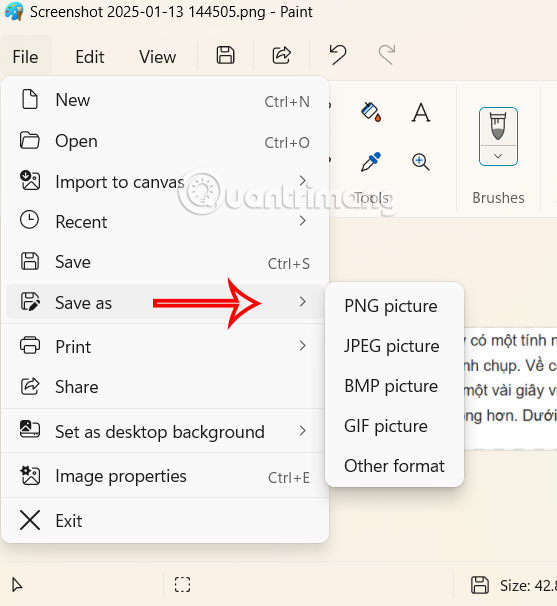
Finally, when you have finished editing the image, click on the save icon to save the image. Or you click on the File icon and select Save as to choose the image format you want to save.

You should read it
- Instructions for enabling or disabling Snipping Tool in Windows 10
- Steps to Fix Snipping Tool Not Working Error On Windows
- Learn how to use Paint to edit photos on Windows
- Cannot find Snipping Tool on Windows 10? This is how to fix it
- Instructions on how to crop photos with Paint
- About the Paint Tool SAI tool
 5 tips to improve image and sound in Zoom calls
 Different ways to classify waste
 How to Use a Backup Email Address to Keep Your Online Accounts Safe
 How to fix Telegram group not showing error
 Apple Watch SE will have a new look this year
 How to hide Telegram group members list