How to draw vector illustrations from A to Z
Instructions for drawing vector illustrations from A to Z. After going through a series of tutorials on basic tools of Adobe Illustrator, you may realize this is a powerful software that you can build. Get the vector illustrations of anything
After going through a series of tutorials on the basic tools of Adobe Illustrator, you may realize this is a powerful software that can help you build vector illustrations of anything. perfect way. Now it's time to try applying them to draw different illustrations. If you do not know the basic knowledge of Adobe Illustrator, please read the previous articles of ThuThuanPhucSoft.vn.
In this article, ThuThuanPhucSoft Software.vn will guide you to draw a complete illustration with the most basic tools. Please refer!
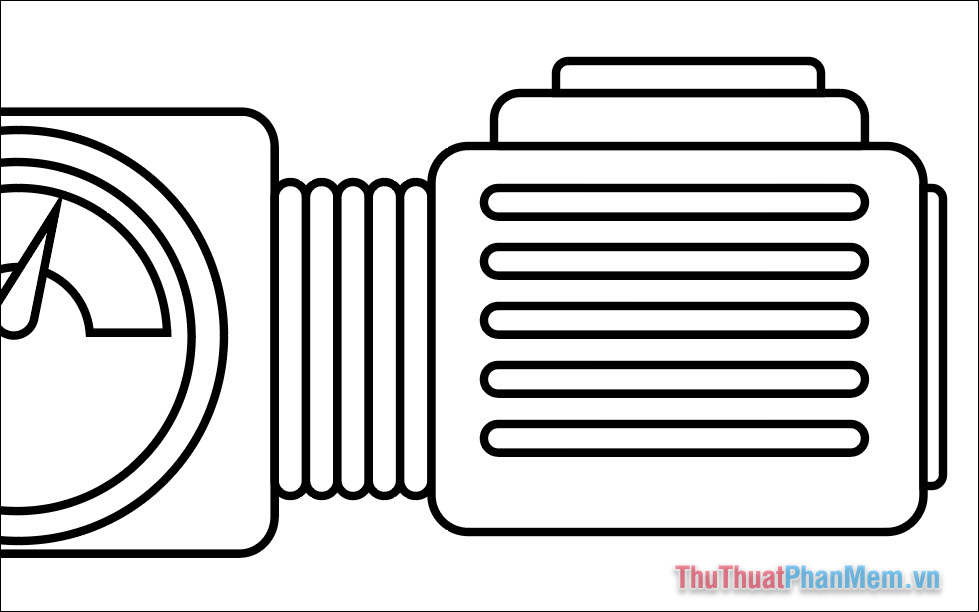
The image that I am about to draw below is a water gun, in addition you can draw an illustration of anything in Illustrator. But first try drawing a water gun.
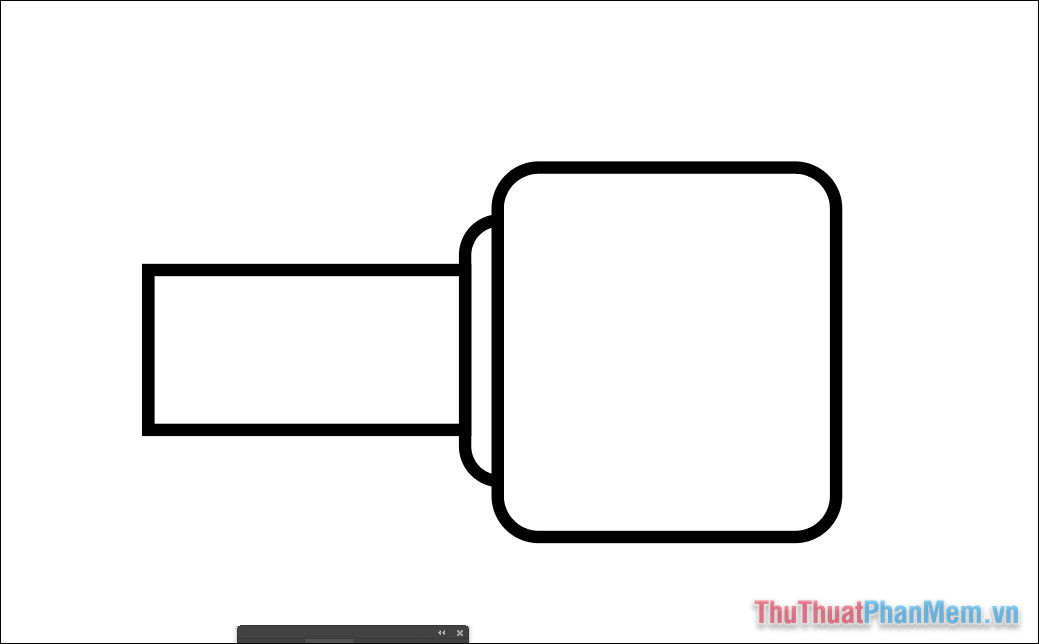
Open Adobe Illustrator and create a new drawing page. Start using the Retangle Tool to draw the shape using the form below, this is the tip of the gun.
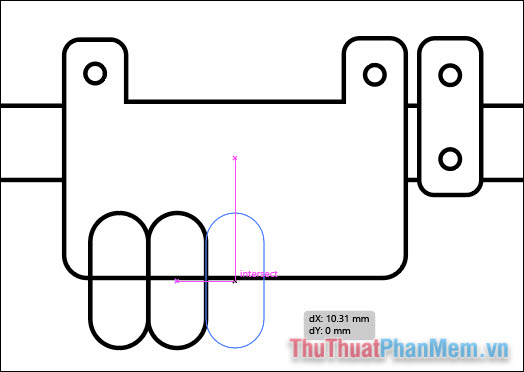
For this part, you create a long sausage-like rectangle, creating similar shapes using Copy (Ctrl + C) and Paste (Ctrl + V).
Combined with the Align feature to align the spacing evenly, if you don't see the Align window, look for it in Windows >> Align .
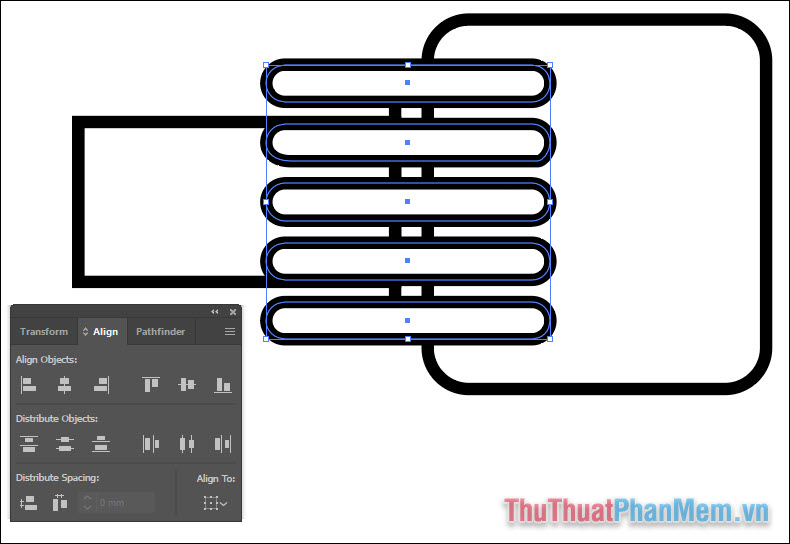
- Group all the "sausages" into a group (Group) .
- Use the Selection Tool to select the group of sausages and the large rectangle.
- Using Shape Builder , hold Alt and click on redundancy to delete them.

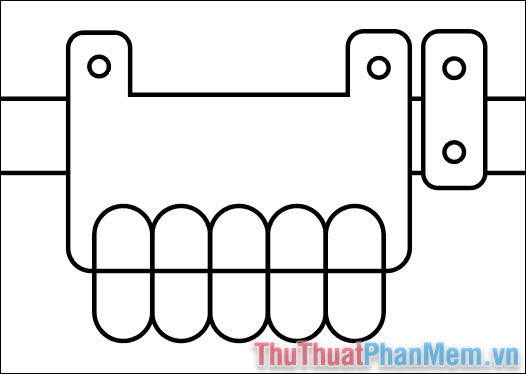
Continue drawing a long rectangle to make the barrel of the gun, along with adding a rectangle in the lower two corners as follows:
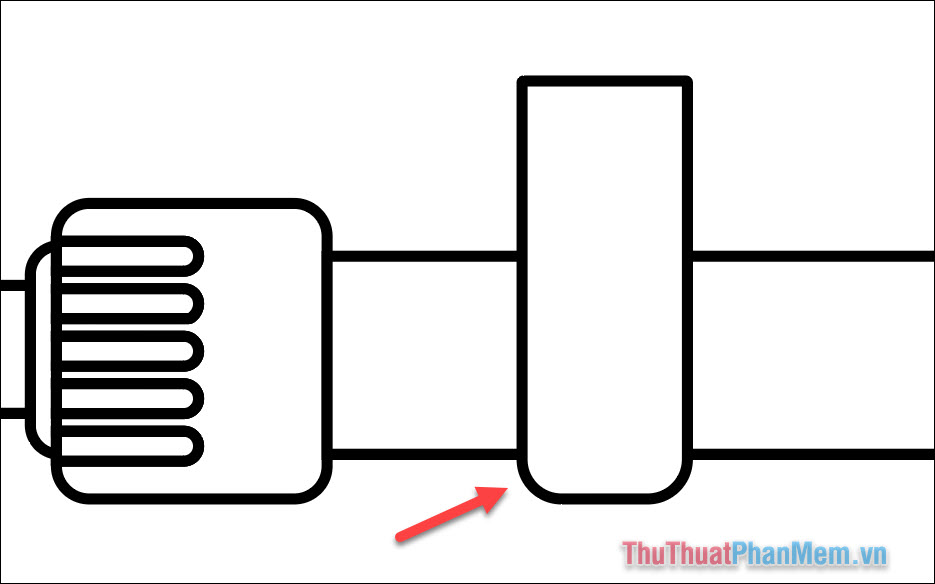
Draw 2 small circles to add details, use Align to align them.
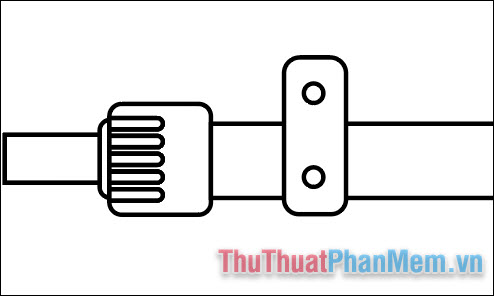
Make 3 more copies and put them in different positions. Next you draw one more large rectangle to make the handle for the gun.
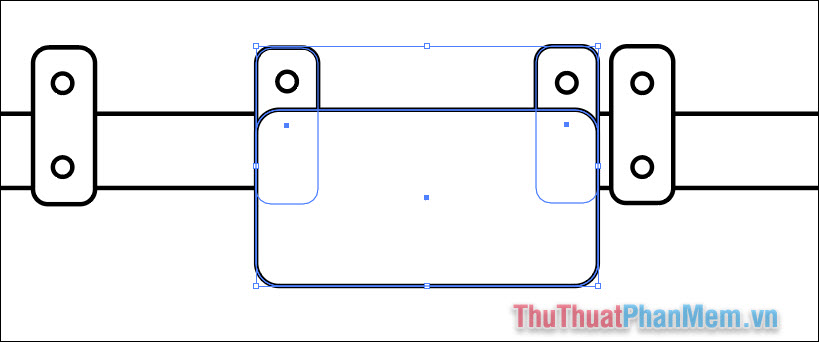
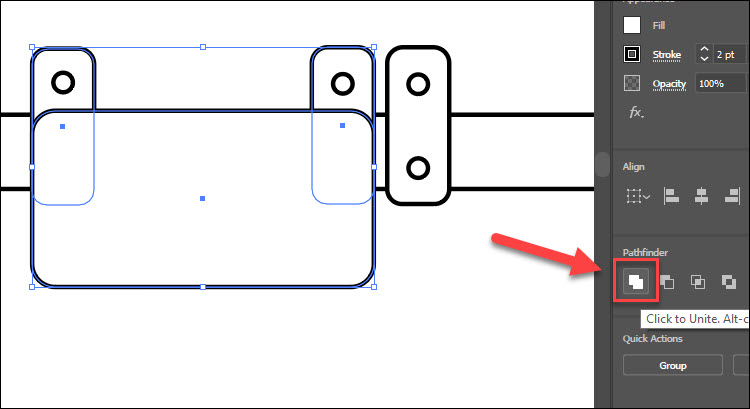
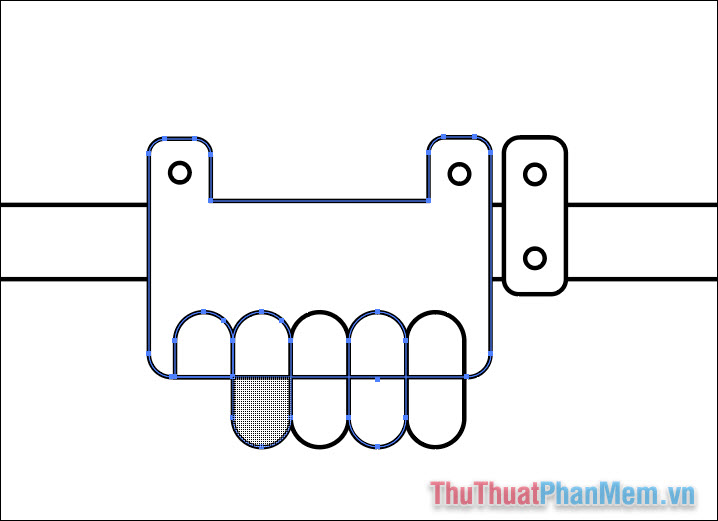
Use the Selection Tool to select 2 small rectangles and big rectangles. Select the Unite feature in Pathfinder to combine them. If you don't see the Pathfinder window , press Ctrl + Shift + F9 .
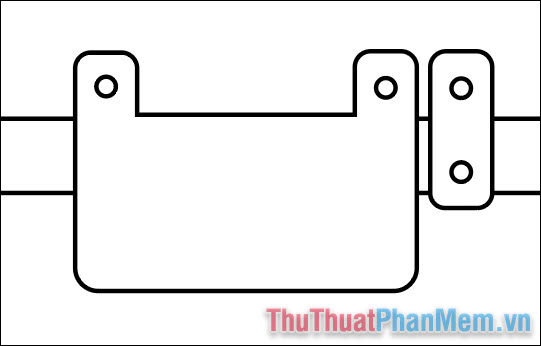
Press Ctrl + [ to bring the circles upward, then delete the 2 circles below.
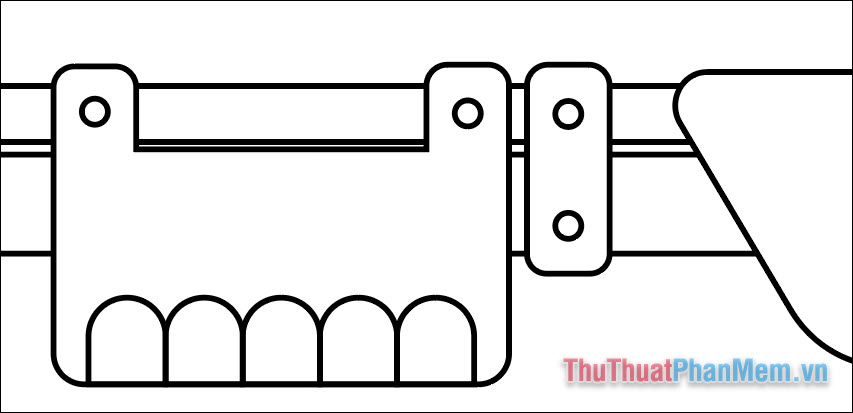
Continue to create the following details, to be able to quickly create a copy, you can create a first image then use the Selection Tool , hold Shift + Alt and drag the image to the next position:
Delete the leftovers with Shape Builder .
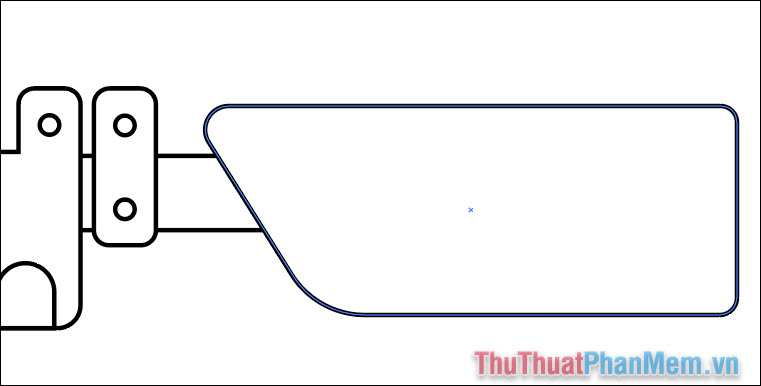
Draw a large rectangle at the bottom, use the Direct Selection Tool and drag the corner of the lower corner of the image to create a quadrilateral.
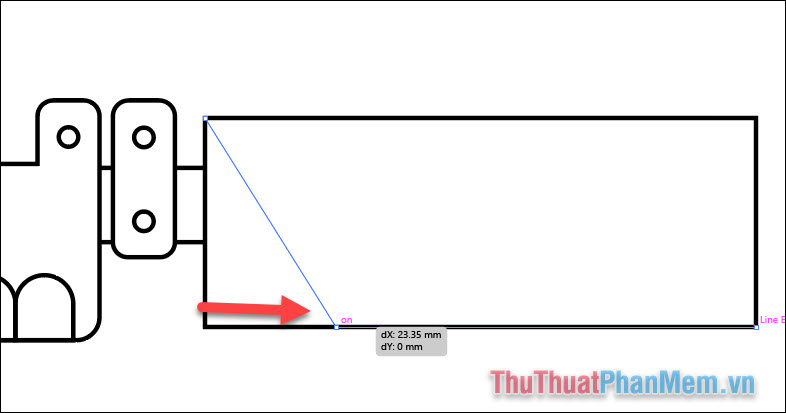
Round the corners.
You draw a long rectangle across as follows:
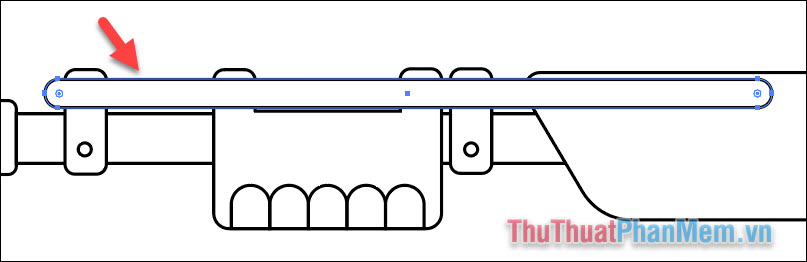
Select the shape with the Selection Tool , then right click and select Arrange >> Send to Back .

The image will be placed below the other objects as follows:
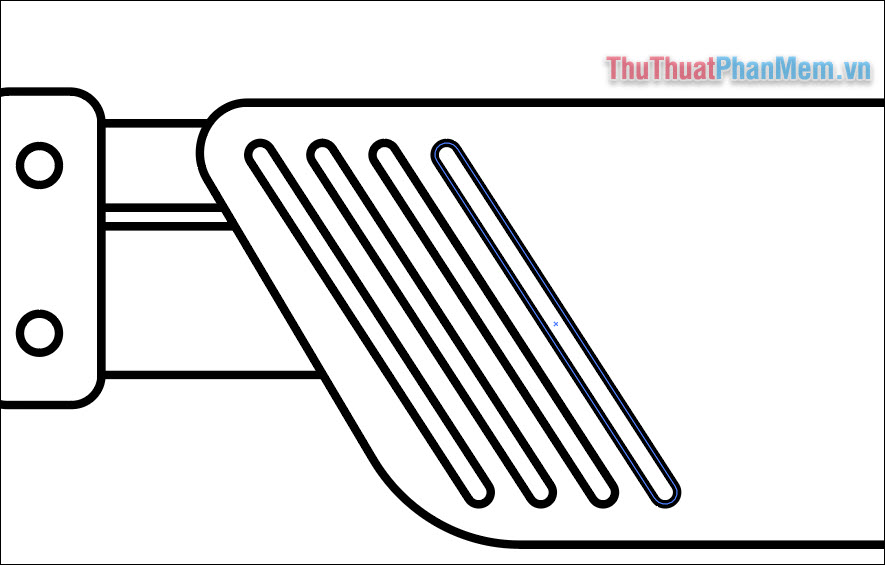
Add details with some long "sausage" shapes and tilt it.
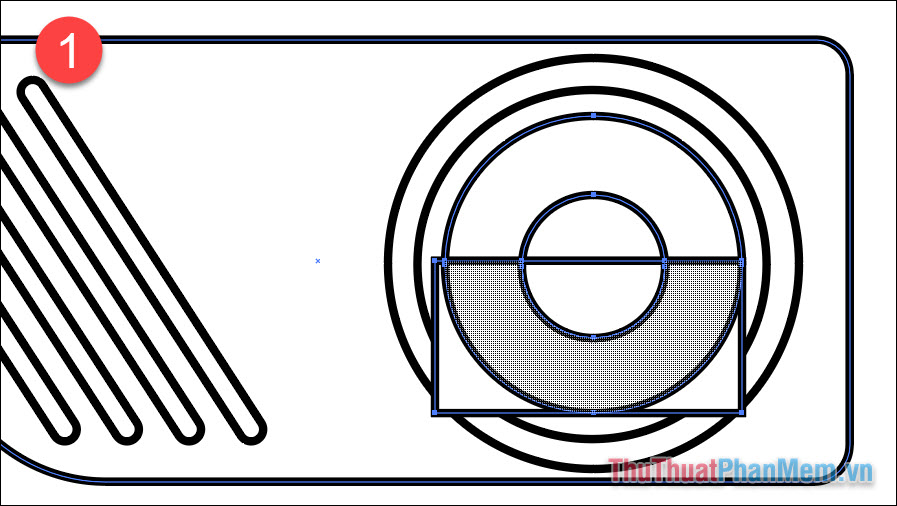
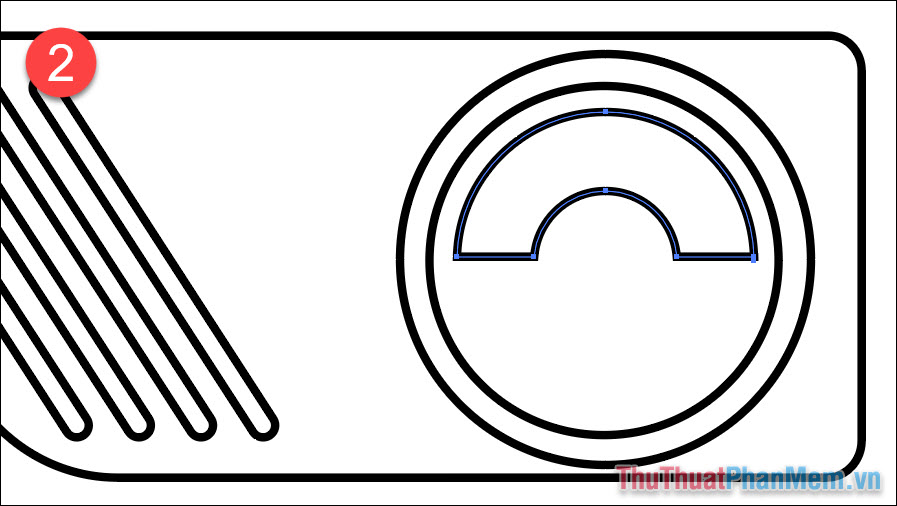
Draw concentric circles that are bigger and bigger to create a clock face inside the gun body area. Use a rectangle and the Shape Builder to cut the half of the circle like this:
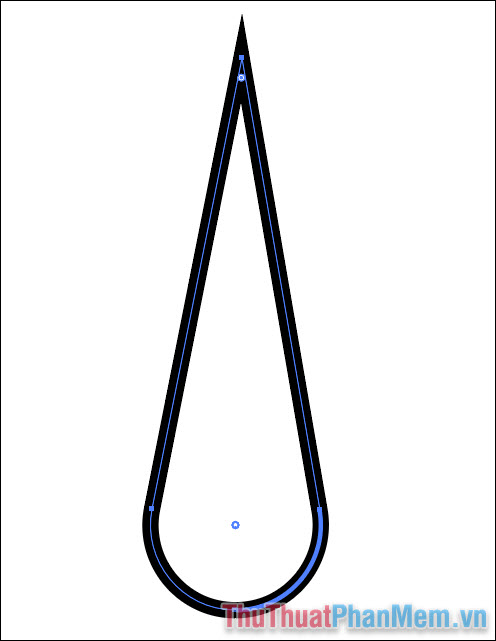
To draw a needle, first draw a pointed triangle and circle the bottom two corners:
Put it in the right position:
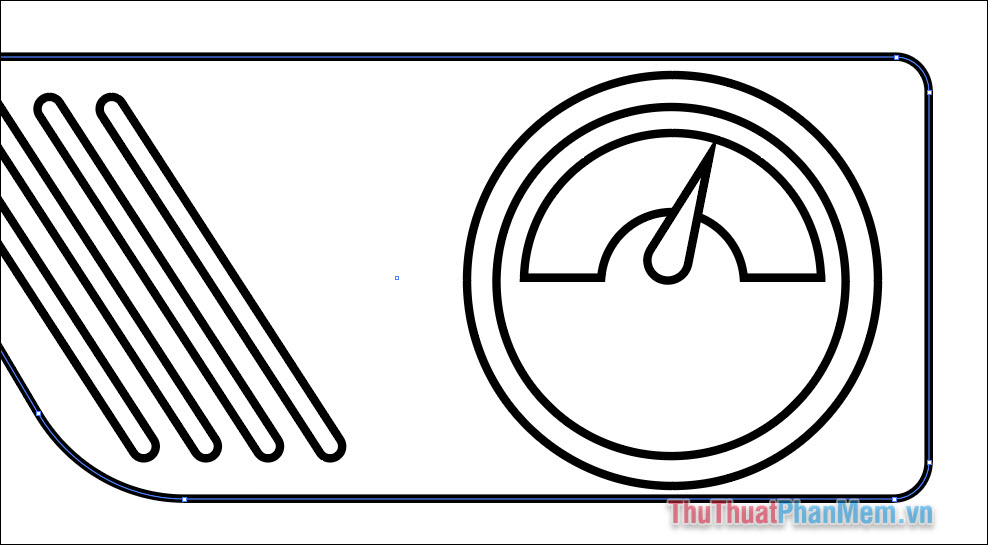
You use the techniques above to serialize more details for the gun. The more elements are added, the more detailed the illustration.
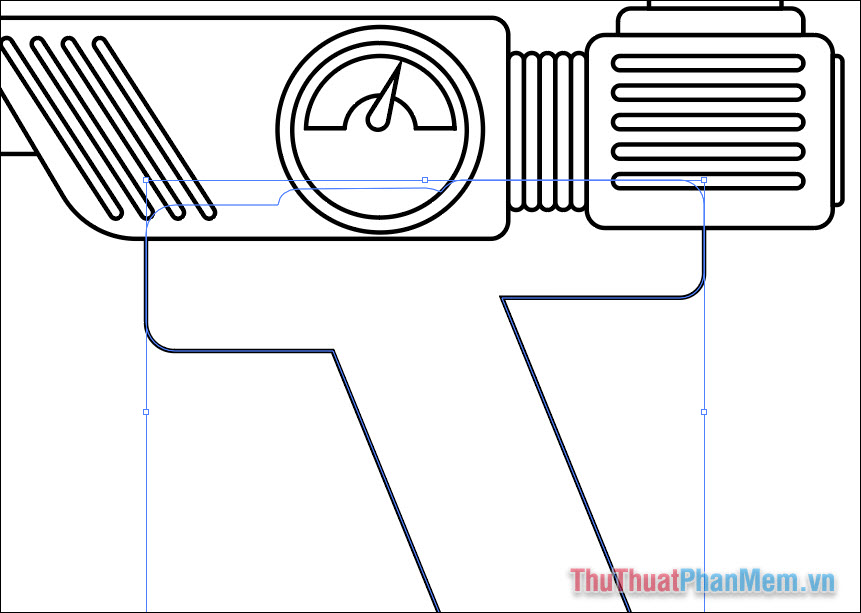
You draw a rectangle to make the gun handle, then use the Shear Tool to tilt it as shown in the picture.

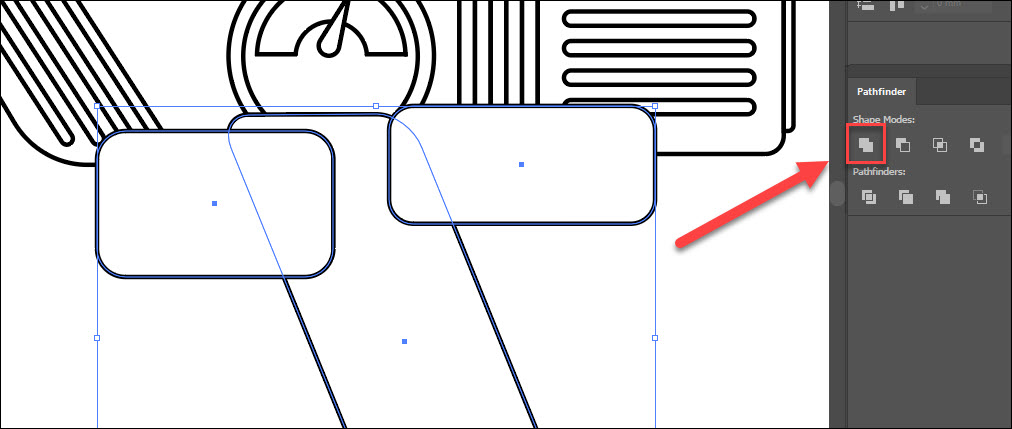
Draw 2 more rectangles at the following locations and use Pathfinder 's Unite feature to merge them together:
Then right click >> A rrange >> Send to back .
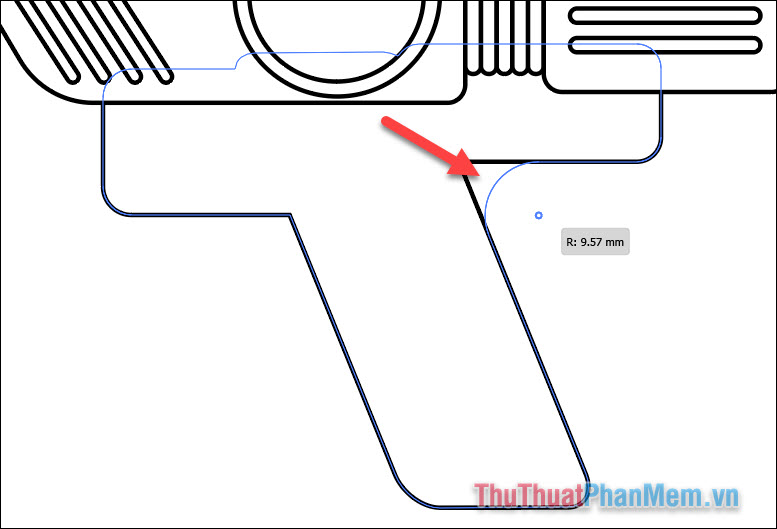
Use the Direct Selection Tool to select the point in the right corner and drag it into a rounded corner.
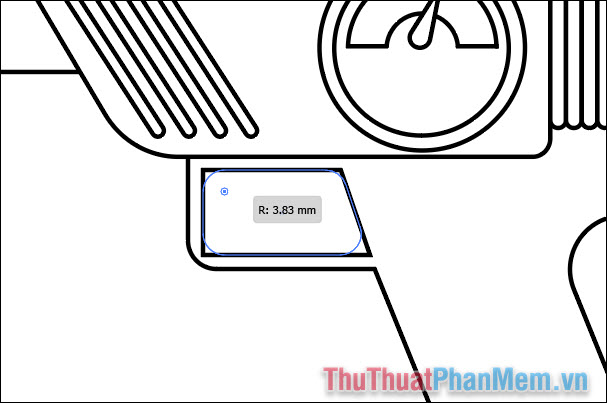
Create a small quadrilateral to make the trigger, then round the corners.
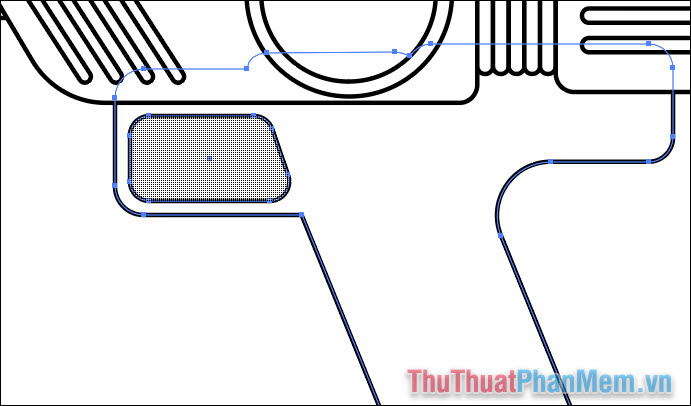
Select the shapes in this area with the Selection Tool , then remove the trigger frame with the Shape Builder Tool and you will have a gap here.
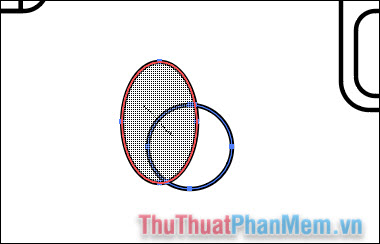
Create the trigger with a circle and ellipse on top, then use the Shape Builder Tool to remove the excess.
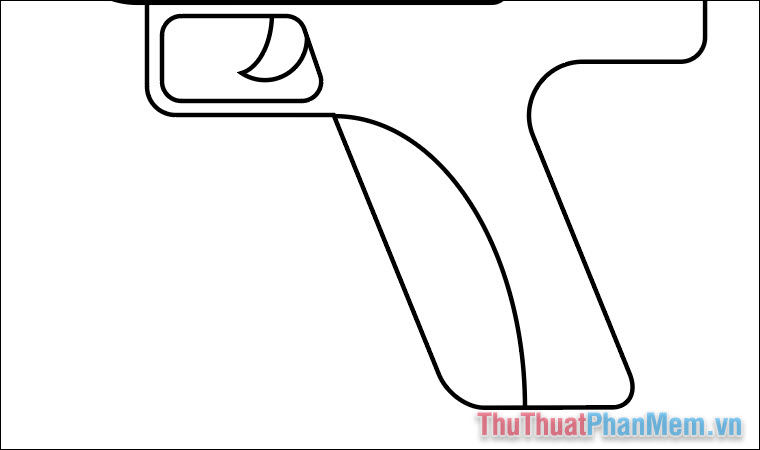
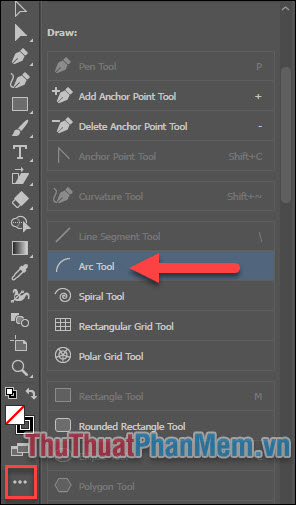
Draw one more curve element on the handle of the gun with Arc Tool .
If you don't see the Arc Tool , click the 3 dots at the bottom of the toolbar and then drag and drop Arc Tool onto the toolbar.
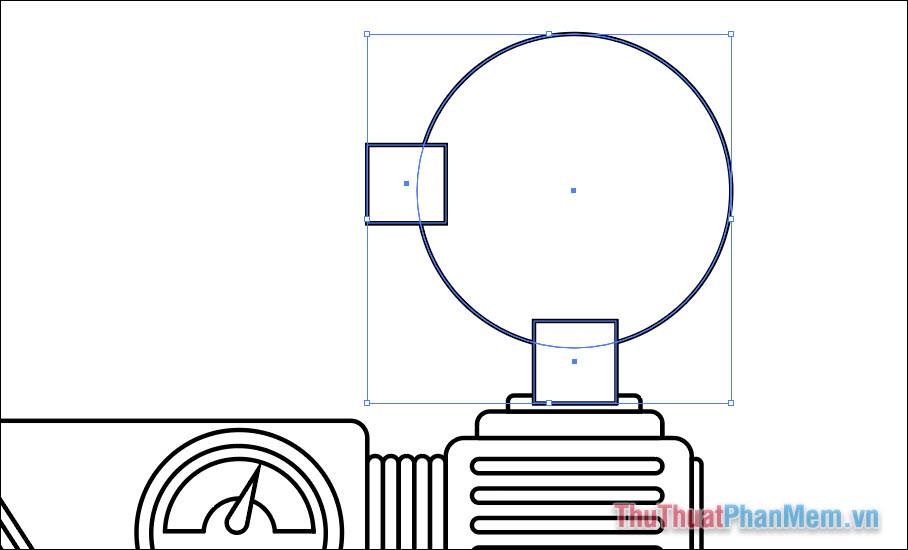
Draw a big circle with 2 small rectangles to make the pitcher, merge them together with Pathfinder .
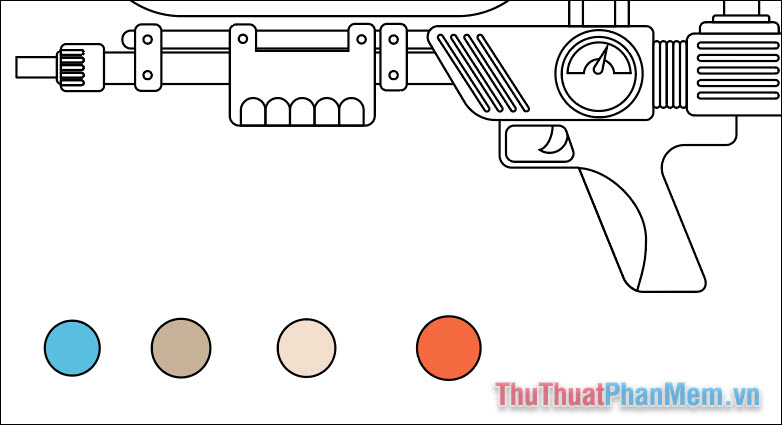
You complete the rest of the work using the same techniques.

Create a palette of colors you will use and leave it separate from the drawing.
Similar to opening Arc Tool , find and drag the Live Paint Bucket tool out.
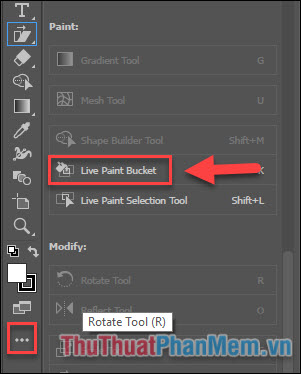
You use the Eyedropper Tool and click on the color to get the color.
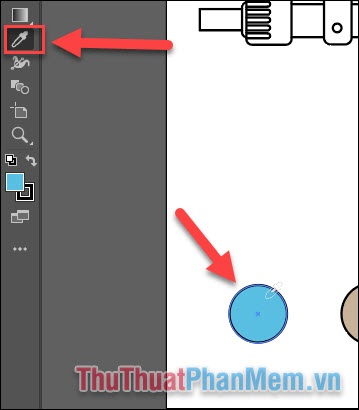
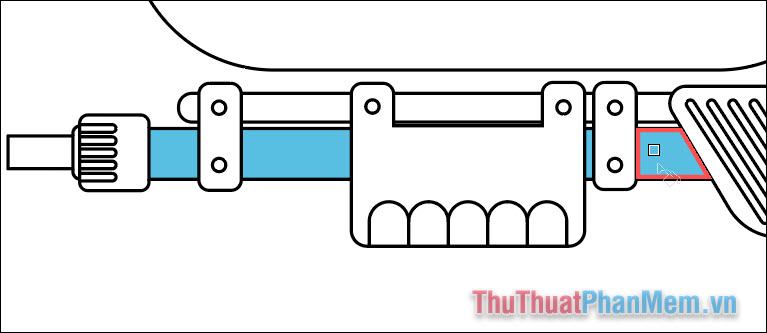
Then choose Live Paint Bucket and my friend color directly into the picture. Keep switching between Eyedropper Tool and Live Paint Bucker to complete the coloring of the work.
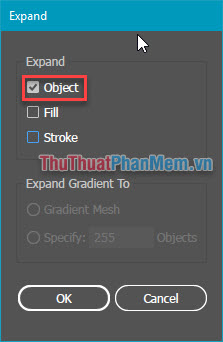
When you're done coloring, press Ctrl + A to select all objects, select Object >> Expand . Here only tick the Object box and then OK . Then the Live Paint Bucker colors will be applied to the Fill color for the shapes.
At this point, you have finished drawing an illustration for a water gun. Along with the techniques we have just applied above, you can also create illustrations for other objects.
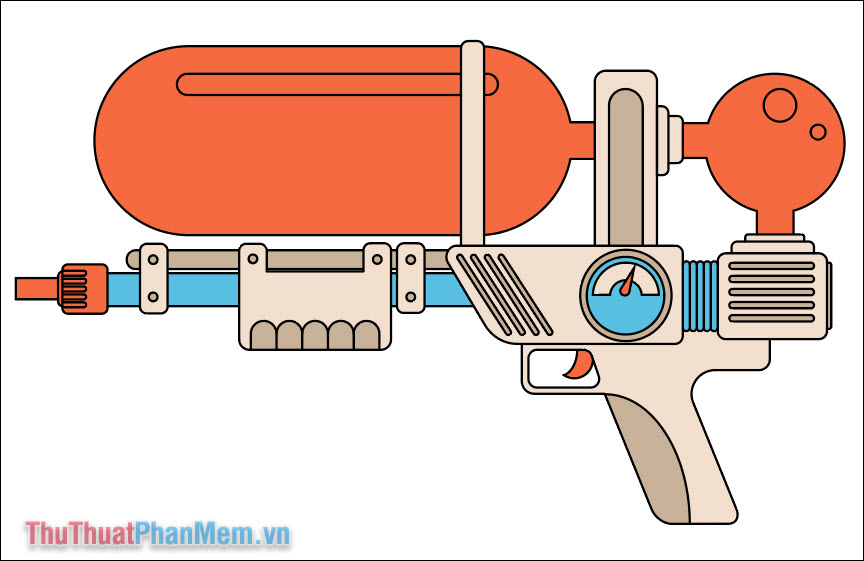
Good luck!
Was this article helpful?
Your feedback helps us improve.
Related Articles
 How to Convert JPG to Vector8 minutes read
 SVG element in HTML58 minutes read
 How to draw anime hair covering one eye5 minutes read
 Instructions for creating illustrations on Napkin AI2 minutes read
 Create and work with vector graphics in Photoshop15 minutes read
Reader Comments 0
Sign in with email or Google to join the discussion.