Table of Contents
This guide explains how to disable Windows Search on Windows 8.1 and Windows 7, with clear steps, practical tips, and important checks before you begin.
How to turn off search on Windows 7 and Windows 8 / 8.1
Step 1. First, you need to make sure that the Windows Search service is not being used. To do this, press Ctrl + Shift + Esc to open Task Manager.
Step 2. Inside Task Manager , go to the Processes tab and look for Microsoft Windows Search progress . When you see it, right-click on it and choose End Task from the context menu.
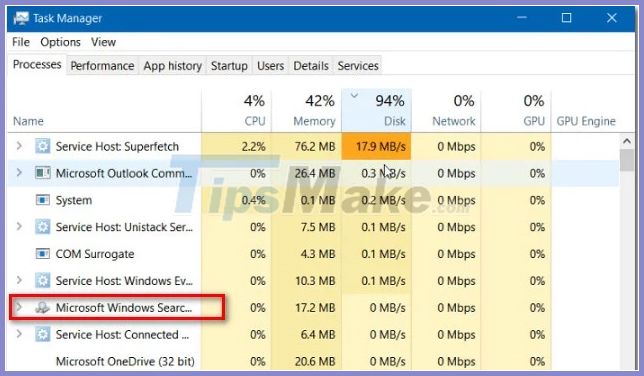
Step 3. When the service is temporarily stopped, press Windows key + R to open the Run dialog box . Then, type appwiz. cpl and press Enter to open the Programs and Features window.

Step 4. Inside the Programs and Features window, click Turn Windows features on or off from the vertical menu on the left.

Step 5. Inside the Windows Search window, scroll through the list of features and locate Windows Search. When you see it, uncheck the checkbox that comes with it and click OK.
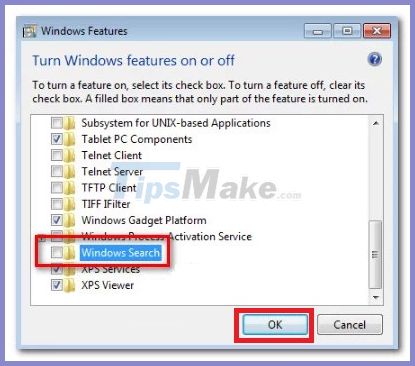
Step 6. When the confirmation window appears, click Yes and wait for the changes to be implemented. Then, restart the computer.
Step 7. When the reboot is complete, the Windows Search feature is now disabled.
Note : If you want to re-enable Windows search, just redo the above steps and click on the enable Windows Search checkbox.
FAQ
What should I know about Disable Windows Search on Windows 8.1 and Windows 7?
Focus on the key features, requirements, limitations, and practical use cases explained in this guide.
How do I get the best results with Disable Windows Search on Windows 8.1 and Windows 7?
Follow the recommended steps, use current software or information, confirm compatibility, and review settings before major changes.
Are there any risks or limitations?
Potential limitations depend on compatibility, data quality, cost, privacy, support, and how the product or method is used.






Reader Comments 0
Sign in with email or Google to join the discussion.