How to disable applications that start with Windows 11
Applications that start with Windows are installed so that users can quickly access the programs they need every time they turn on their computers. However, some applications also take advantage of this feature to annoy users..
In addition, when there are too many applications that start with Windows 11 will start slower. Therefore, in this video tutorial, TipsMake.com will guide you how to turn off applications that start with Windows 11.
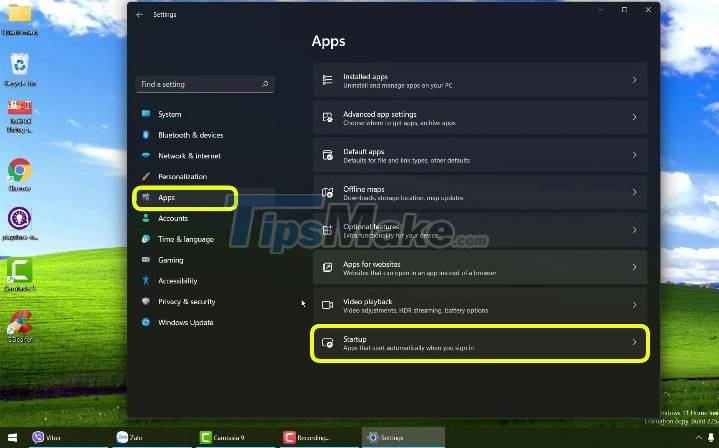
Method 1: Use Settings of Windows 11
The steps are as follows:
- Open Windows 11's Settings then go to Apps > Startup.
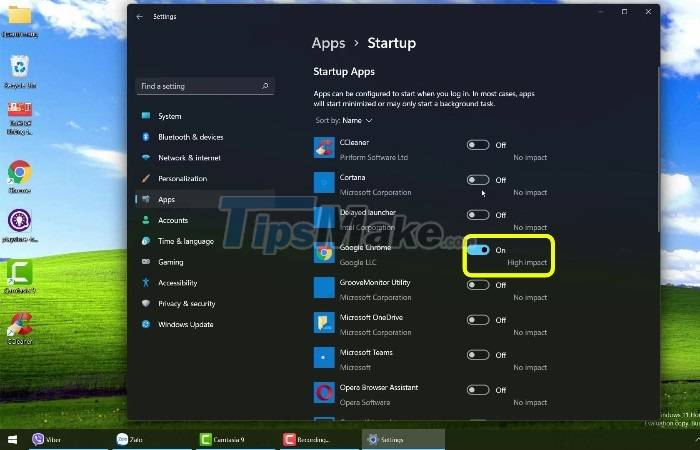
- On the new window that appears, switch the button to Off with the applications you want to disable starting with Windows 11.
Method 2: Use msconfig
- Open Run then type msconfig and press Enter.

- Click the Startup tab then click Open Task Manager

- Here, if you do not see the full interface, click More details.
- Find and tap the Startup tab.
- Select the application you want to disable from starting with Windows 11 and then click the Disable button.
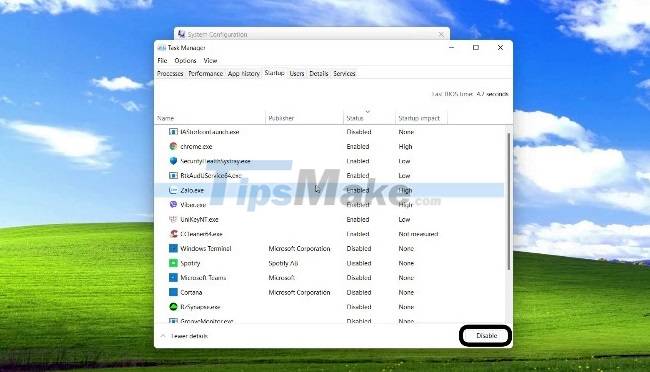
- You can also right-click the application you want to disable and select Disable.
Method 3: Use Task Manager
- Press Ctrl + Shift + Esc to open Task Manager
- Here, if you do not see the full interface, click More details.
- Find and tap the Startup tab.
- Select the application you want to disable from starting with Windows 11 and then click the Disable button.
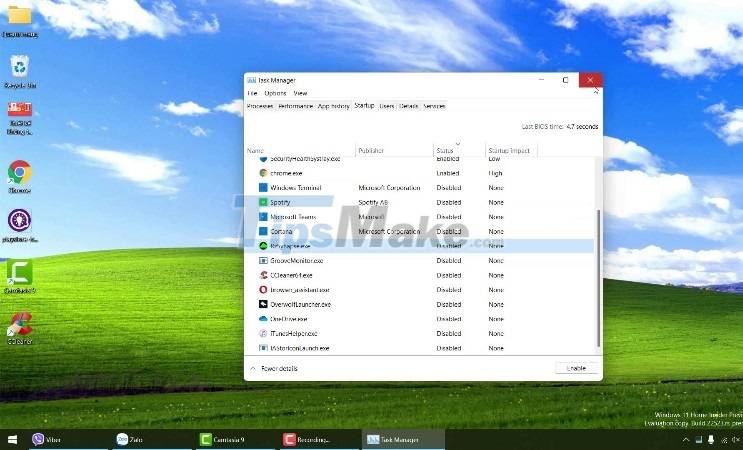
- You can also right-click the application you want to disable and select Disable.
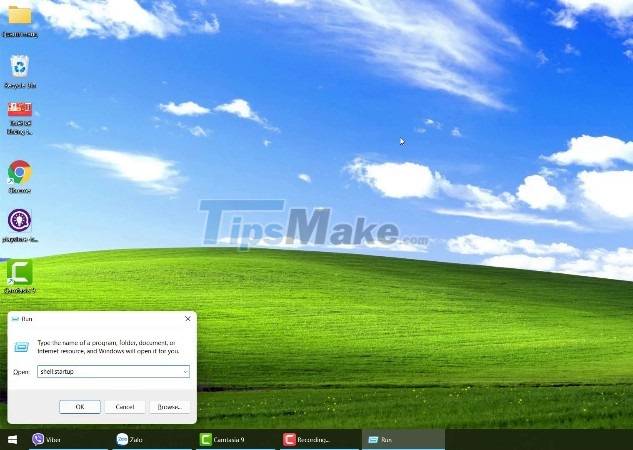
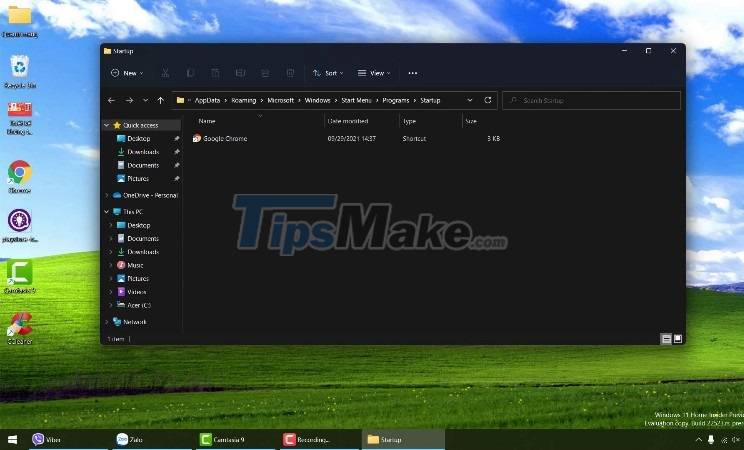
Method 4: Use the Startup folder
- You open Run then type shell:startup and then press Enter.
- In the newly opened Startup folder, delete the shortcut of the application that you want to disable starting with Windows 11.
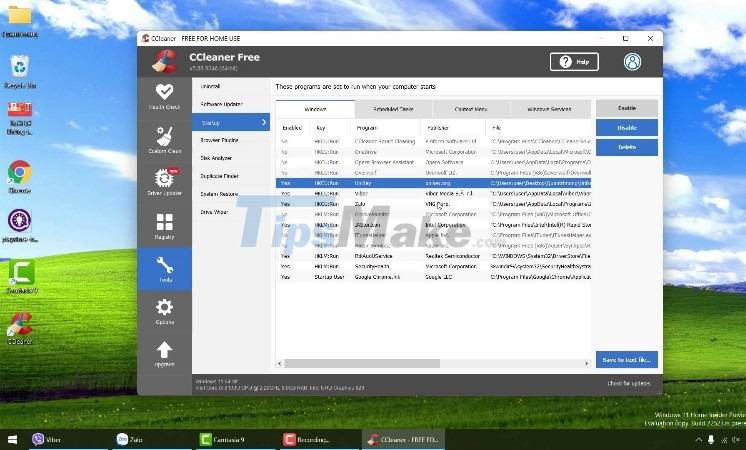
Method 5: Use the CCleaner application
- Download CCleander then install and open.
- Select Tools > Startup.
- Select the application that needs to be disabled from starting with Windows 11 and then click Disable.
Wish you all success and remember to support TipsMake.com as well as like and sub for TipsMake.com's YouTube channel too!