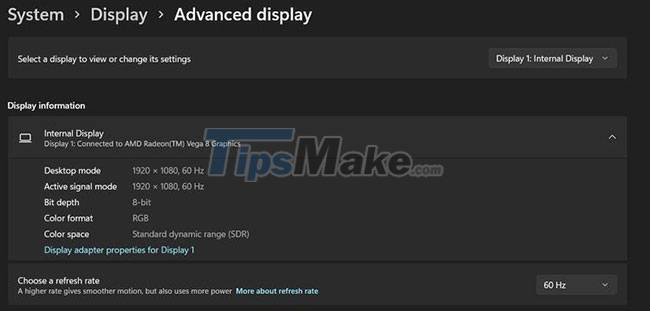
How to change the refresh rate on Windows 11
Refresh rate is simply the number of times per second an image is refreshed on the screen and it is measured in hertz (Hz). For example, a 144Hz monitor will refresh a new image 144 times per second; A higher refresh rate will make your graphics much smoother and improve the overall display experience.
Therefore, setting the correct refresh rate is an important part of getting a good visual experience. So here's how you can adjust the screen refresh rate on your Windows 11 PC.
How to change the refresh rate on Windows 11
If you're using a Windows 11 PC, you can quickly adjust your monitor's refresh rate with a few clicks through the redesigned Settings app. To change the refresh rate of the display:

Step 1. Launch the Start menu, search for Settings and click on the best match.
Step 2. From the sidebar menu, click System, and then select the Display tab.
Step 3. In the Related settings tab, click Advanced display.
Step 4. Now you will see a drop-down box next to Choose a refresh rate, choose the desired speed and your changes will automatically apply.
Step 5. If you want to adjust the refresh rate of different monitors, select the required display from the Select a display drop-down box to view or change its settings.
While the average user won't feel the need to change the refresh rate, gamers can notice a significant difference in their gaming experience with a higher refresh rate. Whatever the case, now you know how to properly adjust your system refresh rate in Windows 11.
Hope you are succesful.
You should read it
- ★ What does the Refresh Rate parameter on the computer screen, TV mean?
- ★ How to view and change the refresh rate of the Windows screen
- ★ Why is 90Hz screen a top factor when choosing a smartphone in 2020?
- ★ How to turn on 144Hz (or higher) on dedicated gaming screens
- ★ This is the smartphone with the cheapest 120Hz refresh rate in the world at the present time