Table of Contents
This updated guide explains how to Dictate on Word through clear steps, practical examples, and important checks that help prevent common errors.
Method 1 of 2:
Windows
-
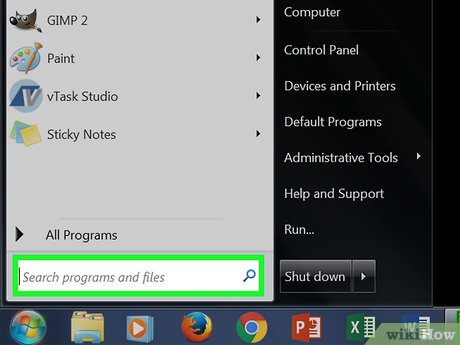 Press ⊞ Win+S to open the Search box.
 -
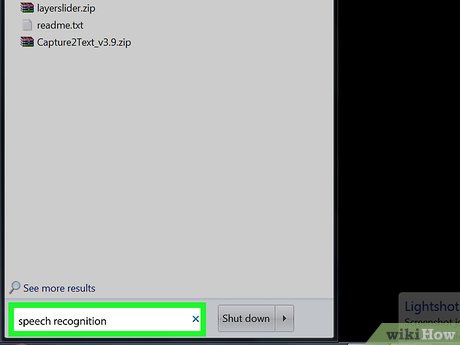 Type speech recognition. A list of matching results will appear.
- This may be called 'voice recognition' on some systems. The behavior will be the same.
-
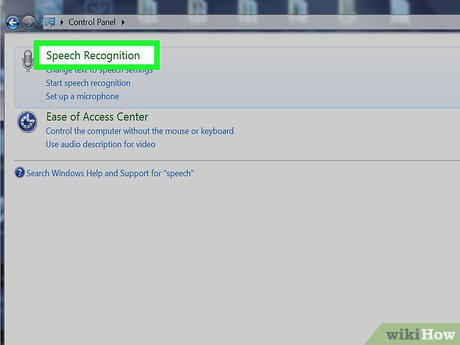 Click Speech Recognition. This opens the Speech Recognition control panel.
 -
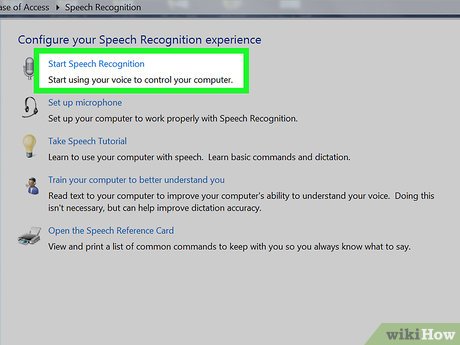 Click Start Speech Recognition. If you've already set up Speech Recognition, you'll see the voice recognition panel at the top of the screen. This means you're ready to get started.
- If it's your first time using Speech Recognition, you'll have to click Next to go through the setup process. Follow the on-screen instructions to teach the computer to recognize your voice. Once you complete the process, you'll see the voice recognition panel.
-
 Click the microphone icon. It's on the voice recognition panel. Now you're ready to start dictating.
 -
 Open Word. You'll find it in the Windows menu under 'Microsoft Office.'
 -
 Click where you want your text to appear.
 -
 Start speaking. You will now see your words appear on the screen as you speak.
Method 2 of 2:
macOS
-
 Click the Apple menu. It's at the top-left corner of the screen.
 -
 Click System Preferences.
 -
 Click Keyboard.
 -
 Click Dictation. It's one of the tabs at the top of the window.
 -
 Select 'On' next to 'Dictation. ' Clicking the circle will turn it blue and add a white dot at its center.
 -
 Check the box next to 'Use Enhanced Dictation. ' This allows you to use dictation offline, as well as continuous dictation with live feedback.[1]XResearch source
 -
 Click the red circle to close the Keyboard window.
 -
 Press Fn twice. Now you'll see a window with a microphone icon. Dictation is now active and ready to use. This is the dictation window.
 -
 Open Word. You'll usually find in the Applications folder or on the Launchpad.
 -
 Click the document where you want the text to appear.
 -
 Start talking. As you speak, your words will appear in the Word document.
FAQ
What is the easiest way to Dictate on Word?
Start with the requirements in this guide, then follow each step in order. Check the result after every major change so problems are easier to identify.
Can beginners follow these instructions?
Yes. The process is organized into practical steps, and you can repeat any step before moving forward.
What should I check if the method does not work?
Confirm your software or device version, permissions, settings, file format, and internet connection when the task depends on online services.
Related Articles
 Why Doesn't Word Have Dictate? How to Fix: Complete Overview6 minutes read
 Learn Dictate, Microsoft's Multilingual Dictation Feature3 minutes read
 How Does the Word in Microsoft Word Jump?: Word Error Jumps Word4 minutes read
 Steps to Fix Word Count Not Showing Up in Microsoft Word6 minutes read
 How to Create Text Inverted, Reverse the Word in Word4 minutes read
 Basic Tasks in Word 201311 minutes read
Reader Comments 0
Sign in with email or Google to join the discussion.