Table of Contents
This updated guide explains how to Delete a Contact through clear steps, practical examples, and important checks that help prevent common errors.
Method 1 of 9:
Deleting a Contact on iPhone
-
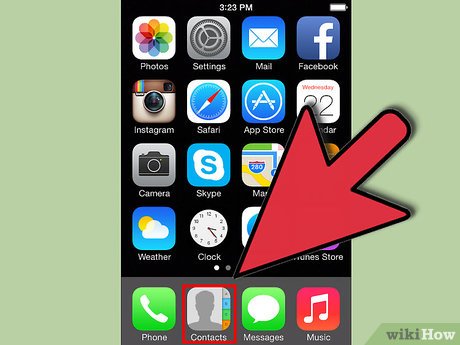 Open the 'Contacts' app on your iPhone.
 -
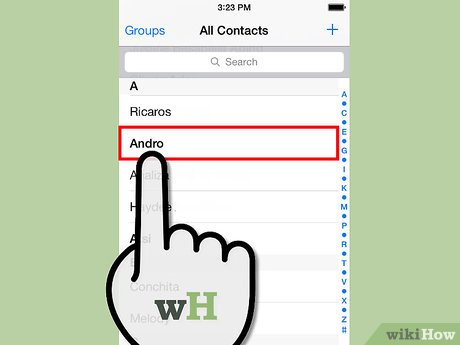 Navigate to and tap on the contact you want deleted from your phone.
 -
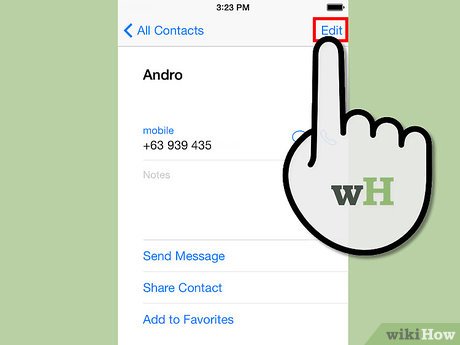 Tap on 'Edit' in the top right corner of your contact's Info screen.
 -
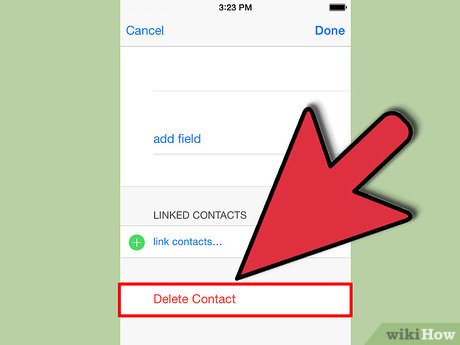 Scroll to the bottom of the Edit screen and tap on 'Delete Contact.'
 -
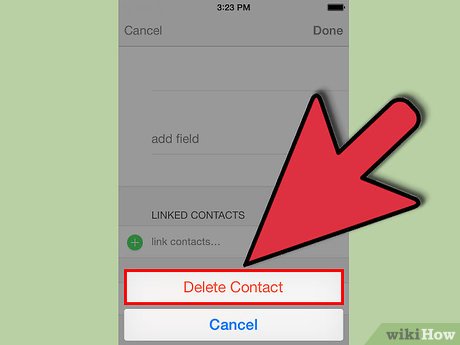 Tap on 'Delete Contact' when asked to confirm that you may need to delete the contact. That particular contact will now be deleted from your iPhone[1]XResearch source.
Method 2 of 9:
Deleting a Contact in Gmail
-
 Log into your Gmail account at https://mail. google. com/.
 -
 click 'Gmail' at the top left corner of your session and select 'Contacts.'
 -
 Place a checkmark next to the name of the contact you want deleted.
 -
 click the 'More' button and select 'Delete contact.' The contact you selected will now be removed permanently from your Gmail account[2]XResearch source.
Method 3 of 9:
Deleting a Contact in Windows 8
-
 Tap or click the 'Start' icon of your Windows 8 device.
 -
 Tap or click 'People.'
 -
 Type the name of the contact you want deleted into the search field provided.
 -
 Tap or click the name of the contact you want deleted when it appears in search.
 -
 Swipe in from the bottom edge of the screen to access additional options.
- If you are using a mouse, right-click anywhere within the People app to access additional options.
-
 Tap or click 'Delete.' The contact you selected will now be removed from your People, Mail, and Calendar apps in Windows 8[3]XResearch source.
Method 4 of 9:
Deleting a Contact in Windows 7 / Vista
-
 click the 'Start' button of your Windows 7 or Windows Vista computer.
 -
 click 'All Programs' and select 'Windows Contacts.'
 -
 Navigate to the contact you want deleted from Windows Contacts.
 -
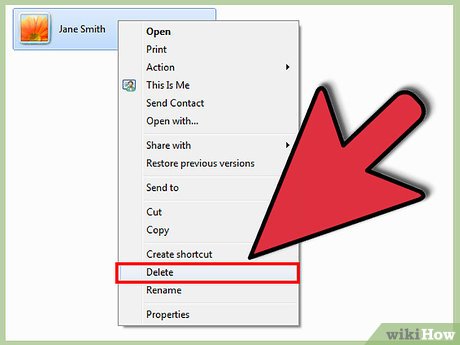 Right-click the contact you want deleted and select 'Delete.' The contact you deleted will no longer be available in Windows Contacts or Windows Mail[4]XResearch source.
Method 5 of 9:
Deleting a Contact on Blackberry Devices
-
 Select the 'Contacts' icon from the Home screen of your Blackberry device.
 -
 Navigate to the contact you want deleted from your Blackberry.
 -
 Press the Blackberry key on your device. The Blackberry key contains the image of the Blackberry logo.
 -
 Select 'Delete' from the list of options provided. The contact you chose to delete will no longer be available in your Contacts app[5]XResearch source.
Method 6 of 9:
Deleting a Contact from Yahoo Mail
-
 Log in to your Yahoo Mail account at https://login. yahoo. com/config/mail.
 -
 click the arrow next to 'Address Book' located at the bottom of your Yahoo Messenger list.
 -
 Navigate to the contact you want deleted from Yahoo Mail.
 -
Right-click the contact you want deleted and select 'Delete.''

-
 Select 'Yes' when asked to confirm that you want that particular contact deleted. The contact you selected will no longer show up in Yahoo Mail or Yahoo Messenger[6]XResearch source.
Method 7 of 9:
Deleting a Contact on Facebook
-
 Sign in to your Facebook account at https://www. facebook. com/.
 -
 Navigate to the 'Friends' list in the left pane of your Facebook profile.
 -
 click the profile of the contact or friend you want deleted from Facebook. Your contact's timeline and profile page will display onscreen.
 -
 Point to the button labeled 'Friends' at the top of the contact's Facebook timeline.
 -
 Select 'Unfriend' from the list of options provided. Going forward, that contact will no longer display in your Facebook timeline, and your own Facebook profile will also be removed from that particular contact's timeline[7]XResearch source.
Method 8 of 9:
Deleting a Contact on Twitter
-
 Log in to your Twitter account at https://twitter. com/.
 -
 Navigate to or click the profile of the contact you want deleted from your Twitter timeline.
 -
 Point to the blue button labeled 'Following' at the top of the contact's Twitter timeline. The button will then change to read 'Unfollow.'
 -
 click the 'Unfollow' button. That particular contact will no longer display in your Twitter timeline[8]XResearch source.
Method 9 of 9:
Deleting a Contact on LinkedIn
-
 Sign in to your LinkedIn account at https://www. linkedin. com/.
 -
 click the 'Connections' tab on your LinkedIn profile.
 -
 click the name of the contact you want deleted from LinkedIn. That person's LinkedIn profile will display onscreen.
 -
 click the arrow next to 'Send a message' at the top of the contact's profile.
 -
 click 'Remove connection' from the list of options provided.
 -
 click 'Remove' to confirm that you may need to delete the contact. That person will then be removed permanently from your LinkedIn profile[9]XResearch source.
FAQ
What is the easiest way to Delete a Contact?
Start with the requirements in this guide, then follow each step in order. Check the result after every major change so problems are easier to identify.
Can beginners follow these instructions?
Yes. The process is organized into practical steps, and you can repeat any step before moving forward.
What should I check if the method does not work?
Confirm your software or device version, permissions, settings, file format, and internet connection when the task depends on online services.
Related Articles
 The Note When Wearing Contact Lenses5 minutes read
 Instructions on How to Share Contacts in Microsoft Outlook6 minutes read
 How to Delete Phone Numbers on iPhone and Mac6 minutes read
 Unexpected Discovery: Teenagers Wearing Contact Lenses Who Wear Bad3 minutes read
 How to Hide Contact Information on Instagram: Step-by-Step Guide3 minutes read
 How to Adjust Contact Photo Privacy on iPhone3 minutes read
Reader Comments 0
Sign in with email or Google to join the discussion.