How to create Primary Zones in Windows Server 2012
To manage DNS, we have to create a Primary Zone because by default, there is no zone to manage records at all..
To manage DNS, we have to create a Primary Zone because by default, there is no zone to manage records at all. The following article will show you how to create Primary Zones in Windows Server 2012.
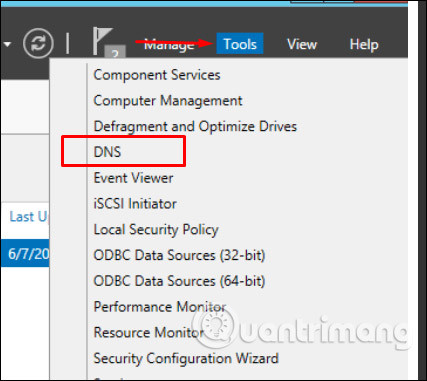
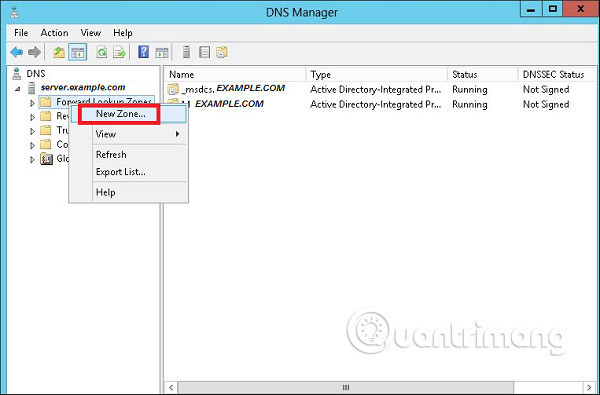
Step 1 - To manage DNS, go to Server Manager → Tools → DNS → Right click on ' Forward Lookup Zone ' → New Zone .
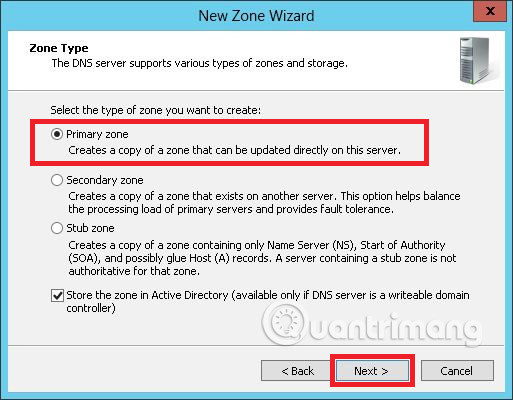
Step 2 - Select ' Primary Zone ' and then click Next .
Step 3 - Enter the name of the Primary Zone for which you want to manage the logs.

Step 4 - Select the option ' Create a new file with this filename '.

Step 5 - If you want to update this zone's record manually, you must select ' Do not allow dynamic Updates ', as shown in the following screenshot.

Step 6 - Click the Finish button.

See more:
- Learn Resource Monitor tool in Windows Server 2012
- How to install DNS Role in Windows Server 2012
- How to create DC Accounts in Windows Server 2012