How to create images with AI in Krita
This powerful feature allows anyone to create stunning images with ease, and in this article, TipsMake will show you how to set up Generative AI for Krita and get the most out of it. .
How to install the Generative AI for Krita plugin
Setting up and running the Generative AI for Krita plugin is simple, as long as you meet its hardware requirements. More specifically, you need to have a decent GPU with at least 6GB of VRAM. It's technically possible to create an image using only your CPU, but it's so slow that the article can't recommend it.
If you have a capable GPU, you can start by downloading Krita 5.2.0 or later from the Krita website, then install it like any other Windows, macOS, or Linux software.
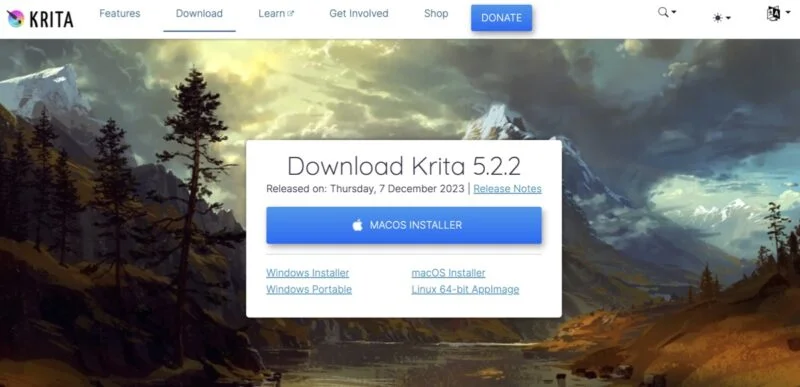
Next, download the Generative AI plugin from its GitHub page. Once you have the plugin, you will need to extract it into the pykrita folder on your system. The location of this folder varies, depending on your operating system:
- For Windows users, the folder is usually found at 'C:UsersAppDataRoamingkritapykrita'.
- On Linux, look for '~/.local/share/krita/pykrita'.
- macOS users should navigate to '/Users//Library/Application Support/krita/pykrita'.

After placing the plugin in the correct folder, the next step is to activate it in Krita. On Windows and Linux, go to Settings -> Configure Krita -> Python Plugin Manager. On Mac, go to Krita -> Preferences -> Python Plugin Manager. Find the plugin in the list, make sure it's selected, then restart Krita to activate the plugin.

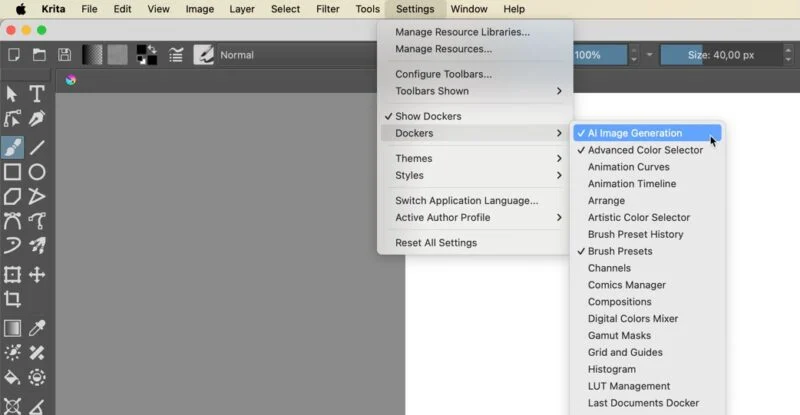
Once Krita is back up, you're almost ready to start creating AI images. Open a new document (make sure to customize its size based on your preferences), then navigate to Settings -> Dockers -> AI Image Generation to bring up the plugin's docker, which is essentially a container panel. certain tools.
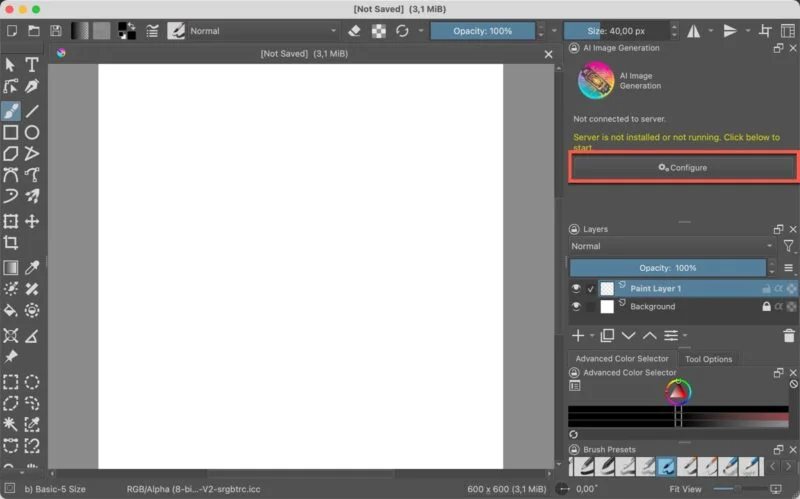
Click Configure in docker to begin the server installation process. Note that this step requires at least 10GB of free disk space on the device.
To create an image with the plugin, you need to install all core components, at least one Stable Diffusion version (the article recommends version 1.5, because it requires less VRAM), and at least one Stable Diffusion checkpoint . (All three checkpoints conveniently provided by Krita are great, so it doesn't matter which one you choose if you're just starting out).
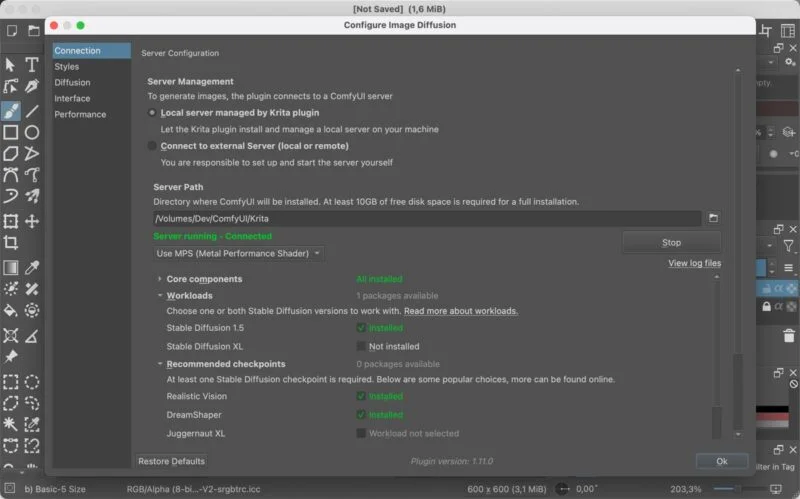
The screenshot above shows what it looks like when the plugin is ready to use.
How to create AI images in Krita
Now that everything is set up, create your first AI image in Krita. The process is very simple and includes only 3 steps.
First, choose one of the two preset settings provided (Cinematic Photo or Digital Artwork). To further customize the style, click the gear icon next to the drop-down menu, select model checkpoint (LoRA), provide your own model prompt, and customize the model settings. If you don't know what this means, you should stick to the two default preset settings until you further advance your Stable Diffusion skills.
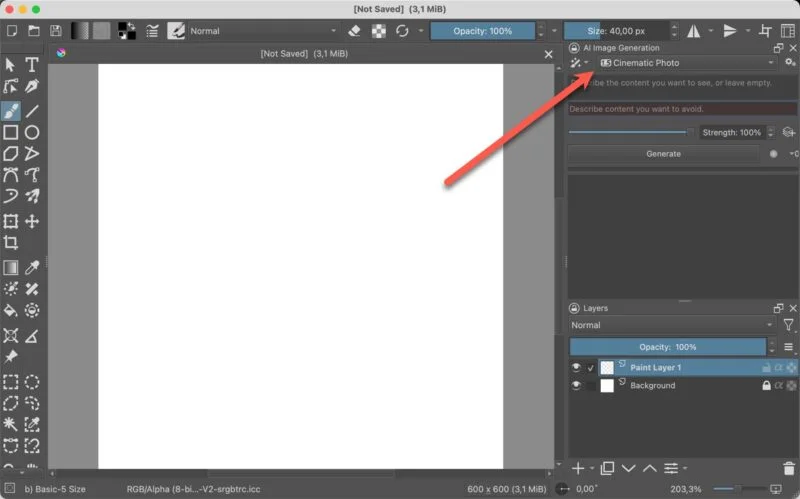
Next, enter positive and negative reminders in the respective fields. The author of the article chose '1girl, drinking coffee, cozy room, early morning, realistic, photo' for positive suggestions and 'ugly, deformed, digital art, painting' for negative suggestions.
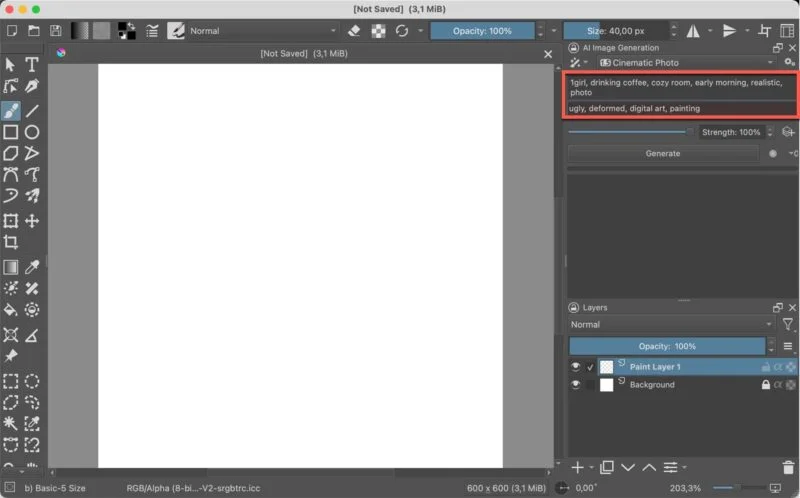
Finally, click the Generate button while leaving the Strength slider at 100%. (That's the setting you want to use whenever creating a new image from scratch). The image will be created after a short time (depending on your GPU performance). Remember that the first image always takes the longest to create.
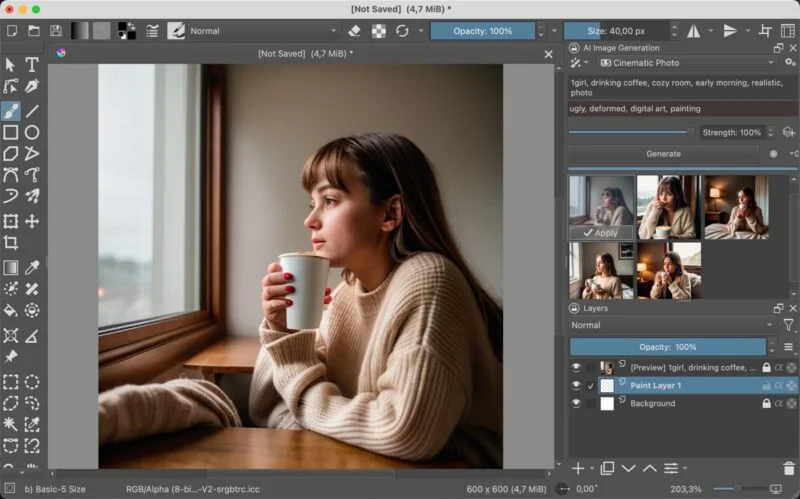
Some versions will be provided by Krita. Choose the one you like best and click Apply.
You should read it
- ★ How to color faster in Krita using Colorize Mask
- ★ How to create GIF images with Google's Gboard keyboard on iPhone and Android
- ★ Instructions for creating GIF images on YouTube do not need software
- ★ How to create gif images from videos with Workflow on iPhone
- ★ 5 effective online Gif image creation tools