How to create a Slide Master on PowerPoint - Create a new theme for the slide
Each Slide Master is the common interface for all branch slides. Each branch slide will have a different layout based on the general format of the Slide Master. So with Slide Master, users will format the entire slide, or newly added slides, saving formatting time and working faster. The article below will show you how to create a Slide Master on PowerPoint.
What is Slide Master in PowerPoint?
The Slide Master in PowerPoint is the main slide that defines and sets the layout, colors, fonts, backgrounds, effects, and almost everything else for the slides that follow it. Any changes you make to fonts or upload logos in Slide Master - they will automatically be applied to all slides below.
Think of the Slide Master as the starting point where you define the design principles for your entire PowerPoint presentation.
Once you activate and design a Slide Master, you can make changes to your entire presentation instantly instead of repeating the same changes for each slide.
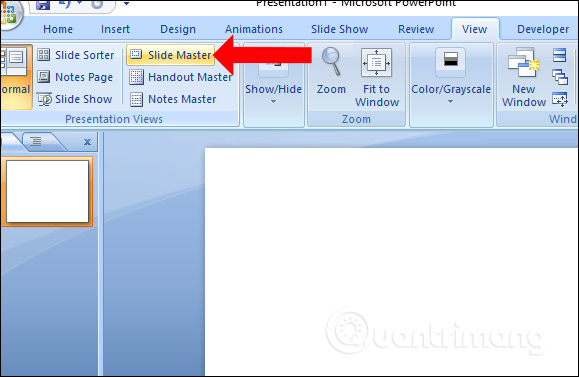
To turn on Slide Master and start customizing, go to View > Slide Master .
The main uses of Slide Master include:
- Change fonts on all slides : Remember that you need to be in the Slide Master tab to make global changes to your presentation.
- Change colors on all slides : Changing colors in the Slide Master happens by changing the entire color palette for the presentation, including primary accent colors, secondary colors, etc. You can easily Customize them so you can apply your own brand colors for a consistent design.
- Change background on all slides : Similar to other settings, you can instantly change the background color of all your slides with just one operation. The good thing is that you can still change the background of single slides below your Slide Master so there's enough flexibility there.
Quick start Guide
- Create Slide Master on PowerPoint : At the first slide interface, click View > Slide Master . Click on the first slide on the Slide Master branch to format the slide. Format slides according to needs. After formatting is complete, click Close master to complete creating Slide Master. Click the Home tab , select New Slide and the slides will have the format of the created Slide Master applied.
- Create another Slide Master format : Click View and select Slide Master. The previously created Slide Master will be displayed. Skip the first slide and then select another slide below to change the format. Add other content according to the slide format you want to use. After changing the format, click Close Slide Master . Return to the Home tab and click New Slide.
- Save Slide Master format : Click the Design tab , look down at the Themes section , click the down triangle icon to expand options. Click Save Current Theme to save the current format. The theme saving interface displays, name the theme, click Save. To use a saved theme, click Design > drop-down triangle icon > Browse for Theme. Find the theme storage folder and then click on the theme you want to use.
Detailed instructions
1. How to create Slide Master on PowerPoint
Step 1:
At the first slide interface on PowerPoint, click View and select Slide Master .
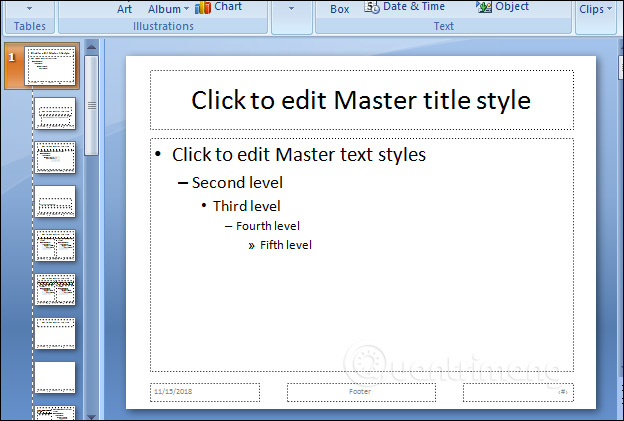
The Slide Master branch appears as shown below. Click on the first slide to format the slide.
Step 2:
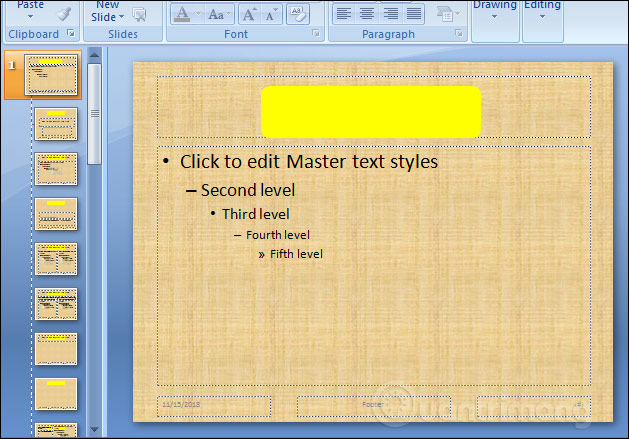
You format the slide, insert the content you want such as inserting images, frames, adjusting text format, inserting images, logos, etc. Depending on the user's needs, we format the first slide to use. use.
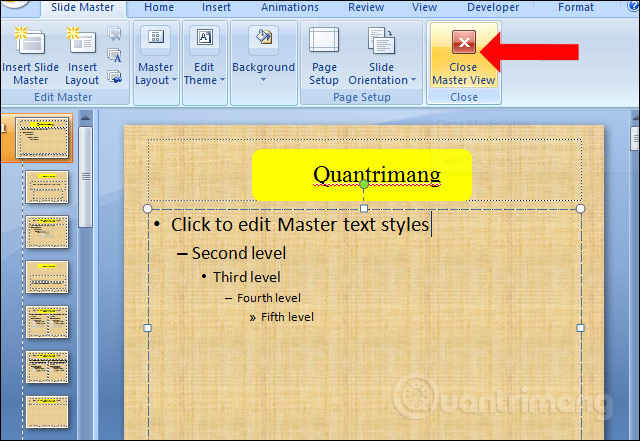
After formatting the first slide, click Close master to complete creating the Slide Master.
Step 3:
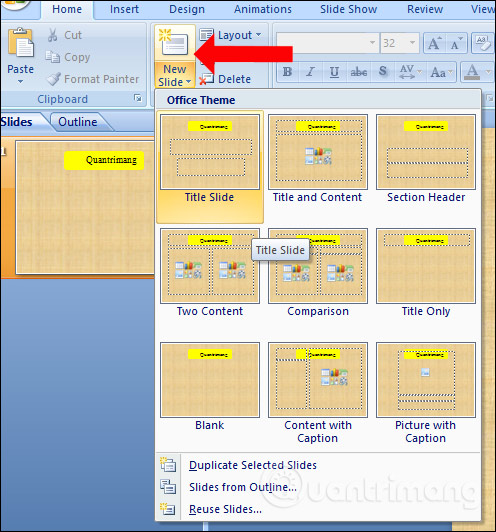
Now when you click on the Home tab , select New Slide and you will see the slides have the format of the created Slide Master applied.
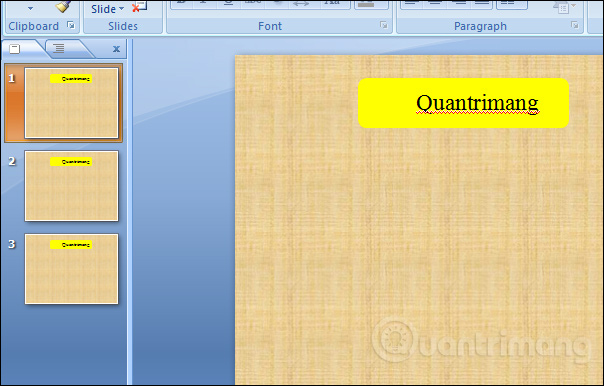
When you create new slides, the formatting will be applied immediately to those newly added slides. As shown in the picture, all 3 slides have the same format, without having to create each slide.
Thus, users have shortened the time and operations when formatting slides on PowerPoint.
2. How to create another Slide Master format
When you create a Slide Master, the other slides will have that format applied. However, while presenting content, sometimes you require a few slides to have a different format than the original Slide Master.
Step 1:
We also click View and select Slide Master . The previously created Slide Master will then display. Skip the first slide and then select another slide below to change the format.
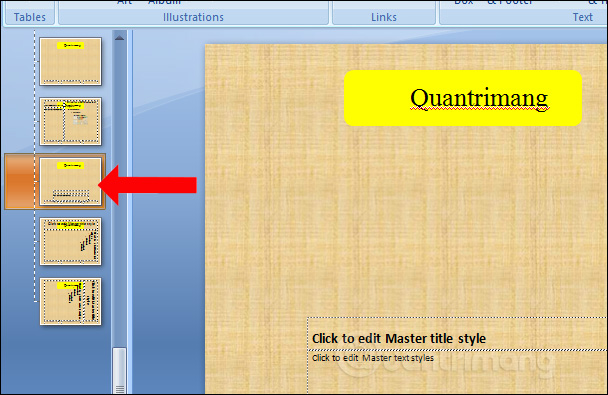
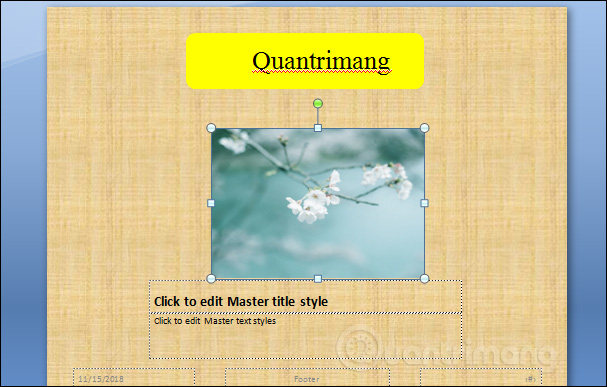
Users enter additional content according to the slide format they want to use. For example, add an image to a new slide.
Step 2:
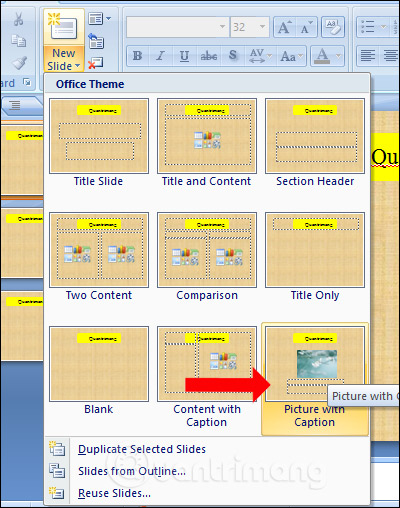
After changing the format, click Close Slide Master. Go back to the Home tab and click New Slide and you will see a new slide created in a different format.
Step 3:
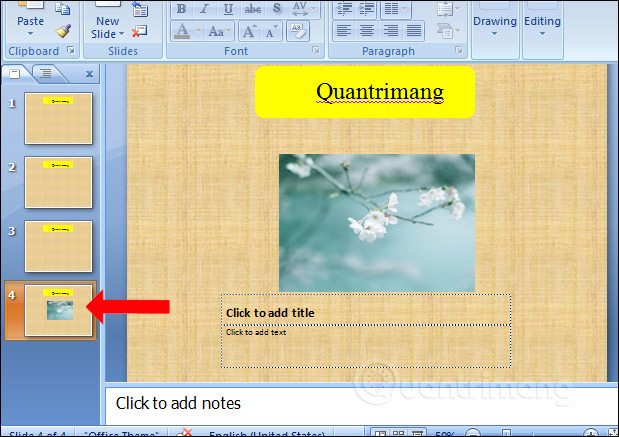
Click on the slide you want to use and you will see slides with different formats displayed along with slides in the same format.
So in 1 Slide Master we can create many different formats, based on the format of the first slide.
3. How to save Slide Master format
To use the created Slide Master for future slide making, users should save the Slide Master.
Step 1:
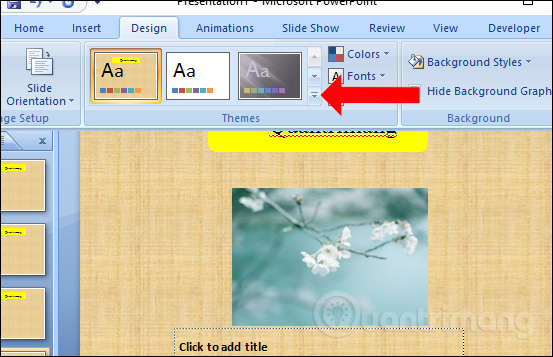
Click on the Design tab then look down at the Themes section and click on the down triangle icon to expand options.
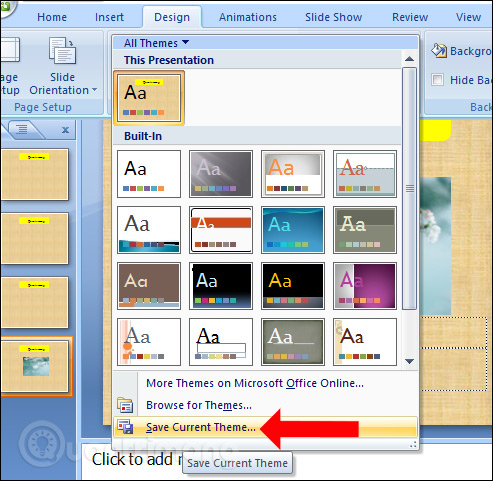
Click Save Current Theme to save the current format.
Step 2:
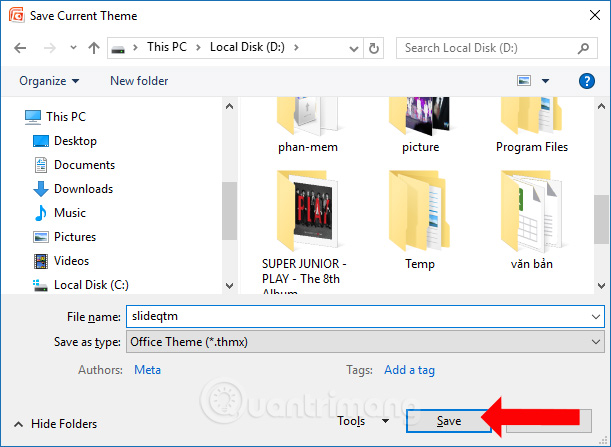
Display the theme saving interface, name this theme and click Save. By default the theme will be saved in the C:UsersUserAppDataRoamingMicrosoftTemplates folder. But you can choose another folder to save.
Step 3:
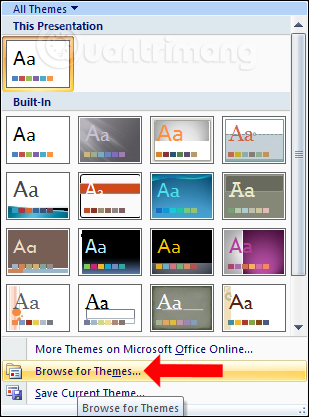
To use a saved theme, click Design then click the drop-down triangle icon and select Browse for Theme…
Step 2:
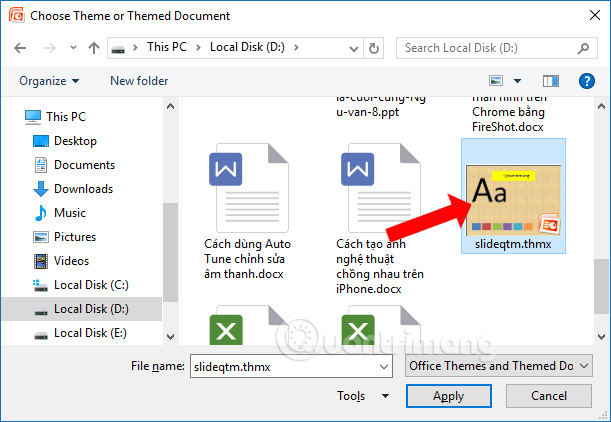
Find the theme storage folder and click on the theme you want to use.
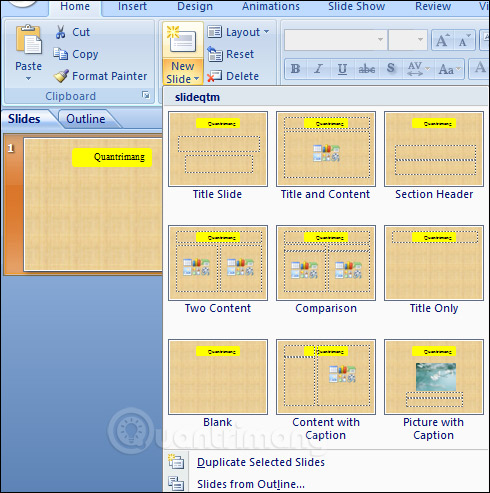
Soon we will see the previously created theme, including slides of the same and different formats.
So we have created a Slide Master on PowerPoint to use when needed. You only need to create the format for the slide the first time, the next time you just need to use it and add other content to complete the presentation.
Wishing you success!