How to create a date table in Power BI
Date and time are very important in data analysis. So here's how you can create data tables in Power BI for more accurate results..

Dates are an important piece of data that can influence the results of your analysis. Therefore, creating a date-time field in Power BI is necessary to ensure accurate data analysis, helping you to optimize reports.
Whether you're looking at sales numbers, financial statements, customer behavior, customer feedback, or web traffic, having accurate date & time data can provide a valuable overview. This is where Power BI dates are needed.
What is a date sheet and why do you need it?
Date Table is a table of dimensional data, containing properties such as year, month, and day of the date. This table contains one value per day. This value is the date. Therefore, this is why it is also called calendar tables.
When analyzing data in Power BI, you need a date table because:
- Intelligent timing data analysis.
- Filter dates and references in templates.
- Generate reports that need information related to dates.
- Make sure all dates available in the data have dates correctly formatted and centralized to the data model.
- Create information-rich images.
- Provide consistent and standard dates for reports.

Necessary conditions to create a date table
- The first column is a date column and should be in date/time format.
- The date value of the first column must be unique, not blank.
- The date table markup is created as a date table.
- Dates cannot be missing values and contain all dates for a period (which can be several months to a year or more).
How to create a date table with Auto Date/Time
The Power BI Auto Date feature automatically creates a date table and a date hierarchy based on columns in the data. It also updates the date based on your baseline data. With the created hierarchy, you can drill down, aggregate, and filter data based on specific dates or specific periods.
To enable the Auto date feature:
- Navigate to File ribbon > Options and Settings .
- Then select Options > Current File > Data Load > Time Intelligence .
- Check the box Enable Auto date/time .
The date hierarchy here will include Year, Quarter, Month and Day.

How to create a date table with DAX
One thing that sets Power BI apart from Microsoft Excel is Power BI's Data Analysis Expression (DAX) functions. Although DAX can be used in Excel, it is not intuitive to this application.
CalendarAuto and Calendar are two DAX functions that create these tables. The only difference between both functions is that Calendar generates a date based on the data you select, while the CalendarAuto function generates a date based on what it automatically detects from your data.
To use the Calendar function:
1. Navigate to the Home Tab in the ribbon of Power BI Desktop .
2. Select New Table .
3. Enter the DAX formula below. This formula will create a table of dates from January 1, 2022 to December 31, 2023.
Date = CALENDAR(DATE(2022,1,1), DATE(2023,12,31))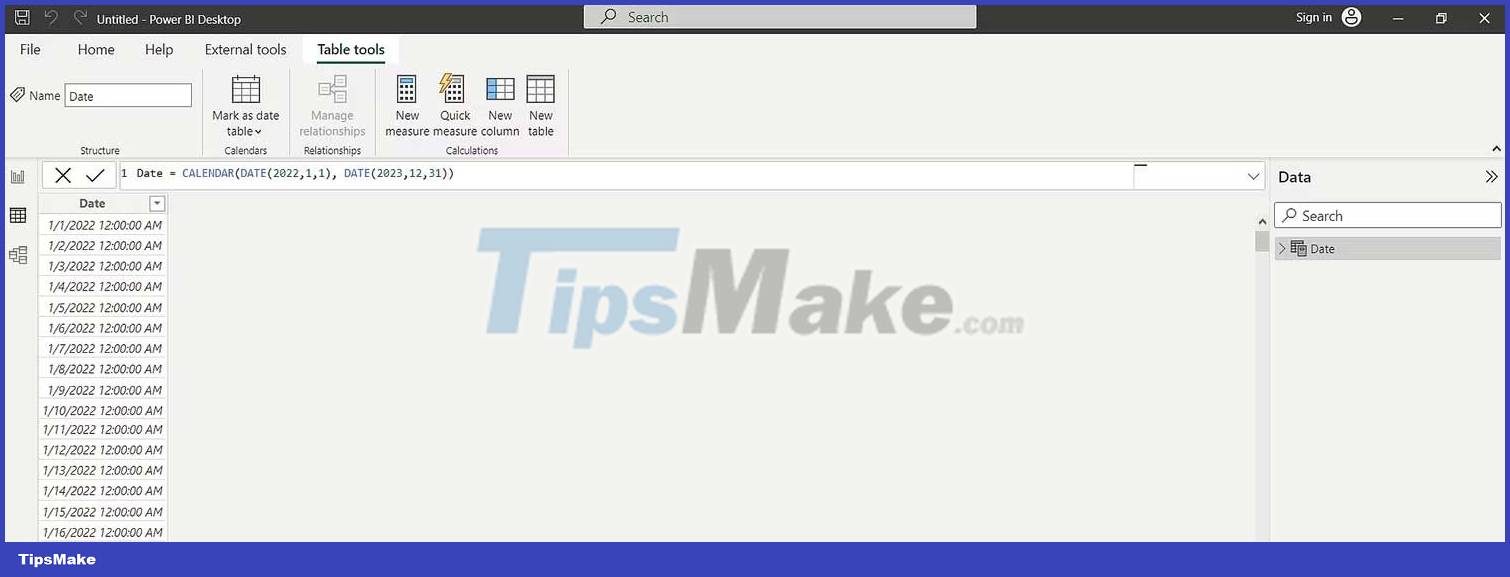
4. If you want it to increase itself, you can replace the end date with TODAY() as shown below.
Date = CALENDAR(DATE(2022,1,1),TODAY())5. To add a Year column, select New column and use the YEAR function to write this DAX function.
Year = YEAR('Date'[Date])6. Select New column and add a date column using the MONTH() DAX function. However, this function writes the month in numeric format.
Month = MONTH('Date'[Date])7. For a category function, use the FORMAT() function.
Month Cat = FORMAT('Date'[Date],"MMM")You must sort the month in the Cat column by the Month column using the Sort By Column option.
8. You can create a date column using the DAY() function.
Day = DAY('Date'[Date])9. The WEEKNUM() function tells you the week containing the date:
Week = "Week " & WEEKNUM('Date'[Date])10. The QUARTER() function tells you which quarter contains the date:
Qtr = "Qtr " & QUARTER('Date'[Date])How to set a table as a date table
After you have created the date table, you need to mark the newly created table as the date table. This is the final step in the process.
You can do the following:
- Right-click the table name in the Field pane.
- Select Mark as date table .
You can also use the Mark as date table on the Power BI ribbon.
- Select date .
- Select OK .

Above is how to create a date table in Power BI. Hope the article is useful to you.