How to create bullets in PowerPoint
PowerPoint content editing tools are quite similar to Word or Excel. On PowerPoint you can also create bulleted characters, either by numbers or by dots or squares. Users can use the first line numbering function with characters or use Bullets with different headers. The following article will show you how to create a bullet headline on PowerPoint.
- Word 2013 Complete Guide (Part 10): Bullets, Numbering, Multilevel list in Microsoft Word
- Enter the serial number and the automatic initial character MS Word
- Summary of useful shortcuts in PowerPoint
Instructions for creating the first line of PowerPoint
Method 1: Number the first line of content
Step 1:
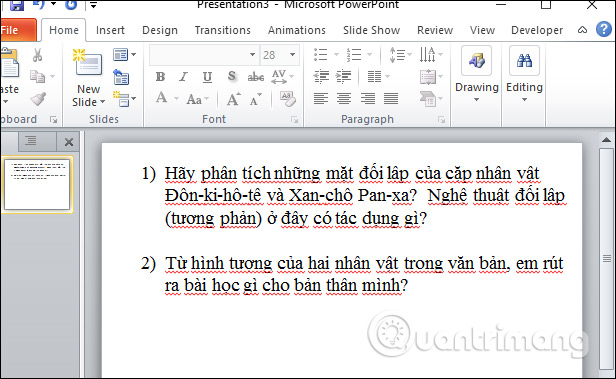
Black out the content on PowerPoint to create the first line, users click on the Home tab and then in the Paragraph group, click the Numbering icon with the line number character.

Step 2:
Appear different types of line numbering for you to choose. We can choose the type of roman number, the font to number the first line.

The line character will be applied to the content as shown below.
Step 3:
If you want to make other customizations, click on Bullets and Numbering .
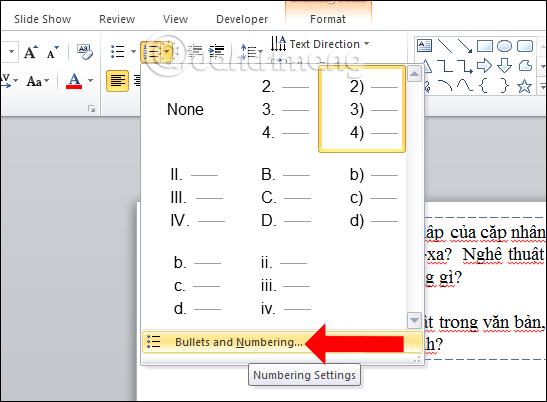
Step 4:
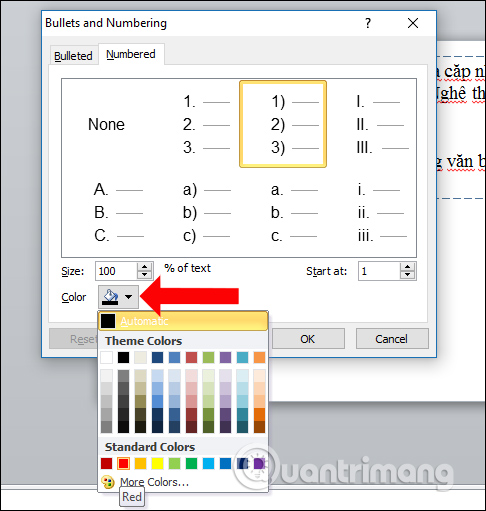
In the Bullets and Numbering dialog box, we can select colors for the number of lines in the Color field. In addition, you can also adjust the headline character size in Size, Start at to adjust the start numbering value without having to follow the order starting from 1.
Finally click OK to save.
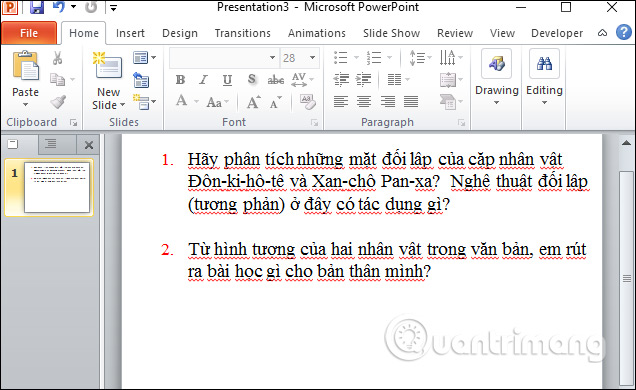
As a result, we will have the numbering characters added as shown below.
2. How to use Bullets to create leading characters
Step 1:
We also black out the content in PowerPoint and click on the Bullets character section.
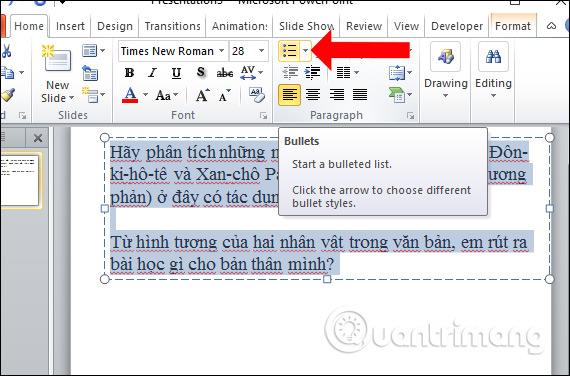
Next, we select the prefix line style available in the list.
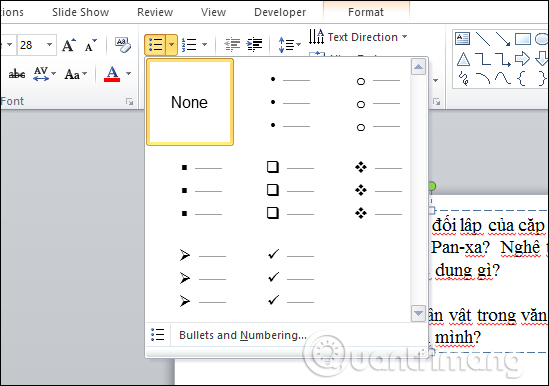
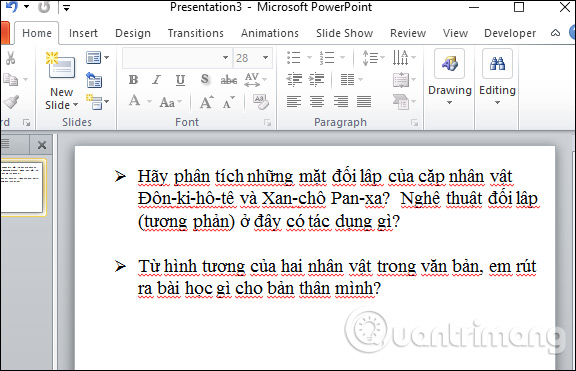
After that we will have the top notation on PowerPoint as shown below.
Step 2:
If you want to edit more users click on Bullets and Numbering .

Step 3:
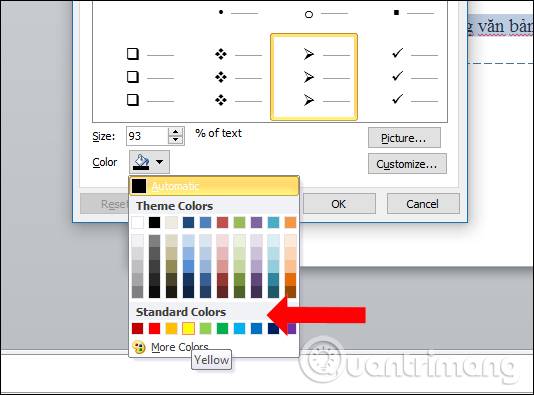
In the new dialog box, users can also select the color in the Color section, the symbol size in the Size section.
If you want to add a bullet header, click on Customize . Display the Symbol table so that you can select the characters you want to add to the list. Click on the character then press OK.
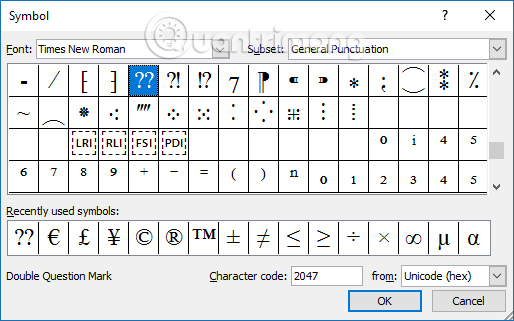
You will then see a new character appear in the list of bulleted characters.
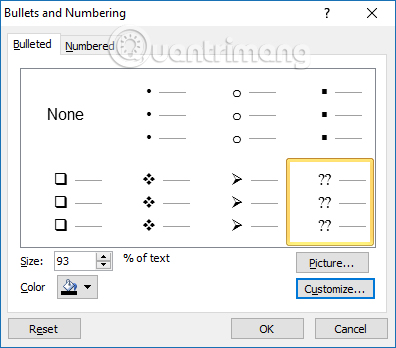
Step 4:
To use the image as a line character, click on Picture… Show the folder on the computer to select the image. Click on the image and then click the Insert button below.
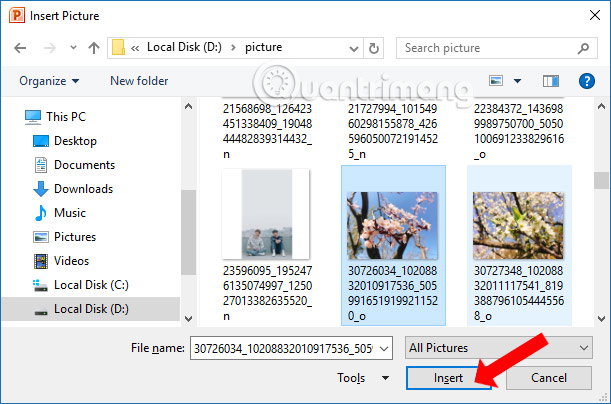
The image will then be set as the first line character and will automatically be scaled to fit the entire slide layout. Users can customize the size if desired.
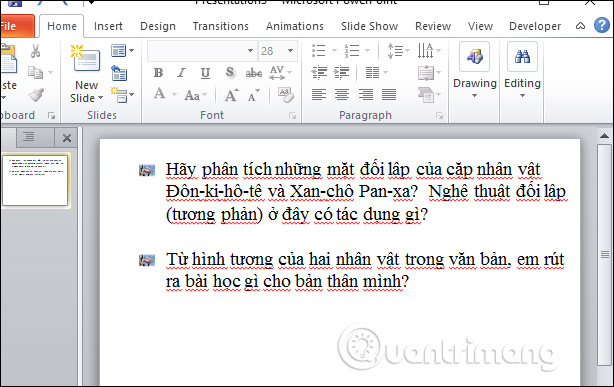
Thus, you will have 2 ways to create bulleted characters in PowerPoint, with the number of lines or the first line characters. Users can still customize characters such as color, size, or can use the characters, images available on the computer.
See more:
- How to insert text into images in PowerPoint
- MS PowerPoint - Lesson 10: Slide presentation effects
- Fix 6 common errors on PowerPoint slides
I wish you all success!