Table of Contents
This updated guide examines How to Hide a File in an Image File and organizes the essential facts, background, and practical takeaways in clear American English.
Method 1of 2:
On Windows
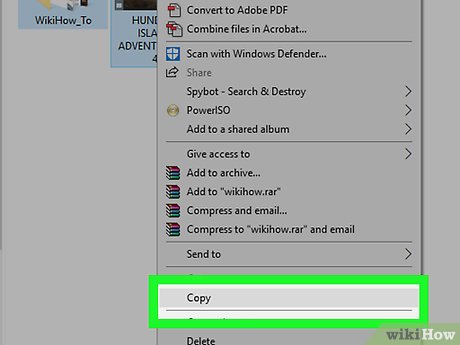 Copy the the file(s) and the image to your desktop. Select the files you want to hide, pressCtrl+C, go to your desktop, and pressCtrl+V, then do the same with the image you want to use.
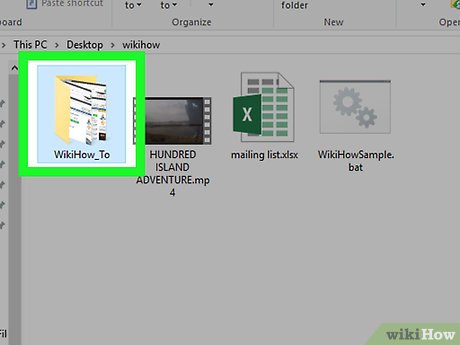 Select the file(s) you want to hide. Click and drag your mouse cursor across the list of files you want to hide.
- If you're just hiding one file, click once the file to select it.
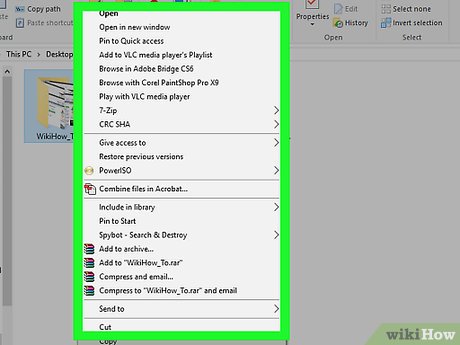 Right-click a selected file. Doing so will prompt a drop-down menu.
- If your mouse doesn't have a right-click button, click the right side of the mouse, or use two fingers to click the mouse.
- If your computer uses a trackpad instead of a mouse, use two fingers to tap the trackpad or press the bottom-right side of the trackpad.
 SelectSend to. It's near the middle of the drop-down menu. A pop-out menu will appear.
 ClickCompressed (zipped) folder. This option is near the top of the pop-out menu. Doing this creates a new ZIP folder with your files inside.
 Enter a name for the ZIP folder. After the ZIP folder appears, type in whatever you want to name the ZIP folder and press↵Enter.
- It's best if you choose a one-word name for the ZIP folder.
 Right-click the image. A drop-down menu will appear.
 ClickProperties. It's at the bottom of the drop-down menu.
 Check the image's extension. In the parentheses next to the "Type of file" heading, you'll see the type of file your image is (this will usually be either ".jpg" or ".png").
 Copy the image's location. Click and drag your mouse cursor across the address to the right of the "Location" heading, then pressCtrl+C. This will ensure that you enter the path to your files correctly.
- You can close the Properties window after doing this.
 Open Command Prompt. Open Start
 , type incommand prompt, and click
 Command Prompt at the top of the Start menu.
 Change the directory to your desktop. Type incdand press the spacebar, then pressCtrl+Vto paste in the copied address and press↵Enter. This will change Command Prompt's focus to use the desktop.
 Type in the "Copy" command. The command to place the file(s) in your image is as follows:copy /b image.extension + folder.zip image.extension where "image.extension" is replaced by the image's name and its extension (e.g., "hello.jpg") and "folder.zip" is replaced by the ZIP folder's name and extension (e.g., "hi.zip").
- For example, if your ZIP folder is named "Secret" and your image is a JPG named "Hide", you would type incopy /b Hide.jpg+Secret.zip Hide.jpghere.
 Press↵Enter. Doing so runs the command and places the ZIP folder inside of the image.
 View your hidden files. Once your image contains the ZIP folder, you can double-click the image file to open the image as-is; however, if you want to view the image's hidden files, do the following:
- Install WinRAR if you don't have it.
- Open File Explorer
 .
. - Click the View tab.
- Check the "File extensions" box in the "Show/hide" section.
- Go to the image file you used, right-click it, and click Rename .
- Replace the image file's extension with "rar" (e.g., "Hide.jpg" would become "Hide.rar").
- Press↵Enter, then click Yes when prompted.
- Double-click the image file to open it in WinRAR.
Method 2of 2:
On Mac
 Copy the the file(s) and the image to your desktop. Select the files you want to hide, press⌘Command+C, go to your desktop, and press⌘Command+V, then do the same with the image you want to use.
 Select the file(s) you want to hide. Click and drag your mouse cursor across the list of files you want to hide.
- If you're just hiding one file, click once the file to select it.
 Control-click one of the selected files. Doing so will prompt a drop-down menu to appear.
- You can also use two fingers to press the mouse button.
 ClickCompress Items. It's in the drop-down menu; you should see the number of items you've selected there as well (e.g., Compress 4 Items ). Doing so creates a ZIP folder named "Archive".[1]
- If you're only compressing on file, you'll click Compress [file name] here.
 Check your image's extension. Before you can hide your ZIP folder in the image, you'll need to know your image's extension:
- Click once the image to select it.
- Click File .
- Click Get Info .
- Look at the tag after the period in the file's name at the top of the Get Info window.
 Open Terminal. Click Spotlight
  , type interminal, and double-click the
 Terminal app icon.
 Change to the desktop directory. Type incd Desktopand press⏎Returnto do so.
 Enter the "Hide" command. The command for hiding a ZIP folder inside of an image is as follows:cat image.extension Archive.zip > image2.extension where "image.extension" is your image's name and extension (e.g., "Hide.jpg"), "Archive.zip" is your ZIP folder's name and extension (in most cases, it literally will be "Archive.zip), and "image2.extension" is whatever you want your output image's name and extension to be.
- For example, if your image file is a JPG named "Secret" and your ZIP folder is named "Archive.zip", you would create a hidden file image named "Normal" by typingcat Secret.jpg Archive.zip > Normal.jpghere.
 Press⏎Return. Doing so runs the command and places the ZIP folder inside of the output image.
 View the hidden files. While double-clicking the output image will open the image like usual, you can view the image's hidden files by doing the following:[2]
- Place the image on your desktop if it isn't already there.
- Open Terminal and type incd Desktop.
- Type inunzip image.extension where "image.extension" is your output image's name and extension.
- Press⏎Return.
- Follow any in-Terminal prompts.
- Open the folder that appears on your Mac's Desktop to view the files.
FAQ
What is How to Hide a File in an Image File about?
It provides a structured overview of image, explains the main context, and highlights practical takeaways for readers.
Why does this topic matter?
Understanding the main concepts helps readers evaluate the issue, avoid common mistakes, and make better-informed decisions.
How should readers use this information?
Use the guidance as a practical starting point, confirm details that may have changed, and follow current product, safety, or security recommendations.
Related Articles
 The Steganography Technique Can Hide Malicious Files in6 minutes read
 How to Hide ZIP Files in Image Files on Windows 10/118 minutes read
 Trick to Hide Music into the Image File3 minutes read
 How to Hide the Network Item in File Explorer Windows 112 minutes read
 Types of Data Hiding in Excel - Part End: Hide Excel Files7 minutes read
 What File Is PAT? How to Open, Edit and Convert PAT Files6 minutes read
Reader Comments 0
Sign in with email or Google to join the discussion.