Table of Contents
The safest way to convert a Canon CR2 file to JPEG is Canon Digital Photo Professional (DPP): open the RAW file, make any exposure or white-balance corrections, and export a separate JPEG. For a one-off, non-sensitive image, an online converter is quicker, but it uploads the original file to a third party.
Before converting CR2 to JPEG
CR2 is a Canon camera RAW format. It retains sensor data and gives editing software more latitude for exposure, white balance, tone, and color changes. JPEG is smaller and widely compatible, but the RAW processing choices are baked into the exported image and lossy compression discards information.
- Keep the original CR2 file; exporting a JPEG should not replace it.
- Edit the RAW file before conversion when image quality matters.
- Use a high JPEG quality setting for printing or further work.
- Check the output color, dimensions, metadata, and orientation.
For a fuller explanation of the trade-offs, read RAW versus JPEG for photography. JPG and JPEG refer to the same compression format; the extension length is the practical difference, as explained in JPG versus JPEG.
Method 1: Convert CR2 with Canon Digital Photo Professional
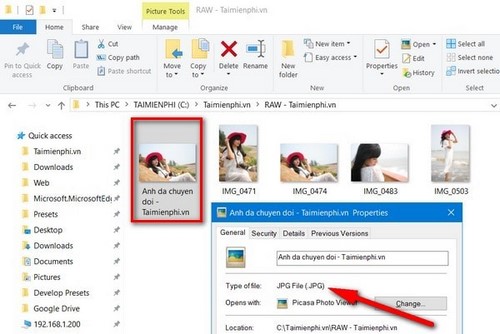
DPP is Canon's own RAW processor and is the best starting point for preserving Canon color and camera settings. Download the current version for your camera and operating system from Canon's Digital Photo Professional support page. Newer releases do not necessarily match the older screenshots below, and current camera models may use CR3 instead of CR2.
Convert one CR2 file
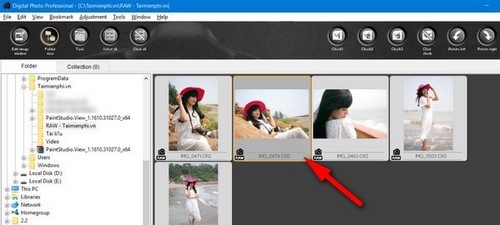
- Open DPP and browse to the folder containing the CR2 files.
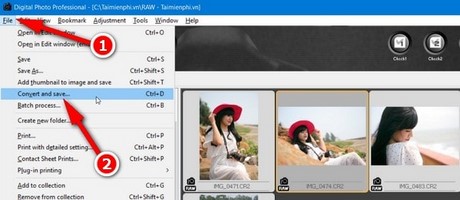
- Select the photo, then choose File > Convert and save. In some releases, opening the editing window first provides the same command.
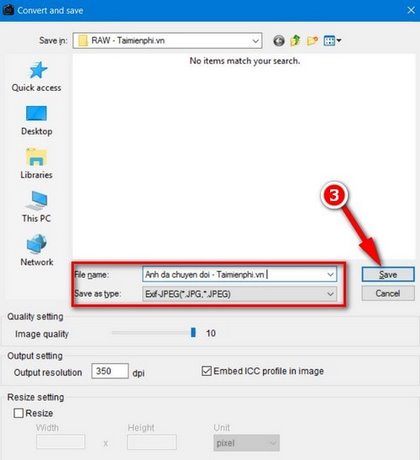
- Choose a destination that is different from the original RAW folder if that makes the files easier to distinguish. Enter a new name and select a JPEG output such as Exif-JPEG.
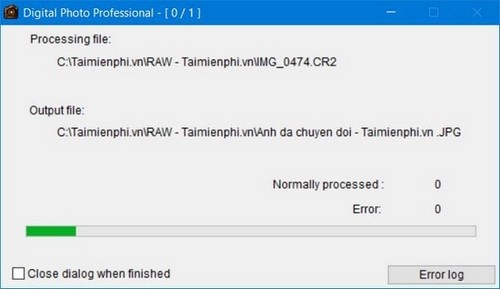
Wait for DPP to process the RAW data and write the JPEG. Large files, intensive corrections, and slower storage take longer.
Open the exported file and compare it with the DPP preview. Check the crop, color, highlight detail, and orientation.
Edit the RAW file before export
DPP applies non-destructive adjustments to the RAW interpretation. You can correct exposure, white balance, Picture Style, contrast, highlights, shadows, and other settings without changing the underlying sensor data.
Open the edit workspace, make restrained adjustments, and use before-and-after comparison or reset controls when necessary.
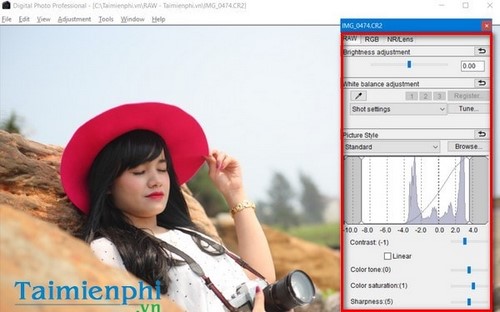
Avoid judging the image only from a small thumbnail. Zoom into detailed areas, check noise and sharpening, and make sure bright areas are not clipped before exporting.
Batch-convert several CR2 files
- In DPP's main window, select the files to convert. Use Ctrl + A only if every image in the current folder should be included.
- Choose Batch process or the equivalent batch command in the current release.
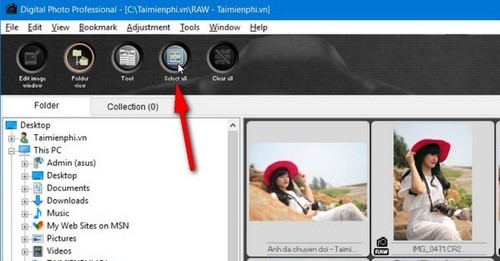
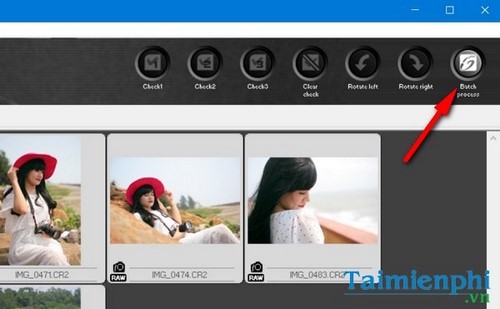
- In Batch settings, choose the destination folder. Do not send the JPEGs to a location where they could be confused with the RAW masters.
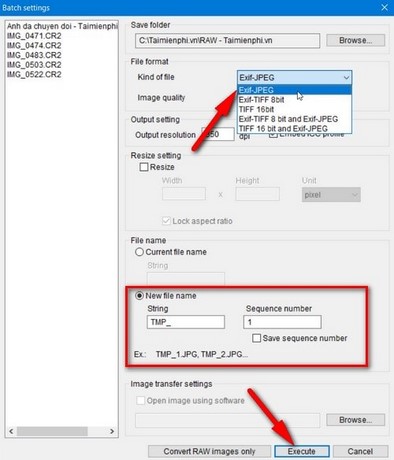
- Select JPEG or Exif-JPEG, set the quality, and review resizing, resolution, color space, and embedded metadata options. For general viewing, sRGB is the safest color space unless a managed print workflow requires another profile.
- Choose a file-naming rule that does not overwrite existing exports, then click Execute.
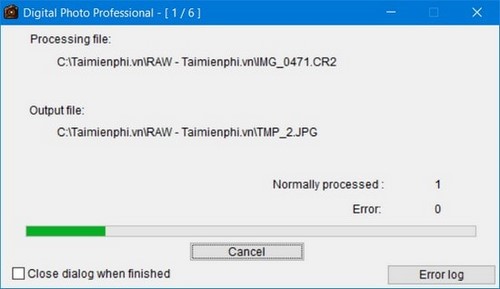
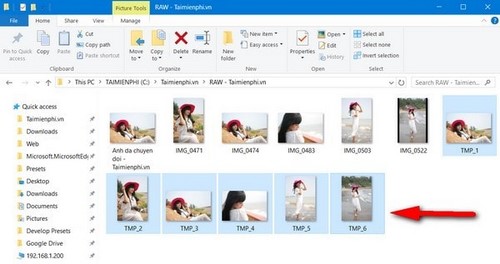
Inspect a representative sample from the beginning, middle, and end of the batch before archiving or sharing the results.
Method 2: Use a trusted desktop RAW editor
If DPP is unavailable, current versions of editors such as Lightroom, darktable, RawTherapee, or GIMP with a compatible RAW processor may be able to open CR2 files from supported cameras. Camera RAW implementations differ, so update the editor and confirm that it supports the specific Canon model—not just the .cr2 extension.
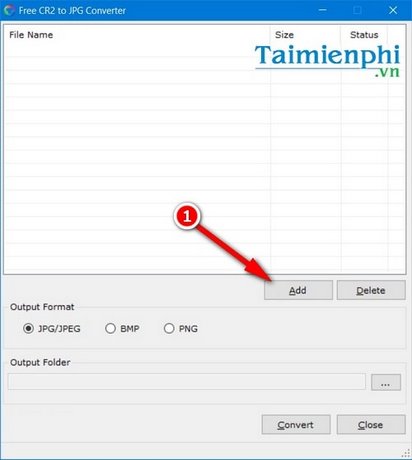
Avoid installing an obscure converter solely because its file name includes “CR2.” The legacy Free CR2 to JPG Converter shown below used a basic add-and-convert workflow, but the screenshots do not prove that a download offered today is current or safe.
Legacy Free CR2 to JPG Converter workflow
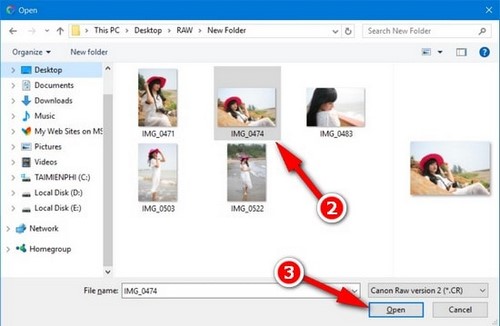
If you already have a trusted, verified copy, its historical interface worked as follows: click Add, select the CR2 file, and open it.
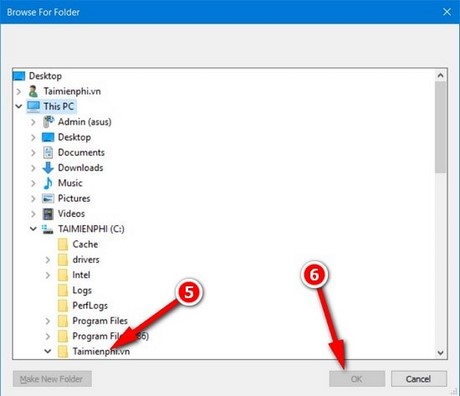
Choose the output folder and format before starting. The program also exposed PNG and BMP choices, but those do not recreate the editing latitude of the original RAW file.
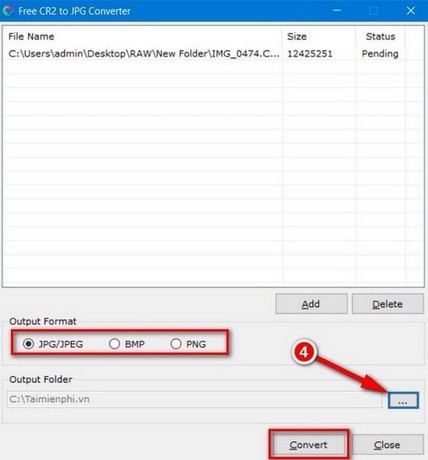
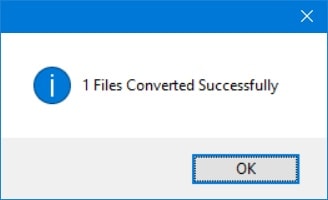
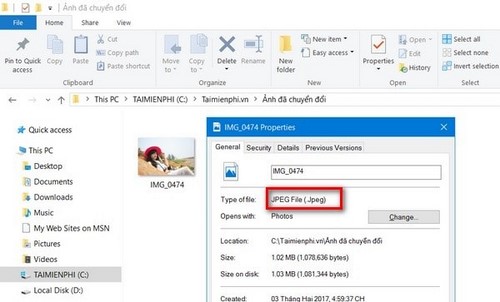
After conversion, the old application displayed a completion message. Verify the actual output file rather than relying only on that notification.
For a maintained free workflow, this GIMP photo-editing guide explains the export distinction, though RAW import may require a compatible external RAW processor.
Method 3: Convert CR2 to JPEG online
An online service is useful when you cannot install software, but CR2 files can be large and may contain camera, time, and location metadata. Do not upload confidential, client, or unpublished photographs unless you have reviewed the service's privacy and retention terms.
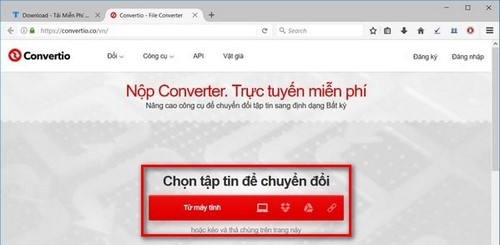
- Open the Convertio CR2-to-JPG page or another service you trust.
- Upload the CR2 file from the computer or a supported cloud account.
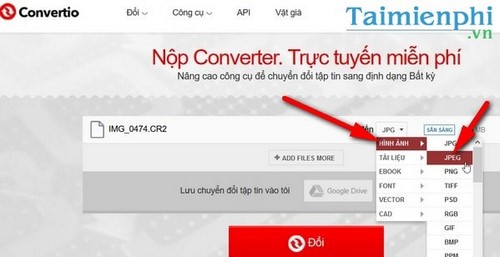
- Select JPG or JPEG as the target. Add other files only if the service's size and batch limits are acceptable.
- Start conversion, download the result promptly, and open it to verify the image.
Delete cloud copies you no longer need and review whether metadata remains in the output before sharing it publicly. TipsMake's photo metadata checklist explains what to inspect.
Choose the right output settings
- JPEG quality: use a high setting for a master delivery copy; lower it only when file size matters and visual artifacts remain acceptable.
- Dimensions: retain full resolution for archiving or printing; resize a separate copy for web use.
- Color space: choose sRGB for broad browser and device compatibility.
- Metadata: retain copyright and capture data when useful, but remove location information before public sharing if privacy matters.
- File naming: keep the original base name plus a clear suffix, such as IMG_1234_web.jpg.
If a CR2 file will not open, first copy it again from the memory card, update the RAW editor, and confirm that the file came from a supported camera. A zero-byte, incomplete, or corrupted RAW file cannot be repaired by changing its extension.
Related Articles
 How to Convert JPEG Images to Word Documents: Practical Guide3 minutes read
 How to Convert Images into PDF Files on iPhone and iPad4 minutes read
 How to Convert Photos to JPEG Format: Clear Instructions10 minutes read
 How to Convert PNG Images to PDF Files: Convert PNG to PDF3 minutes read
 How to Convert AI Files to PNG, JPG Without Software5 minutes read
 How to Convert Images from JPG, PNG to ICO and Vice Versa: Convertio4 minutes read
Reader Comments 0
Sign in with email or Google to join the discussion.