Guide to editing photos using GIMP on a computer.
Image editing operations in GIMP are similar to many other graphics software, but there are also some differences. If you are a beginner or inexperienced, it will take some time to get used to it.
Table of Contents
If you're already familiar with Photoshop or AutoCAD, it won't take long to get used to GIMP. But if you're a beginner, don't worry, Taimienphi will guide you through the necessary steps.
Guide to editing photos using GIMP
Download the software here.
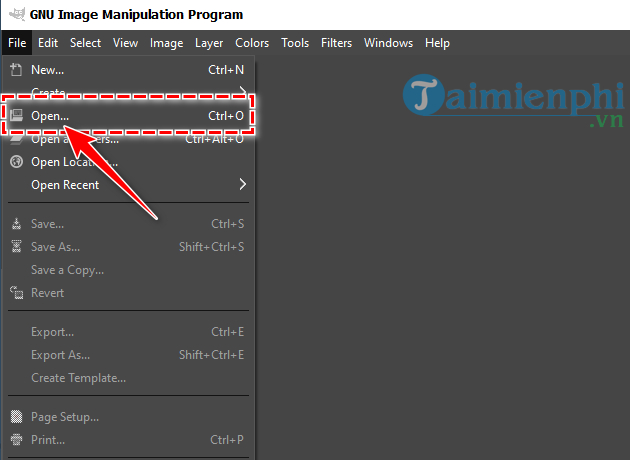
Step 1: Open your project
Open the software on your device. Tap File , then select Open .
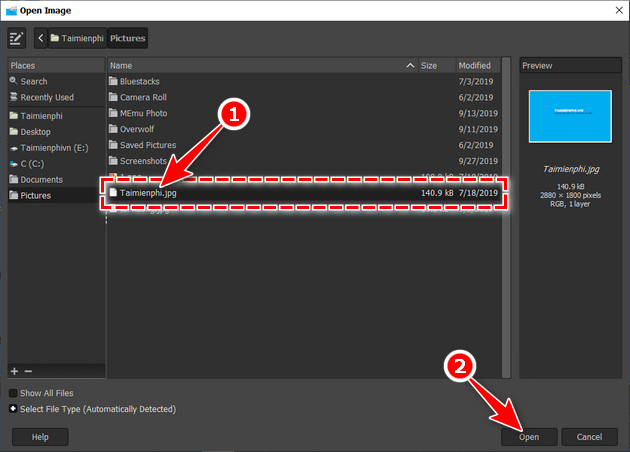
Navigate to the folder containing the images. Select the images , then click the Open button below.
Step 2: Crop your image
Click the Rectangle Select Tool or press the shortcut key R. Hold down the mouse and drag to select the area you want to crop.
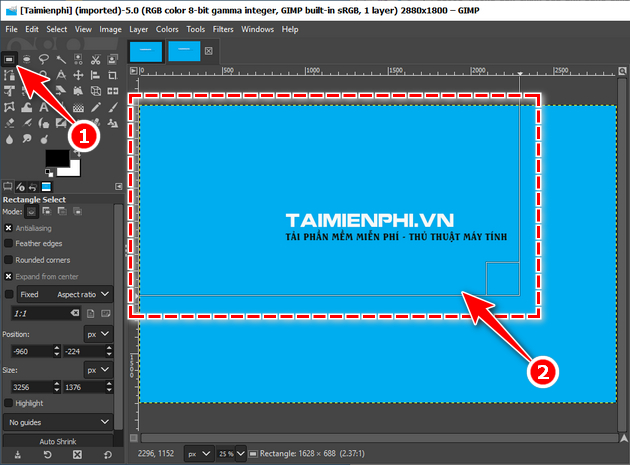
Right-click on the image, select Image , then select Crop to Selection .

Note: If you want to keep the image size the same, you can skip this step.
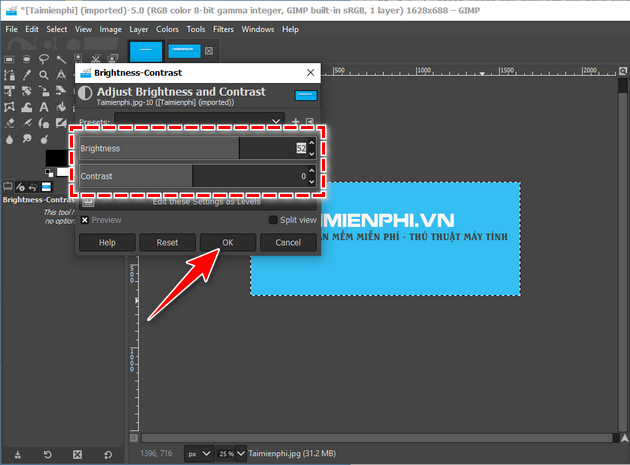
Step 3: Change the brightness
Click on the Color option in the toolbar. Select Brightness - Contrast.

Drag the Brightness slider to adjust the brightness and the Contrast slider to increase or decrease the image clarity. Press OK.
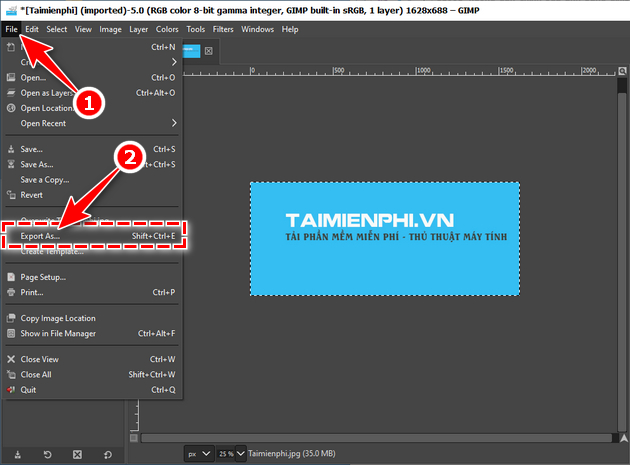
Step 4. Export the image file.
When you've finished editing, click File on the toolbar and select Export As , or press Shift + Ctrl + E.
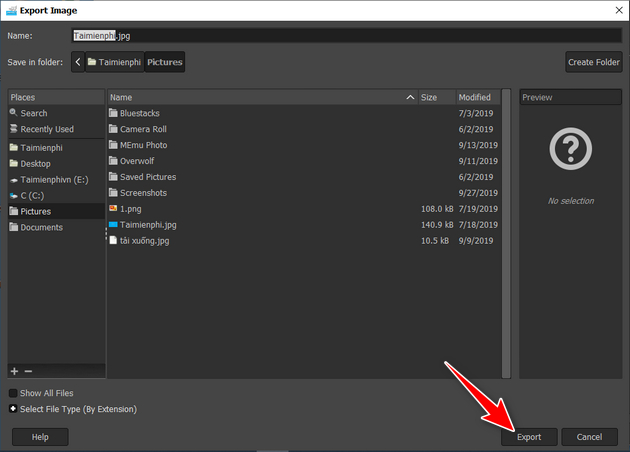
Choose a folder to save the edited image, then click Export .
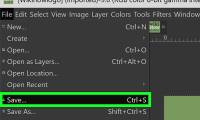
Note : If you select Save or Save As , the system will automatically save the image in GIMP's dedicated file format.
To create perfect images, you need to utilize many of GIMP's image editing features, and it would take time to introduce them all. Taimienphi only guides you through the basic features, helping you quickly get acquainted with the software.
Was this article helpful?
Your feedback helps us improve.
Related Articles
 A full guide to editing photos in GIMP17 minutes read
 How to create animations and GIFs using GIMP on PC4 minutes read
 How to cut advanced photo collage in GIMP19 minutes read
 How to Edit JPG Photos13 minutes read
 How to add text with GIMP2 minutes read
 How to swap and combine faces in GIMP6 minutes read
Reader Comments 0
Sign in with email or Google to join the discussion.