Table of Contents
PhotoCat can soften blemishes and uneven skin texture in a portrait, but the most natural result comes from a restrained edit. Start with a low effect strength, compare the result with the original, and avoid smoothing away pores, facial lines, or defining features.
Interface note: PhotoCat's current online editor uses an automated AI retouching workflow. The screenshots in this guide show an older PhotoCat editor with manual Smooth Skin controls, so the labels may not match the version you open today.
Use the current PhotoCat retouch tool
- Open the official PhotoCat AI retouching tool and upload a portrait.
- Let the tool process the image, then preview the retouched result.
- If strength or style choices are available, select the least aggressive option that corrects the problem.
- Download the result and compare it at full size with the original.
Uploading a portrait sends the image to an online service. Review the site's privacy terms first, especially for sensitive, private, or client photographs. For an offline workflow, use a desktop editor instead; this GIMP editing guide covers the basics.
Legacy PhotoCat editor: manual method
The following steps are retained for readers using the older interface pictured below.
1. Upload the portrait
Click Upload and choose the image from your computer. Keep an untouched copy before editing.

2. Apply gentle overall smoothing
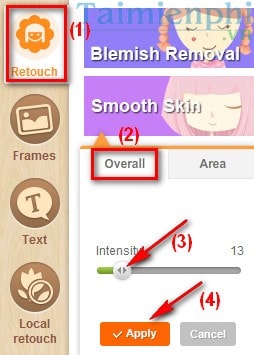
Choose Retouch > Smooth Skin > Overall. Move the Intensity control slowly and stop as soon as distracting texture is reduced. Click Apply only after checking the eyes, hairline, eyebrows, and other detailed areas.
3. Retouch a specific area
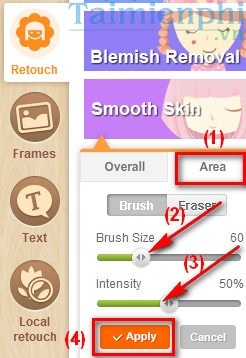
Open the Area option to paint the effect only where it is needed. Set a brush that is slightly smaller than the target area, lower the intensity, and use short strokes. Avoid painting over the eyes, nostrils, lips, hair, or the edge of the face.
4. Correct color only when necessary
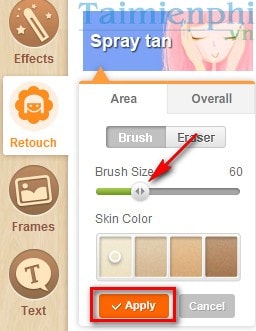
The older editor includes a Spray tan control. Treat this as a color adjustment, not a way to change a person's identity or natural skin tone. Apply it sparingly and watch for uneven color around the face and neck.
5. Save a separate copy
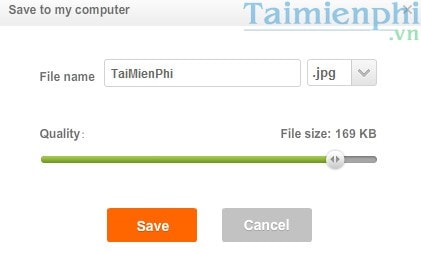
Choose Save to download the edit. Direct sharing may be convenient, but saving locally first lets you inspect the result before publishing it.

Enter a new file name, choose the available format and quality settings, then save. Use a high-quality setting for further editing; a smaller file may be enough for messaging or a web post.
Check the result
View the edited image at 100% and compare it with the original. Look for blurred eyelashes, plastic-looking skin, halos near the face, color differences between the face and neck, and lost detail. If any appear, undo the edit or start again with lower intensity.
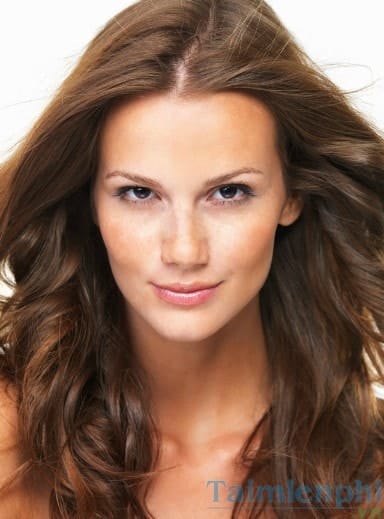
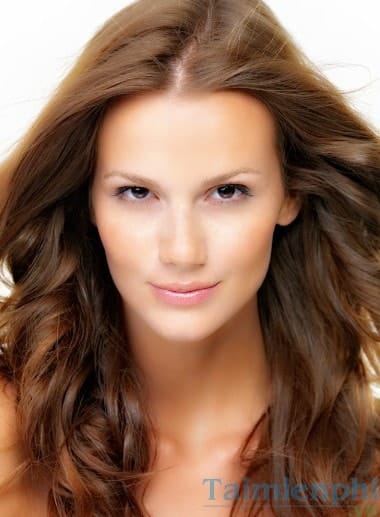
If PhotoCat's current tools do not offer enough control, compare these free online photo editors or consider free desktop photo-editing software.
Related Articles
 7 Kinds of Fruit Juices Help You to Have Bright and Smooth White4 minutes read
 How to Smooth Skin with Photoshop3 minutes read
 5 Steps and 1 'Hot' Morning Habit to Help You Have Smooth, Bright6 minutes read
 The Most Flattering, Beautiful, and Trendy Hair Colors Of 20267 minutes read
 How to Customize ChatGPT Voice to Your Liking4 minutes read
 Things to Do Before Bed to Help Your Skin Become Firmer and: Key Facts4 minutes read
Reader Comments 0
Sign in with email or Google to join the discussion.