Table of Contents
This guide explains how to configure TP-Link Router to Access Point, with clear steps, practical tips, and important checks before you begin.
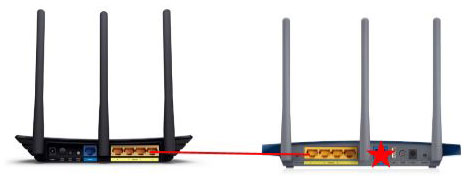
Step 1: Connect the computer to the TP-Link N router
Connect the computer to the second LAN port on the TP-Link N router with an Ethernet cable.
Log into the TP-Link web interface through the IP address listed on the label at the bottom of the TP-Link N router.
Note: While possible, this process should not be tried over Wi-Fi
Step 2: Change the LAN IP address of the TP-Link N router
Go to Network> LAN on the side menu and change the LAN IP address of the TP-Link N router to the IP address on the same segment of the main router. This IP address must be outside the DHCP range of the primary router.
For example, if the primary router's DHCP is 192.168.2.100 - 192.168.2.199 then you can set the TP-Link N router's IP to 192.168.2. X ( X must be outside the main router's DHCP scope), such as 192.168.2.11.

Note : After changing the LAN IP address, you will need to reboot and log in to the TP-Link N router with the new IP address.
Step 3: Configure the SSID
Go to Wireless> Wireless Settings and configure the SSID (Network Name) which may be the same or different from the main router. Select Save.

Step 4: Configure security
Go to Wireless> Wireless Security and configure wireless security. WPA / WPA2-Personal is recommended as the safest option. After configuration, click Save.
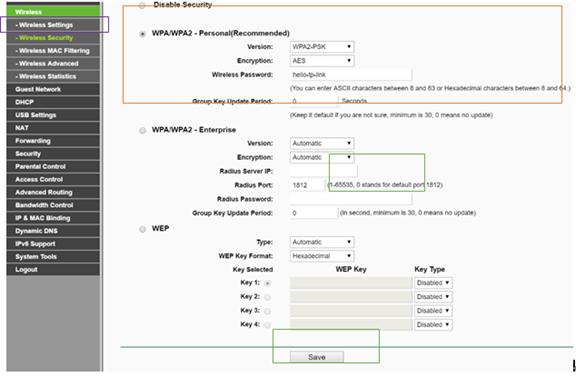
Note: If using a dual band router, repeat this procedure for the 5GHz band.
Step 5: Disable the DHCP server
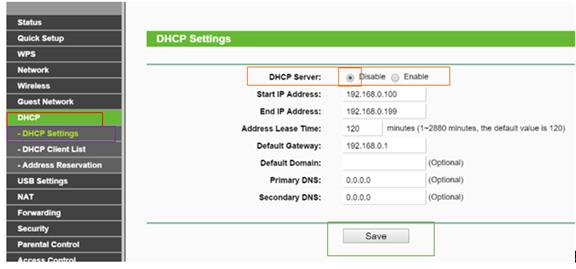
Go to DHCP> DHCP Settings and select Disable the DHCP Server . Click Save.
Step 6: Restart the device
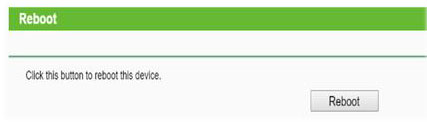
Go to System Tools> Reboot and select Reboot to reboot the device.
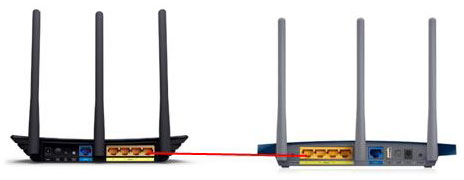
Step 7: Connect the primary router to the TP-Link N router
Use Ethernet cable to connect main router to TP-Link N router through LAN ports (any LAN port can be used). All other LAN ports on the TP-Link N router will now give the device Internet access. In addition, all Wi-Fi devices can now access the Internet through the TP-Link N router using the SSID and password set in the steps above.
FAQ
What should I know about Configure TP-Link Router to Access Point?
Focus on the key features, requirements, limitations, and practical use cases explained in this guide.
How do I get the best results with Configure TP-Link Router to Access Point?
Follow the recommended steps, use current software or information, confirm compatibility, and review settings before major changes.
Are there any risks or limitations?
Potential limitations depend on compatibility, data quality, cost, privacy, support, and how the product or method is used.
Related Articles
 Access Point vs. Router: Key Differences7 minutes read
 How to Configure TP Link Router: Practical Guide21 minutes read
 6 Steps to Block, Block Website with Tp-link Router4 minutes read
 What Is an Access Point? Should I Use an Access Point6 minutes read
 How to Configure Pppoe Connection on Tp-link Wi-Fi 6 Router8 minutes read
 How to Secure the D-link Wireless Router9 minutes read
Reader Comments 0
Sign in with email or Google to join the discussion.