How to Configure TP Link Router
Set up the router
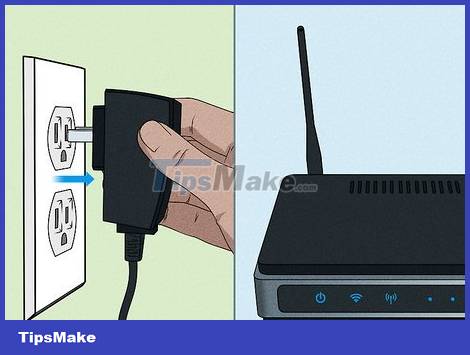
Turn off the power to the modem. If using a separate modem, you will need to unplug the power to turn off the modem. If the modem has a backup battery, don't forget to remove the battery.
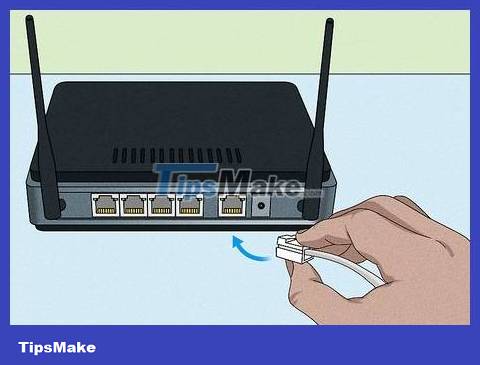
Connect the router to the Internet. You need an Ethernet cable to do this. Follow one of the following steps to connect the router to the network.
For routers with integrated modems, simply connect the network cable from your Internet service provider to the "WAN" or "Internet" port located on the back of the device.
If using a separate modem, connect the home network cable to the "WAN" or "Internet" port on the modem. Then, plug the other end of the Ethernet cable into the "WAN" or "Internet" port on the back of the router.

Plug in the modem. If you use a separate modem, you need to plug it in and reinsert the battery to power on the device.

Plug in the router. Check to make sure you use the AC adapter that came with your router. Plug the AC adapter cable into the power port located on the back of the router. Then, connect to the power source. The router will be turned on. Wait for the lights on the front of the router to stop flashing and turn solid, which means the router has finished booting up.

Connect your PC to the router. You need to use another Ethernet cable to connect. Plug one end of the Ethernet cable into any available "LAN" port on the router. Then, connect the other end to an empty Ethernet port on the computer.
If your computer does not have an available Ethernet port, you will need to purchase a USB-to-ethernet adapter to connect the Ethernet cable to your computer via the USB port.
Or you can also connect to the router wirelessly using the SSID and password listed below the device or in the user manual.
Set up the router configuration through Quick Setup
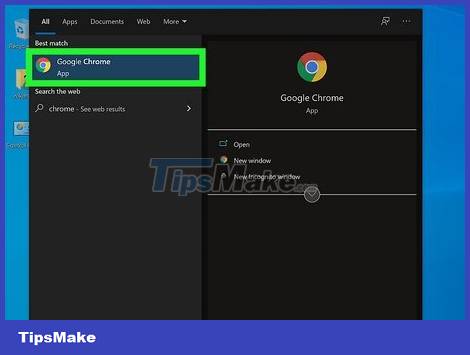
Open a web browser. You can use any web browser on your computer, including Google Chrome, Safari, Firefox, and Microsoft Edge.

Enter the default access address into the address bar at the top of the web browser. The router's user interface opens. You can usually find this address on the bottom of the router or in the user manual. The default access address is usually one of the following lines:
http://tplinkwifi.net
http://192.168.0.1
http://192.168.1.1
http://10.0.0.1
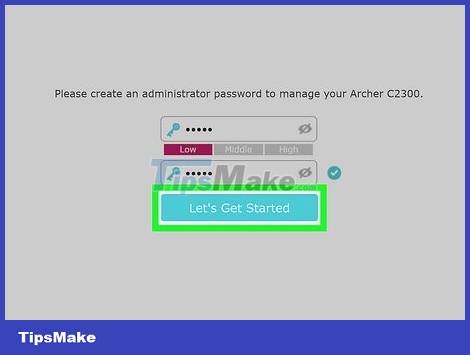
Create a new administrator password and click Let's Get Started . This is the password you will use to log into the router and change settings if necessary, not the Wi-Fi password. Strong passwords need to have at least 8 characters, including letters, numbers and special characters. Note: the password must be easy for you to remember. Enter the password twice and then click Let's Get Started to continue.

Check to make sure the Quick Setup tab is selected. This option will take you through the router setup process. You need to click on the Quick Setup tab at the top (if it's not already selected).
If you have an older TP-Link model, click Quick Setup located at the top of the left menu panel.
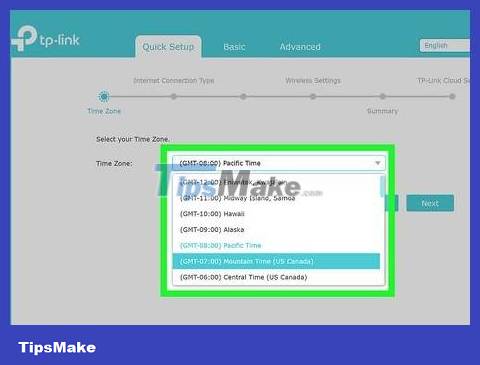
Select time zone. Use the drop-down menu next to "Time Zone" to select your current time zone. Then click Next .

Select the type of Internet connection. Click the radio option next to Internet connection protocol. You can select "Dynamic IP," "Static IP," "PPPoE," "L2TP" or "PPTP". If you're not sure about your connection type, click Auto Detect at the top of the screen. Then, click Next to continue.
The "Auto Detect" feature may not work correctly. You should check with your Internet service provider if you are unsure about your current connection type.
If you don't have the necessary information from your service provider, you can try setting up and launching the Internet using the basic setup process.

Enter IP address or MAC information. Depending on the type of connection you have, you may need to enter the IP address, Subnet mask (usually "255.255.255.0"), default gateway along with primary and secondary DNS. If you do not know this information, you need to ask your Internet service provider. After entering the necessary information, click Next .
If you're asked if you want to copy your computer's MAC address, check with your service provider to see if your current Internet access is restricted to a specific MAC address. If so, you need to make sure that the computer you are using has that MAC address, and click on the radio option to clone the computer's MAC address. If you're not sure, you should click the "Do NOT Clone my Computer's MAC Address" radio option and click Next .

Enter the network name (SSID) and password. The network name is the name people will look for when they want to connect to a Wi-Fi network. The password is what they need to enter to connect to the network. Enter the network name in the "Network Name (SSID)" field and the password in the "Password" field. Then, click Next to continue.
If you plan to allow guests to connect to the network, you need to use a unique password that does not match any other application or service. Use a password that you don't need to worry about others knowing.
If you use a dual-band router, you need to set up separate network names (SSIDs) for both the 2.4 GHz and 5 GHz bands. The 5 GHz band has fast transmission but shorter range. You can use the same password for both bands, but the network names need to be different for easy distinction.
If you don't want the network name to appear on your device when others search for a Wi-Fi network, you can click the "Hide SSID" box. However, you will need to enter the network name and password manually to connect.
If your router supports Smart Connect, you can check the check box to enable this feature. Thus, devices will automatically switch back and forth between the 2.4 GHz and 5 GHz bands depending on the distance to the router.
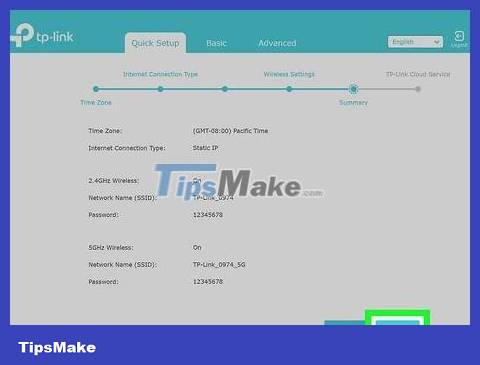
Review the information and click Save . The dashboard will display all the information you entered. After reviewing and making sure everything is correct, you can click Save .
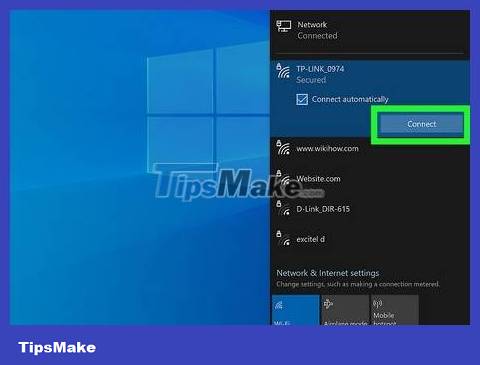
Connect the device to the Wi-Fi network and click Next . The next page will display the network name and password for you to connect your device to Wi-Fi. Then, click Next to continue.

Log in with TP-Link ID. If you already have a TP-Link ID, enter the associated email address and password and click Log In to connect to cloud services and register the router. If you don't have a TP-Link ID, you can click Register Now , enter your email address and password, then agree to TP-Link's terms and conditions to create an ID. . You can also click Log In Later to skip this step.

Click Finish . So you just finished setting up your TP-Link router.
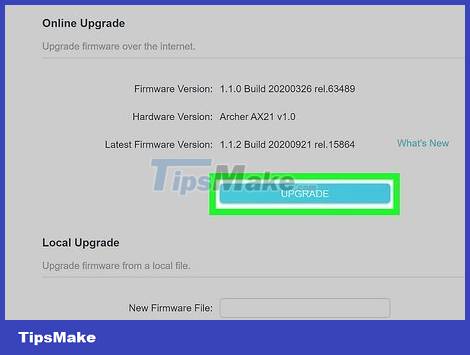
Update your router's firmware. Once you've set up your router, you should update the device's firmware. The router will take a few minutes to update and reboot itself when complete. Here are the steps to update your router's firmware:
Enter the default access address into the web browser.
Log in with the administrator password.
Click Update in the upper right corner.
Click Upgrade below "Online Upgrade" if an update is available.
Click Yes to confirm.
Wait for the update process to complete.
Set up the router configuration through Basic Setup
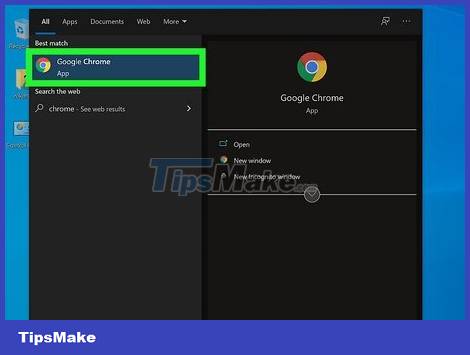
Open a web browser. You can use any web browser on your computer such as Google Chrome, Safari, Firefox or Microsoft Edge.
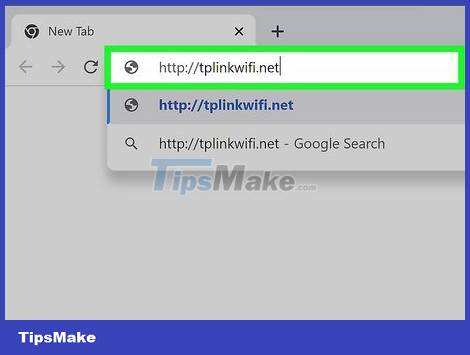
Enter the default access address into the address bar at the top of the web browser. The router's user interface opens. The default access address is usually listed under the router or in the user manual. Here are some common default addresses:
http://tplinkwifi.net
http://192.168.0.1
http://192.168.1.1
http://10.0.0.1
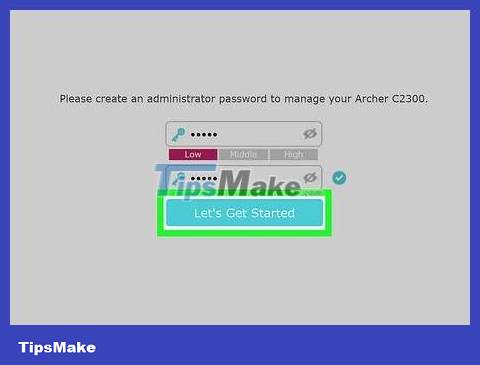
Create a new administrator password and click Let's Get Started . This is the password you will use to log into the router and change settings if necessary, not the Wi-Fi password. Strong passwords need to have at least 8 characters, including letters, numbers and special characters. Note: the password must be easy for you to remember. Enter the password twice and then click Let's Get Started to continue.

Click Basic . The second tab at the top of this screen allows you to configure the router through basic steps with the least necessary information.
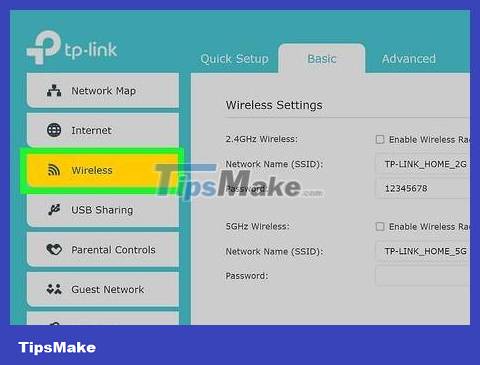
Click Wireless (Wi-Fi). This is the third option in the left menu panel. Here, you will be able to configure your Wi-Fi settings.
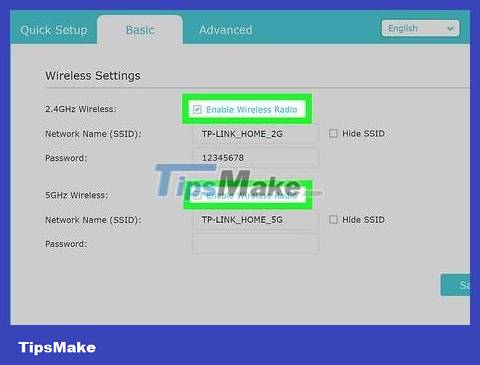
Click the check box to enable network band. Most dual-band routers have two networks that you can turn on and connect to. The 2.4 GHz band has a slower transmission but a wide range, while the 5 GHz band has a fast transmission but a short range. Click the check box next to the network you want to enable. You can turn on both networks at the same time.
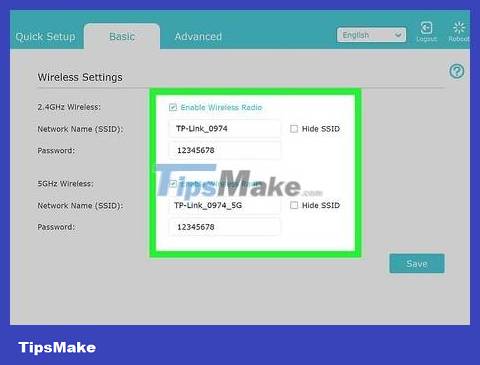
Enter the network name (SSID) and password. The network name is the name people will look for when they want to connect to a Wi-Fi network. The password is what they need to enter to connect to the network. You need to enter a unique name for the 2.4 GHz and 5 GHz band networks, and the password can be the same.
If you plan to allow guests to connect to the network, you need to use a unique password that does not match any other application or service. Use a password that you don't need to worry about others knowing.
If you use an older TP-Link router, you need to click Wireless 2.4 GHz and Wireless 5 GHz in the left menu to configure both bands.
If you don't want the network name to appear on your device when others search for a Wi-Fi network, you can click the "Hide SSID" box. However, you will need to enter the network name and password manually to connect.

Click Save . This blue button is in the lower right corner. Network settings will be saved.
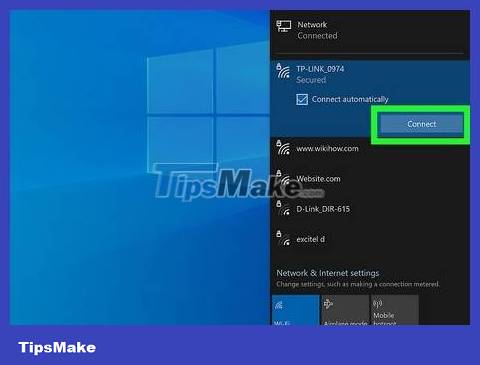
Reconnect to the network. When you change the Wi-Fi network name and password, your computer and devices will automatically log out. Log in to the network again using the name (SSID) and password you set up in the router. Now, you will be able to connect to the Internet.
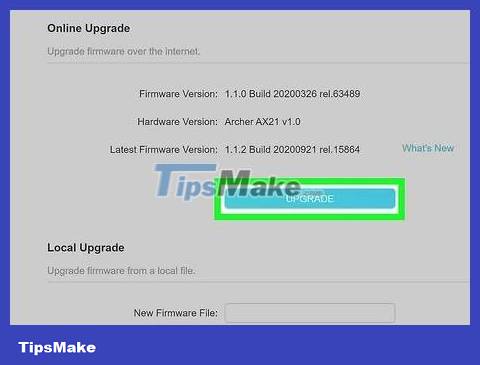
Update your router's firmware. Once you've set up your router, you should update the device's firmware. The router will take a few minutes to update and reboot itself when complete. Here are the steps to update your router's firmware:
Enter the default access address into the web browser.
Log in with the administrator password.
Click Update in the upper right corner.
Click Upgrade under "Online Upgrade" if there is an update available.
Click Yes to confirm.
Wait for the update process to complete.
Set up parental controls
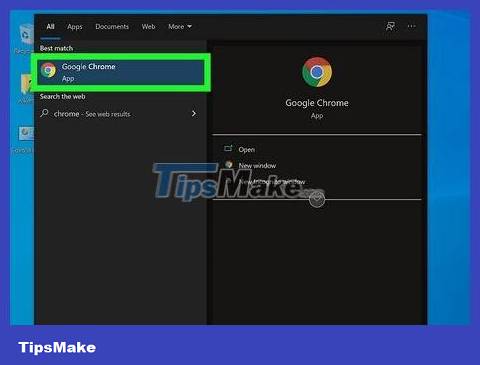
Open a web browser. You can use any web browser on your computer such as Google Chrome, Safari, Firefox or Microsoft Edge. Parental controls are located in the TP-Link router's web-based interface. You can use parental controls to block websites or keywords, as well as set time limits for specific devices.
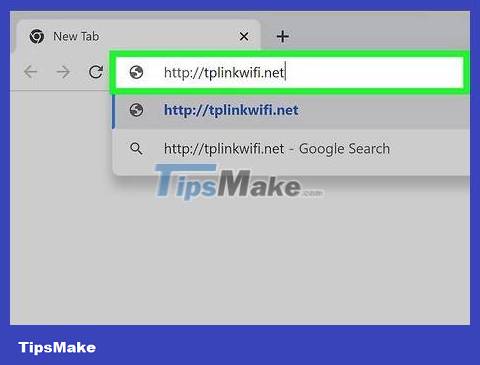
Enter the default access address into the address bar at the top of the web browser. The router's user interface opens. The default access address is usually listed under the router or in the user manual. Here are some common default addresses:
http://tplinkwifi.net
http://192.168.0.1
http://192.168.1.1
http://10.0.0.1
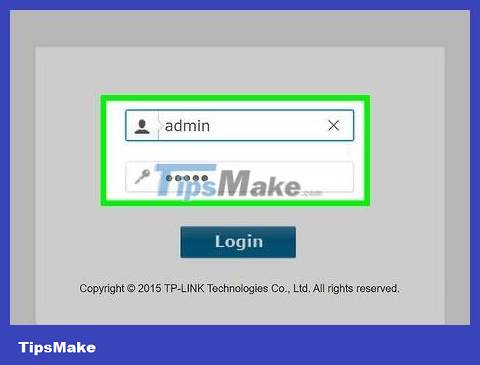
Log in with the administrator password and then click Log In . This is the password you set the first time you open the user interface during the initial router setup. Please enter the administrator password then click Log In .
If you haven't set an administrator password, you need to enter the password and click Let's Get Started . Then, select the Quick Setup tab and complete the initial setup process.

Click the Basic tab . The second tab at the top of this screen allows you to configure the router through basic steps with the least necessary information.
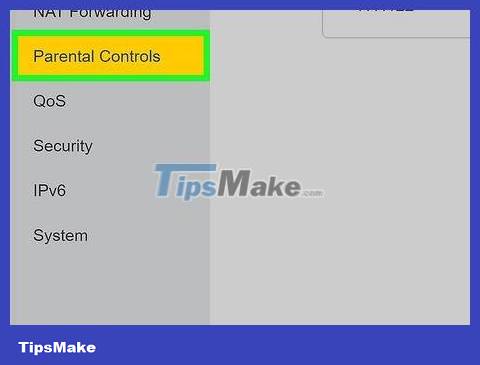
Click Parental Controls . This option with the adult and child icons is fifth in the left menu.
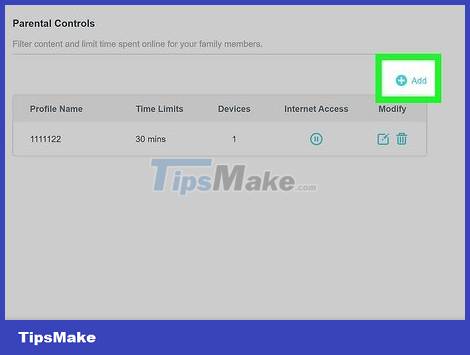
Click Add . This icon is next to the plus sign (+) in the upper right corner of the website.
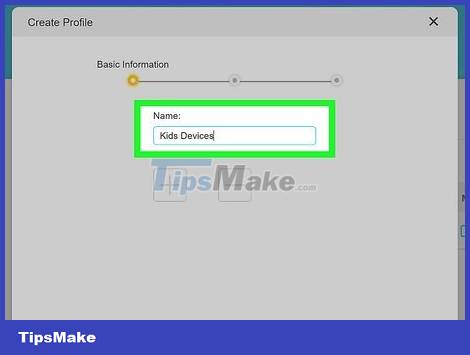
Enter a name for the profile. Enter a name for the parental control profile in the "Name" field.
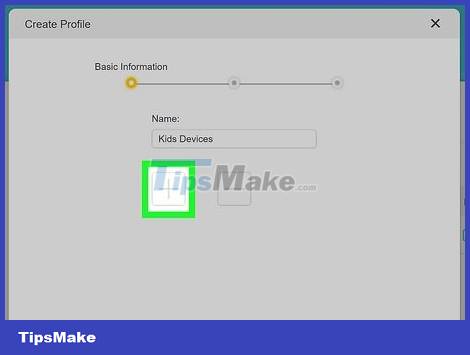
Select devices that apply parental control mode as follows:
Click the large plus (+) icon below the "Devices" heading.
Click the check mark next to one or more devices to which you want to apply the settings.
Click Save in the lower right corner.

Click Next . If the devices listed under the "Devices" heading are incorrect, click Next in the lower right corner to continue.
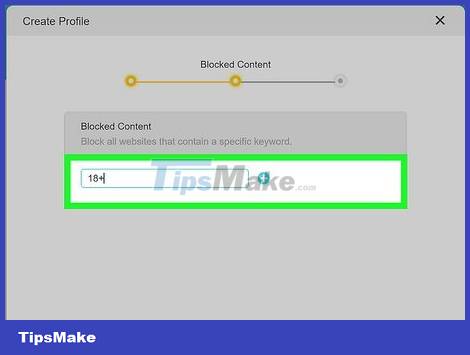
Enter keywords for the content you want to block and click Add . You can enter a keyword to block content from any website containing that keyword, or enter a name to block a specific website/application.
You can add as many keywords or websites as you want.
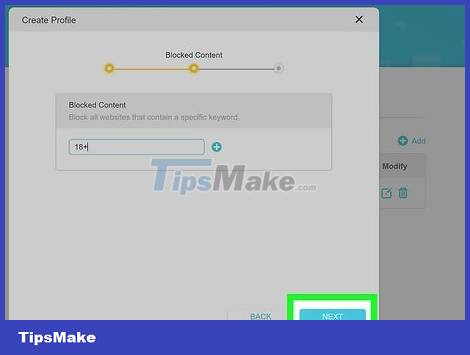
Click Next . Once you've entered all the keywords you want to block, click Next to continue.
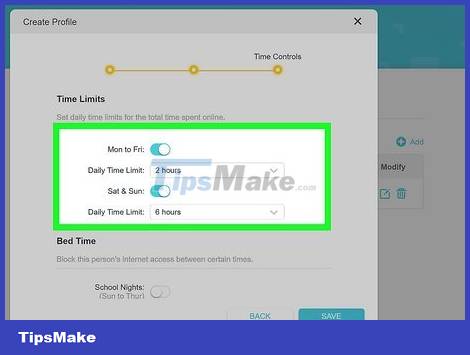
Set time limits each day. To do this, click the Enable box below the "Time Limits" heading. Then use the slider to set a time limit that your device can access the network each day. You can set daily time limits for weekdays (Monday to Friday) and weekends (Saturday & Sunday).
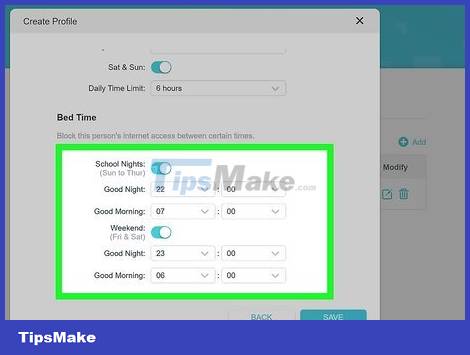
Set sleep time limits. This feature will block the device from accessing the network during sleep time. To set a sleep time limit, click the Enable box below the "Bedtime" heading. Then, use the "From:" and "To:" boxes to set the amount of time the device will be blocked from accessing the network (for example, "From: 9:00 PM, To: 6 :00 AM"). You can set different sleep times for weekdays and weekends.
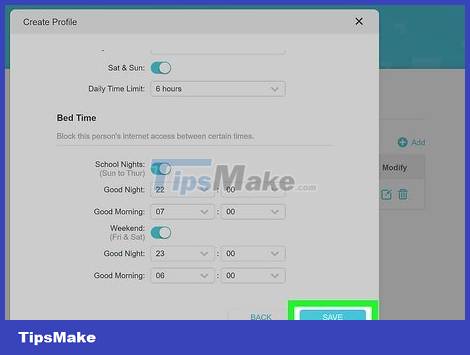
Click Save to save the profile. You can add multiple profiles to restrict in different ways.
Configure port forwarding
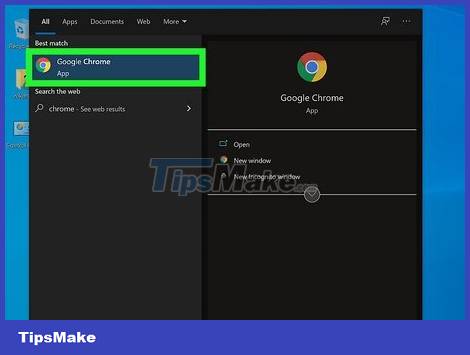
Open a web browser. You can use any web browser on your computer such as Google Chrome, Safari, Firefox or Microsoft Edge. If your computer or device requires access to a specific port or external web address, you need to set up port forwarding on your router to allow the device to connect directly to the external Internet network. Port forwarding can be set up through a web-based interface.
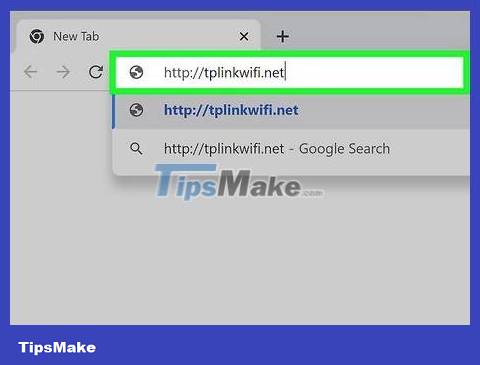
Enter the default access address into the address bar at the top of the web browser. The router's user interface opens. The default access address is usually listed under the router or in the user manual. Here are some common default addresses:
http://tplinkwifi.net
http://192.168.0.1
http://192.168.1.1
http://10.0.0.1
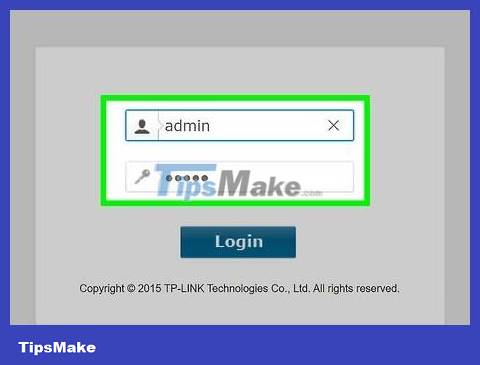
Log in with the administrator password and then click Log In . This is the password you set the first time you open the user interface during the initial router setup. Please enter the administrator password then click Log In .
If you haven't set an administrator password, you need to enter the password and click Let's Get Started . Then, select the Quick Setup tab and complete the initial setup process.
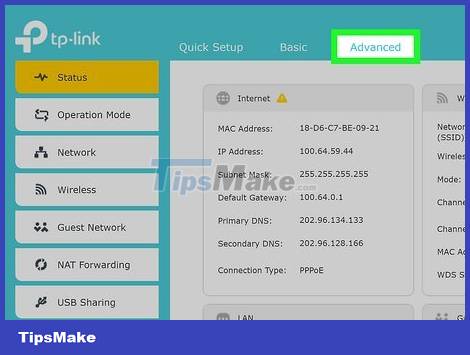
Click Advanced . The third tab at the top of this screen is where you set up advanced configuration for the TP-Link router.
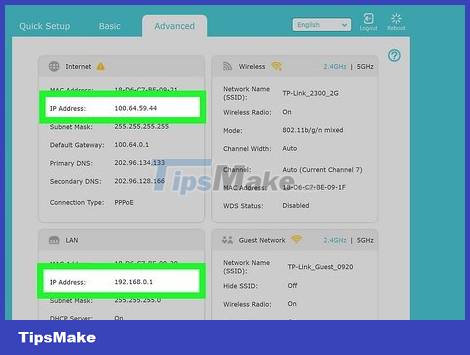
Record private and public IP addresses. The public IP address is listed next to "IP Address" in the "Internet" box. The private IP address is next to "IP Address" in the "WAN" frame. Write down both of these series of numbers.

Open the "DHCP Server" page. To do this, click the Network heading in the menu pane on the left to expand the Network menu. Then, click DHCP Server in the menu under the "Network" heading.
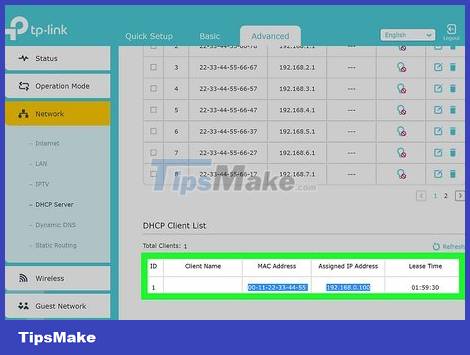
Note down the IP address and MAC address of the device for which you want to forward ports. To do this, scroll down to the "DHCP Client List" panel. All devices connected to the network will be listed here. You can identify devices to apply port forwarding via name. Then, write down the IP address and MAC address assigned to that device.
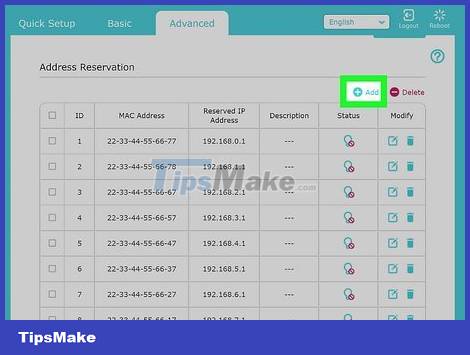
Click the Add button with the plus sign (+) icon located in the upper right corner of the website. You will be able to enter the address that you have previously prepared.
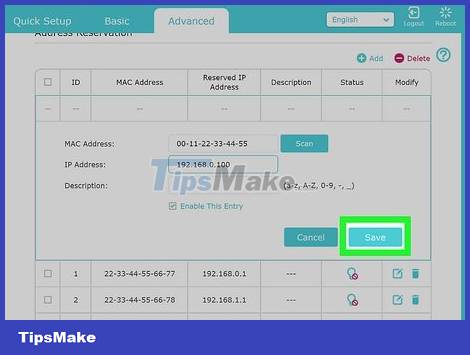
Enter the MAC address and IP address then click Save . Enter or copy and paste the MAC address into the MAC Address field . Then, enter the IP address in the IP Address field . Enter a description (if desired) then click Save . Thus, the router will always assign this IP address to the selected device.

Open the Virtual Servers page. To proceed, scroll down and click NAT Forwarding in the left menu panel. Then, click on Virtual Servers .
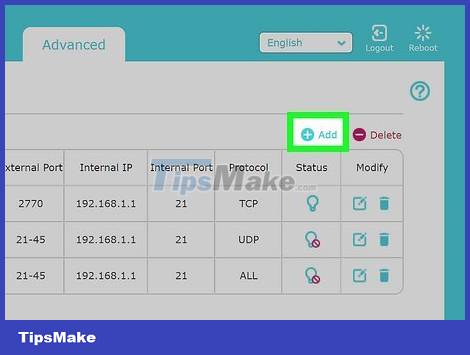
Click the Add button with the plus sign (+) icon in the upper right corner of the website.

Select service type. Services include HTTP, FTP, DNS, Gopher, NNTP, and more. To select a service type, click View Existing Services next to the "Service Type" heading. Then, click Choose next to the service type you want to select. The port number for that service is automatically populated.
If the service you're connecting to uses a different port number than the one that's automatically filled in, you'll need to check on that service's side to determine the correct port number.
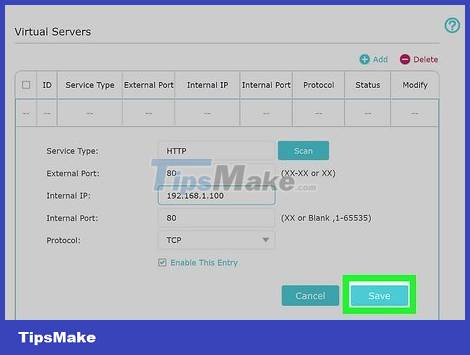
Enter the device's IP address and click Save . Enter the same IP address you assigned to the device previously, then click "Internal IP address". Click Save in the lower right corner once finished. Port forwarding will be set up for the device.
To access the server you just added to your web browser on or off the network, you enter the public IP address in the address bar, then add a colon (:) followed by the port number (for example, 119.139.172.01 :80).