Table of Contents
This guide provides a clear, practical overview of steps to create transparent images with paint.net, with useful context, important details, and straightforward takeaways for everyday readers.
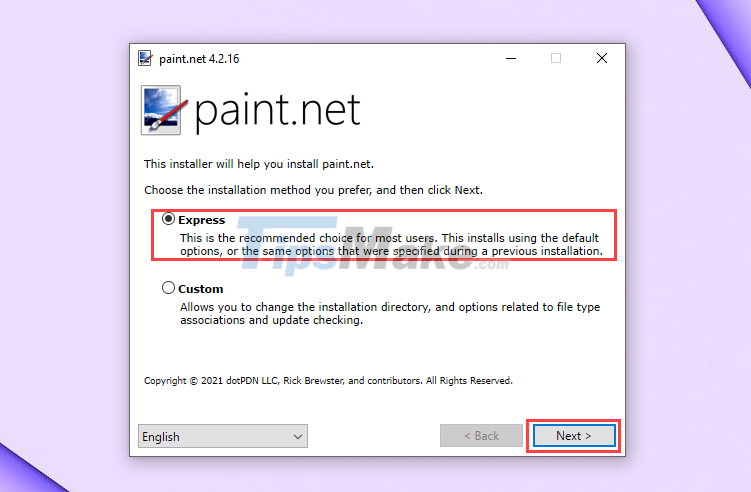
Step 2: In the installation window, select Express and click Next to continue the installation.
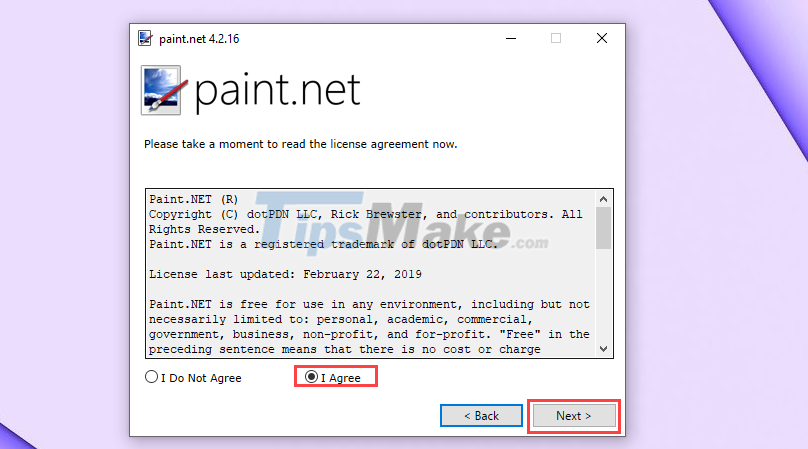
Step 3: Next, select I Agree and click Next to continue with the installation.
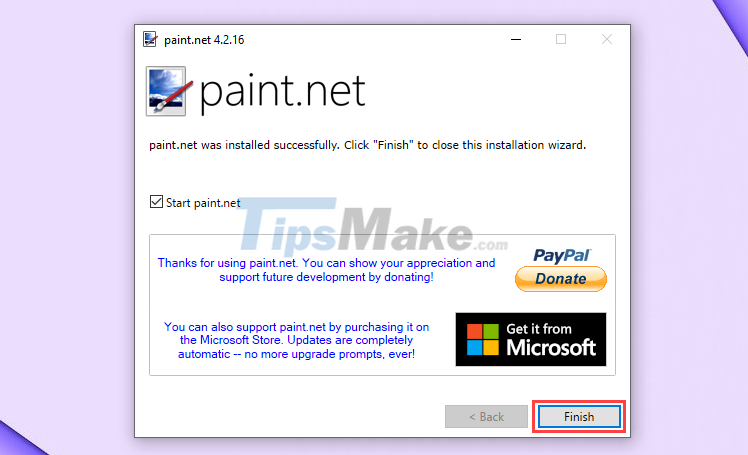
Step 4: When the installation is complete, just click Finish to complete.
Step 5: In the main interface of Paint.NET, select File => Open to open the image to remove the background on the computer.

Step 6: To make the image transparent, you will have to erase the background of the image and we will use the Magic Wand tool.

Step 7: The Magic Wand tool helps you create a selection on the image, usually the ability to capture the image (Tolerance) will be at 50. When you want them to stick to the image border, sharper, then go for it. increase Tolerance and vice versa.

Step 8: In case you want to create multiple selections, hold down the Ctrl key and select areas on the image.

Step 9: Once you have selected a perfect selection, press the Delete key on your keyboard to delete the image background.

Step 10: To save the transparent image on your computer, choose File => Save As… to finish.

Step 11: In image saving mode, keep all the parameters and click OK to finish.

Step 12: With just a few basic operations on Paint.NET, you can remove the image background quickly and effectively.

In this article, Tipsmake showed you how to quickly remove image background on Paint.NET. Have a nice day!
Key Takeaways
Use the information above as a practical reference for steps to create transparent images with paint.net. Review each step carefully, confirm any requirements, and choose the option that best fits your situation.
FAQ
What does this guide explain about Steps to Create Transparent Images with Paint.net?
It explains the main concepts, practical considerations, and useful steps related to steps to create transparent images with paint.net without requiring advanced knowledge.
Who can benefit from learning about Steps to Create Transparent Images with Paint.net?
This information is useful for readers who want a clear overview, practical guidance, and reliable steps related to steps to create transparent images with paint.net.
What should I check before applying this information?
Review the requirements, confirm that your device, software, or situation matches the instructions, and back up important data before making major changes.
Related Articles
 Paint.net 4.3.4 - Paint.net 4.3.4 Download and Installation6 minutes read
 How to Create Semi-Transparent Images in GIMP2 minutes read
 7 Best Websites to Find Images with Transparent Backgrounds8 minutes read
 How to Create Transparent Background in Google Slides3 minutes read
 Top 5 Downloadable Websites for PNG Images, Transparent5 minutes read
 How to Create Transparent Tik Tok Avatar5 minutes read
Reader Comments 0
Sign in with email or Google to join the discussion.