Table of Contents
This practical guide explains how to change username in windows 11 with clear steps and useful context. It also covers common requirements, potential problems, and the details that can help you get better results.
1. How to Change Username Using Control Panel
The Control Panel serves as the central hub in the Windows operating system. From changing the look and feel of the operating system to configuring connected hardware, the Control Panel allows users to control the entire operating system. Among other customizations, users can effectively change their usernames and manage their user accounts with this tool.
To change the username using the Control Panel, follow these steps:
1. Type "Control Panel" in Windows Search and open the Control Panel application.
2. Select Large icons from the View by drop-down menu if it is not already selected.
3. Go to User Accounts.
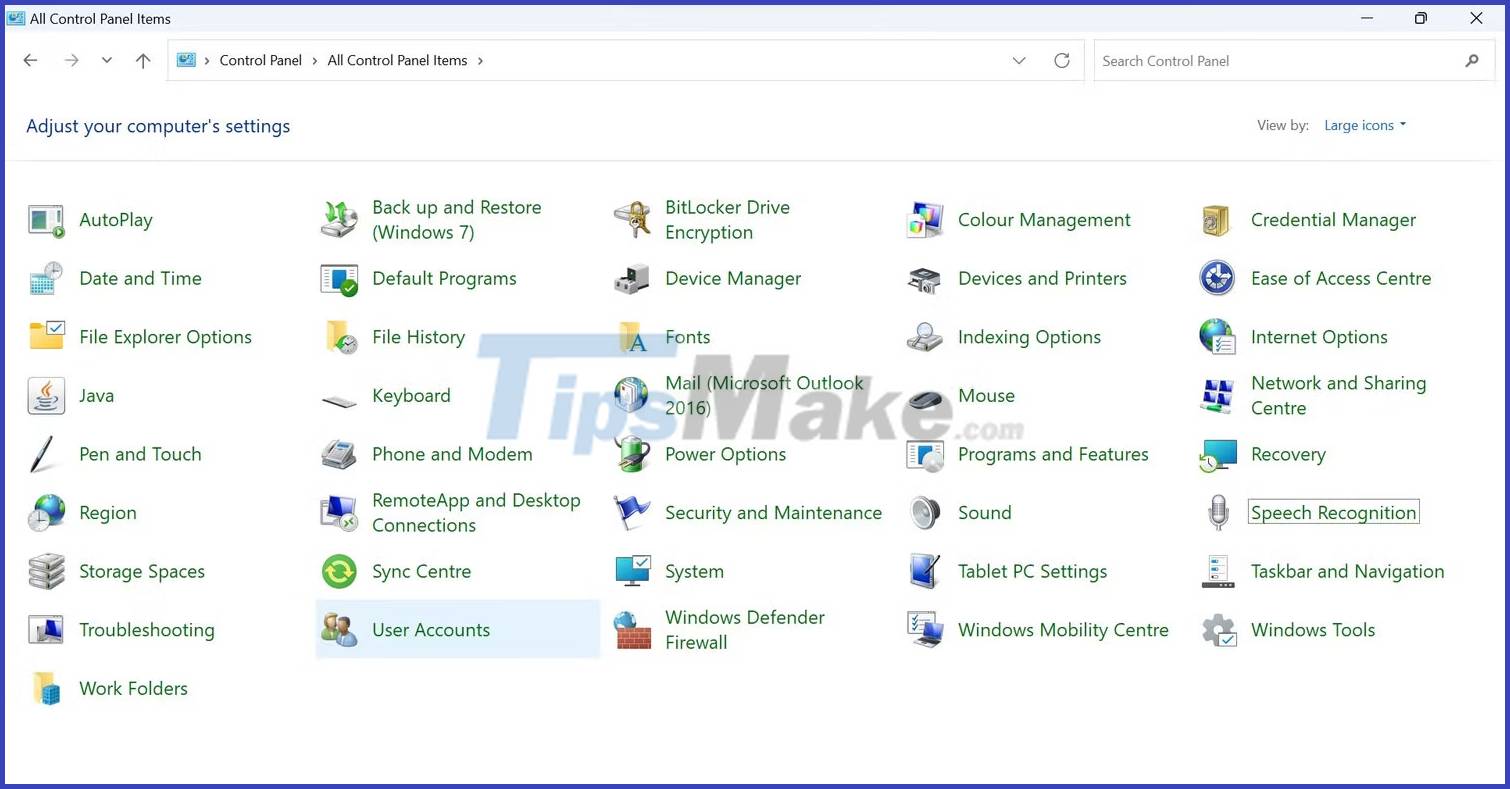
4. Click Change your account name.

5. Click Yes in the User Account Control (UAC) window.
6. In the New account name field, enter your new username.
7. Then click Change Name.
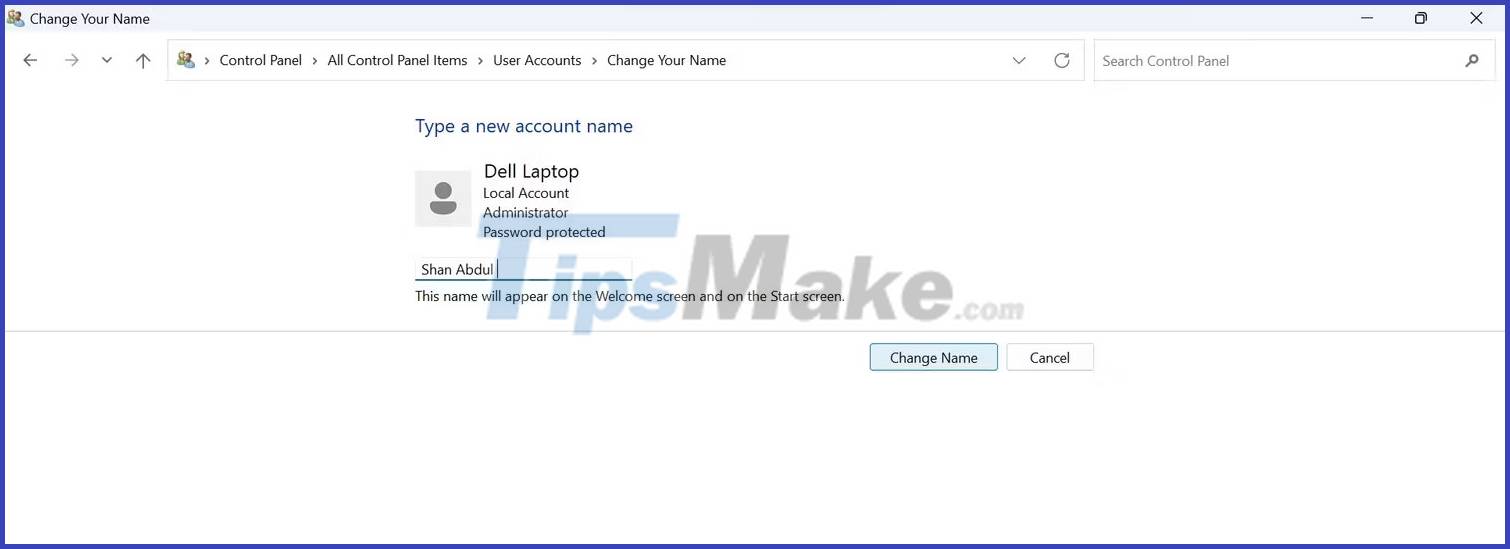
For this change to take effect, you'll need to sign out of your account and sign back in.
2. How to Change Username with Run. Command
Using the Run command, Windows users can access any location on a computer with a known path. It eliminates the need to navigate through multiple folders to get to the desired destination location.
Using this utility, you can access User Accounts settings via a simple command, "netplwiz", which gives access to a dedicated account management panel. From there, you can easily change your username.
To change the username using the Run command, follow these steps:
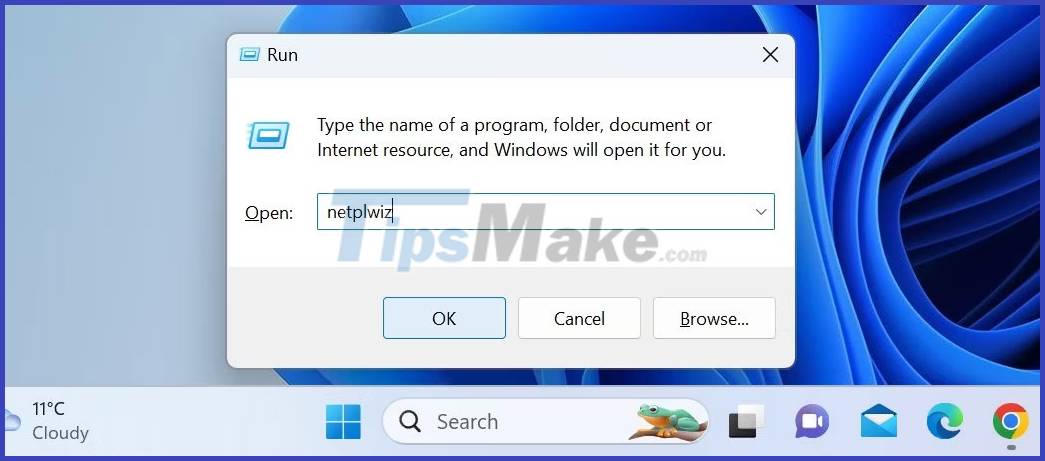
1. Press Win + R to launch the Run command.
2. Type netplwiz in the Run command field and press Enter.
3. Click Yes in the User Account Control (UAC) window.
4. In the User Accounts window, select the user account to change the username.
5. Click Properties.
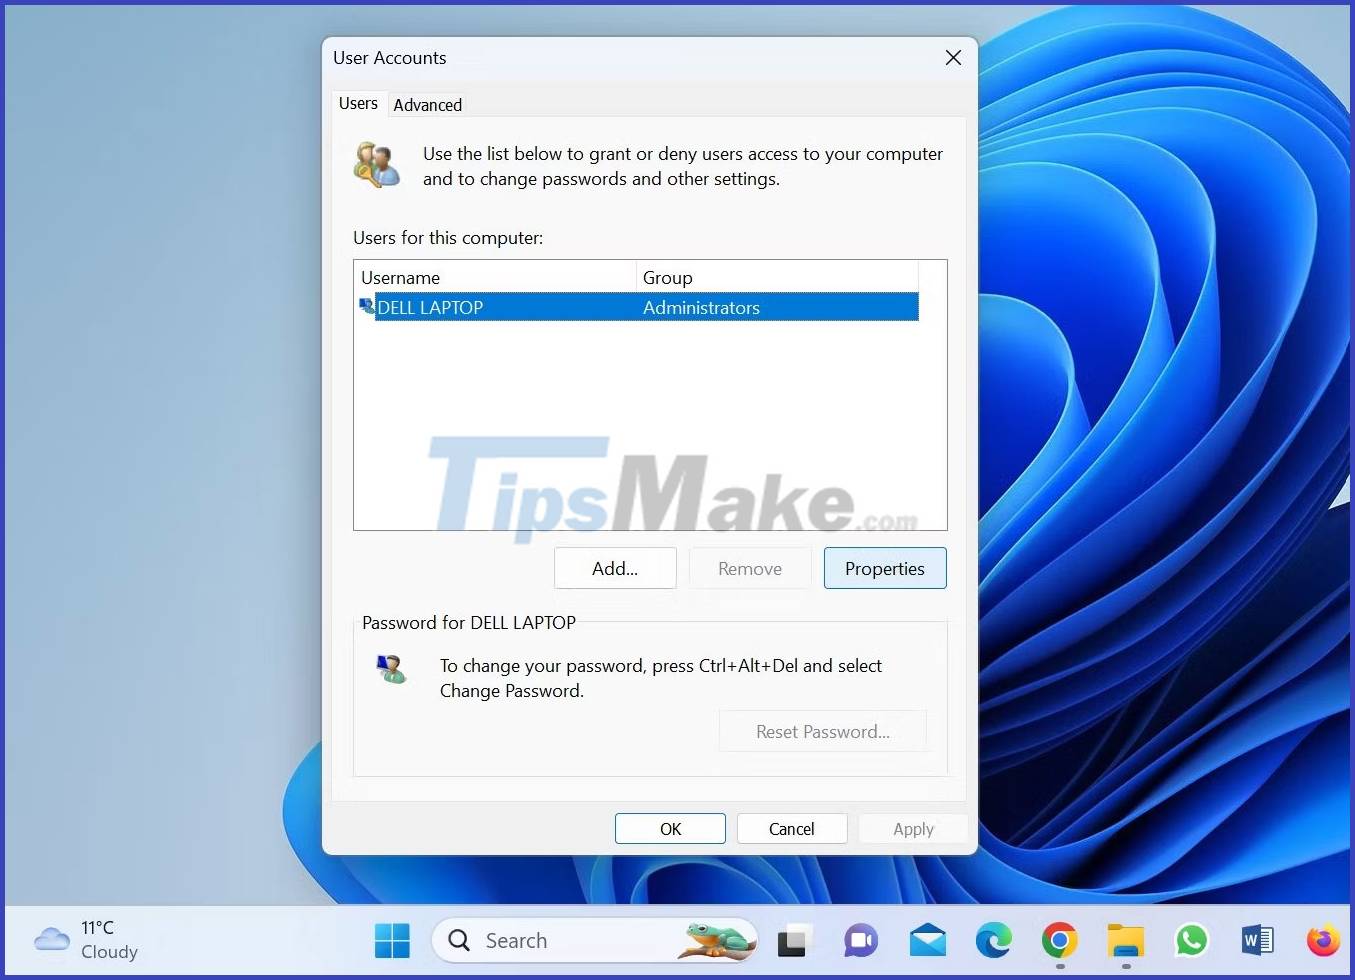
6. In the General tab, you will see your current username. Please rename it to your liking after deleting the old name.
7. Once the new username has been added, click the Apply button > OK.

8. Then, sign out of your account and you'll be greeted with your new username on the Sign-in screen when you sign in.
3. How to Change Username from Local User and Group Management Tool
If the "netplwiz" command doesn't work or gives an error when accessing the user account manager, you can use the local user and group management tool to change the username. This is the easiest way to modify your Windows username, as it allows you to change your username directly - just like you would rename any folder.
Here's how to change the username through the local user and group management tool:
1. Press Win + R to open the Run command.
2. Type "lusrmgr.msc" and press Enter.

3. Click Yes in the User Account Control (UAC) window.
4. Select the Users tab in the left sidebar.
5. Find your account in the right pane.
6. Right-click the username and select Rename.
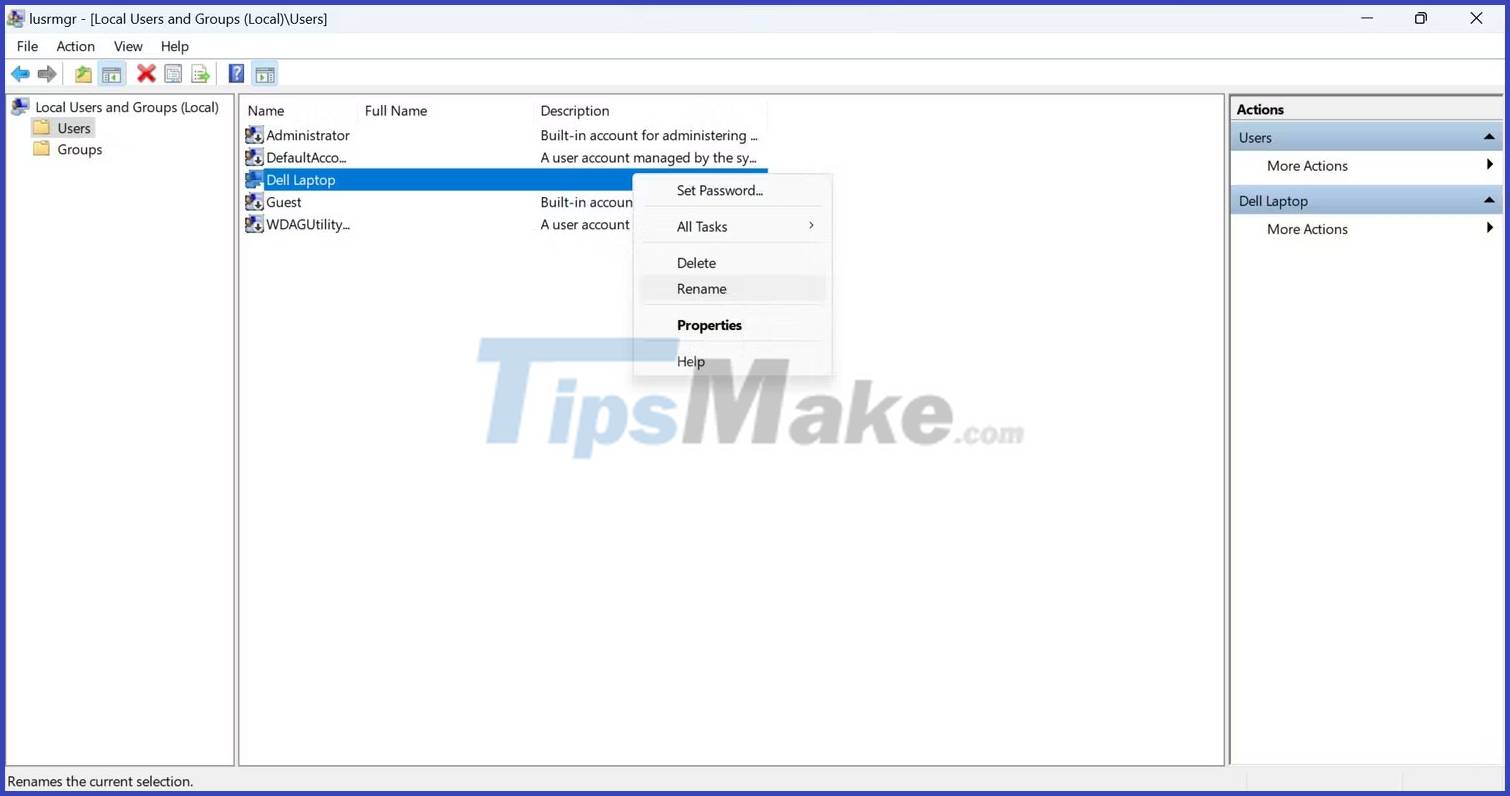
7. Enter the new username you want to use.
Then close the local user and group management tool, log out of the account and you should see your new username on the login screen.
4. How to Change Username with Windows Powershell
Windows Powershell, an object-oriented automation tool, is designed primarily for IT administrators to automate tasks. However, Powershell's simplicity and ease of use make it worthwhile for those with no programming experience.
By using the built-in cmdlets or writing custom scripts, you can make any changes to your Windows device that you normally make through GUI-based applications and settings. You can also change your username using it.
To change the username using Windows PowerShell, follow these steps:
1. Type "Windows PowerShell" in Windows Search and open the Windows PowerShell application.
2. Type the following command and press Enter to find your current username:
Get-LocalUser
3. Add the following command after entering your current username and the name you want to switch to:
Rename-LocalUser -Name "Enter your current username" -NewName "Enter the new username"
4. Press Enter after adding the above command.

5. Then log back into your account after logging out.
5. How to Change Username Profile from Microsoft Website
If you use a Microsoft account on your computer, change the username on the Microsoft website. To update the username profile on the Microsoft website, follow these steps:
1. Go to your account page on the Microsoft website.
2. Sign in to your account if you haven't already.
3. Navigate to Your info menu after logging in.
4. Click the Edit name button.

5. Delete the current username and add the username you want to switch to.
6. Then click Save.
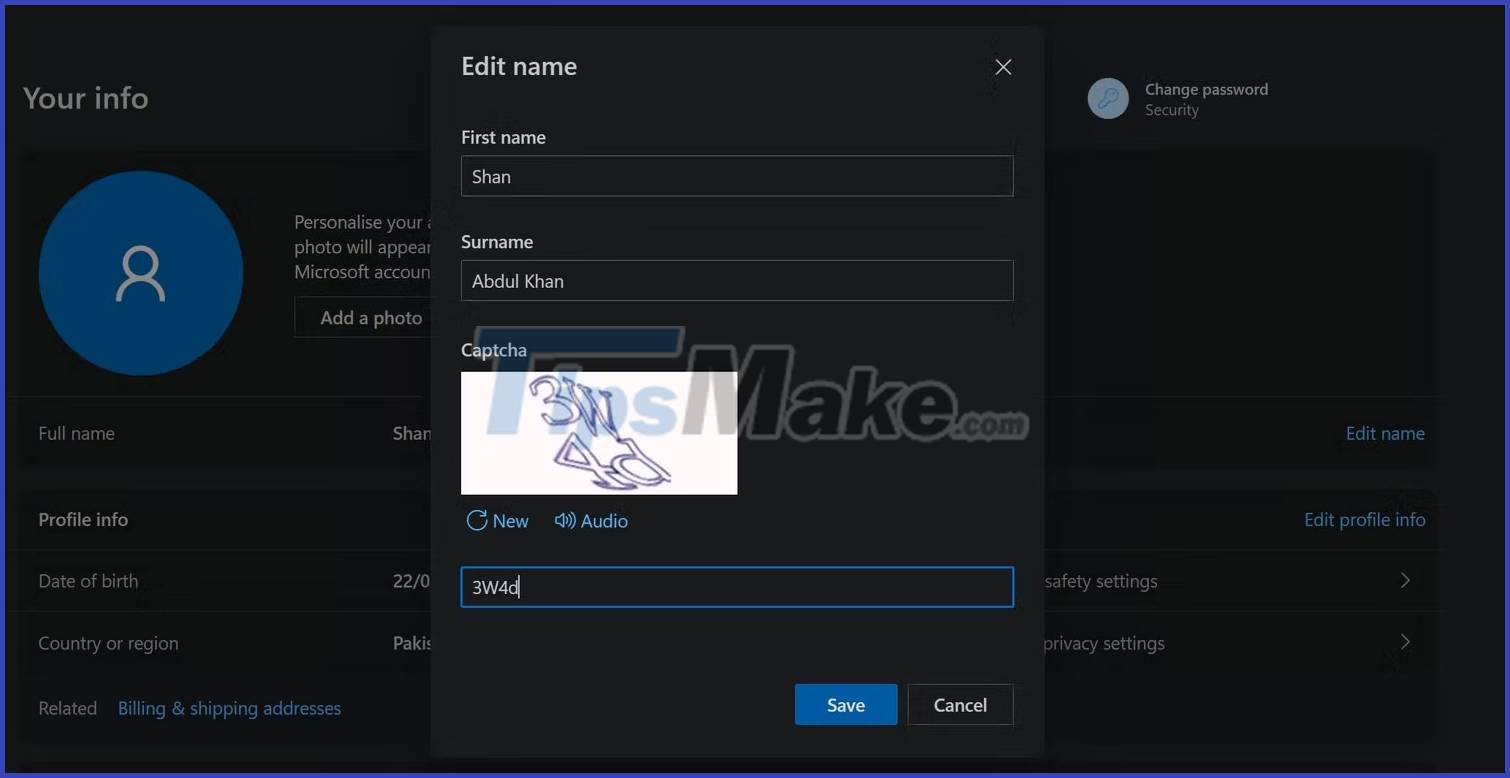
Changing the username associated with your Microsoft account may not take effect immediately. Sometimes, you may not see your new username after signing out of your account, as in other methods. To prevent that from happening, the article recommends restarting your device instead of just signing out.
Conclusion
Understanding Windows 11 makes it easier to compare options, avoid common mistakes, and apply the information in this guide more effectively. Review the relevant requirements before making changes or choosing a solution.
FAQ
How do you change username in windows 11?
Follow the steps in this guide in order, confirm the required settings or tools, and verify the result before making additional changes.
Is it safe to change username in windows 11?
It is generally safe when you follow the recommended instructions, use trusted tools, and avoid changing settings you do not understand.
What should you do if the process does not work?
Recheck the requirements, restart the device or application when appropriate, and review each step for missed settings or compatibility issues.
Related Articles
 How to Change Your Username Vietcombank Ib @@ Nking3 minutes read
 Instructions for Changing Facebook Username3 minutes read
 How to Change Your Instagram Username and Display Name2 minutes read
 Instructions for Changing Your Username and Display Name on Twitter4 minutes read
 How to Change Reddit Username: Complete Guide5 minutes read
 Instructions for Changing Username on Windows 103 minutes read
Reader Comments 0
Sign in with email or Google to join the discussion.